

rsteelesr79
3,000-Calorie Bulking Meal Plan for Muscle Growth
3,000-Calorie Bulking Meal Plan: A Full Day of Eating for Muscle Growth
You train hard.
You follow a structured workout program.
You try to eat more food.
But your body weight refuses to increase.
This is one of the most common problems faced by hardgainers and naturally lean lifters.
Many people believe they are eating enough to build muscle. Once they begin tracking their intake, however, they discover that their daily calories vary dramatically and often fall far below what they expected.
A structured 3,000-calorie bulking meal plan can help remove the guesswork.
It gives you:
- A consistent calorie target
- Enough protein to support muscle growth
- Carbohydrates to fuel demanding workouts
- Dietary fat to increase calories and support overall nutrition
- Meals that can be prepared in advance
- A starting point that can be adjusted according to your results
However, 3,000 calories is not automatically the correct amount for everyone.
For one person, it may create a productive calorie surplus.
For another, it may be close to maintenance.
For someone smaller or less active, it may cause weight gain faster than necessary.
Use this plan as a practical template, then adjust it according to your weekly body-weight trend, strength, appetite, waist measurement, and recovery.
Who Is a 3,000-Calorie Meal Plan For?
A 3,000-calorie diet may be appropriate for:
- Naturally lean men trying to gain weight
- Hardgainers with high activity levels
- Intermediate lifters training four to six days per week
- Larger athletes with higher maintenance needs
- People with physically demanding jobs
- Anyone whose weight remains stable around 2,700–2,900 calories
It may be too high for:
- Smaller individuals
- Sedentary people
- Lifters with lower maintenance needs
- People already gaining weight quickly
- Anyone trying to lose body fat
The correct bulking intake is generally a modest amount above your maintenance calories—not one universal number.
How Fast Should You Gain Weight While Bulking?
The goal of a good bulk is not to gain weight as quickly as possible.
It is to gain muscle while limiting unnecessary fat accumulation.
A practical target for many natural lifters is approximately:
0.25%–0.5% of body weight per week
For a 180-pound person, that equals roughly:
- 0.45 pounds per week at 0.25%
- 0.9 pounds per week at 0.5%
Beginners and underweight individuals may gain toward the faster end.
More experienced lifters should generally use a slower approach because their potential rate of muscle growth is lower.
If you are gaining more than one pound per week for several consecutive weeks and your waist is increasing quickly, reduce calories slightly.
Daily Calorie and Macro Targets
This example provides approximately:
- Calories: 3,000
- Protein: 190–210 grams
- Carbohydrates: 360–400 grams
- Fat: 75–90 grams
The exact totals depend on brands, serving sizes, cooking methods, and ingredient substitutions.
You do not need to hit these numbers perfectly.
A daily range such as the following is reasonable:
- Calories: 2,900–3,100
- Protein: 180–210 grams
- Fat: 70–95 grams
- Carbohydrates: the remaining calories
Protein intake is intentionally high enough to support muscle growth, while carbohydrates provide most of the training fuel.
The Complete 3,000-Calorie Bulking Meal Plan
Meal 1: High-Protein Bulking Breakfast
Oatmeal, eggs, fruit, and milk
Ingredients
- 80 grams dry oats
- 1 cup 2% milk
- 1 medium banana
- 2 whole eggs
- 150 grams liquid egg whites
- 1 tablespoon peanut butter
Approximate nutrition
- Calories: 720
- Protein: 45 grams
- Carbohydrates: 91 grams
- Fat: 22 grams
Preparation
- Cook the oats with milk or water.
- Slice the banana over the oatmeal.
- Stir in the peanut butter.
- Cook the whole eggs and egg whites together.
- Add cinnamon or a zero-calorie sweetener if desired.
Why it works
This meal provides:
- Complete protein from eggs and milk
- Slow-digesting carbohydrates from oats
- Faster carbohydrates from fruit
- Calorie-dense fat from peanut butter
- Enough energy to begin the day well fed
Meal 2: Greek Yogurt Muscle-Building Snack
Greek yogurt, granola, berries, and honey
Ingredients
- 250 grams nonfat Greek yogurt
- 50 grams granola
- 100 grams berries
- 1 tablespoon honey
- 15 grams almonds
Approximate nutrition
- Calories: 470
- Protein: 31 grams
- Carbohydrates: 62 grams
- Fat: 12 grams
Preparation
Combine everything in a bowl or portable container.
Easy substitutions
Replace Greek yogurt with:
- Skyr
- Cottage cheese
- Soy yogurt plus plant protein powder
- A whey or plant-protein shake
Replace almonds with:
- Walnuts
- Peanut butter
- Pumpkin seeds
- Trail mix
Meal 3: Chicken and Rice Bulking Lunch
Chicken, rice, vegetables, and olive oil
Ingredients
- 170 grams cooked chicken breast
- 250 grams cooked white rice
- 150 grams mixed vegetables
- 1 tablespoon olive oil
- Salsa or low-calorie sauce
Approximate nutrition
- Calories: 710
- Protein: 61 grams
- Carbohydrates: 82 grams
- Fat: 15 grams
Preparation
- Season and cook the chicken breast.
- Prepare rice in bulk.
- Steam, roast, or sauté the vegetables.
- Add olive oil after cooking or use it during meal preparation.
- Add salsa, herbs, hot sauce, or seasoning for flavor.
Why this meal is useful
Chicken and rice provide:
- A large amount of complete protein
- Easily adjustable carbohydrates
- A meal that is simple to prepare in bulk
- Predictable calories and macros
The olive oil raises calories without dramatically increasing meal volume.
Meal 4: Pre-Workout Snack
Bagel, turkey, and fruit
Ingredients
- 1 plain bagel
- 85 grams sliced turkey breast
- 1 slice reduced-fat cheese
- Mustard
- 1 apple
Approximate nutrition
- Calories: 500
- Protein: 33 grams
- Carbohydrates: 78 grams
- Fat: 7 grams
Timing
Eat this meal approximately:
60–120 minutes before training
depending on your digestion.
Why it works
The bagel and apple supply carbohydrates for training.
The turkey and cheese provide protein without making the meal excessively heavy.
Keep fats moderate before training if high-fat meals make you feel sluggish.
Meal 5: Post-Workout Dinner
Lean beef, potatoes, and vegetables
Ingredients
- 170 grams cooked 93% lean ground beef
- 350 grams potatoes
- 150 grams vegetables
- 1 teaspoon olive oil or butter
- Seasonings
Approximate nutrition
- Calories: 620
- Protein: 48 grams
- Carbohydrates: 72 grams
- Fat: 17 grams
Preparation
- Brown the lean ground beef with seasoning.
- Bake, boil, or air-fry the potatoes.
- Add vegetables.
- Use a measured amount of oil or butter.
Substitutions
Replace beef with:
- Ground turkey
- Chicken thighs
- Salmon
- Pork tenderloin
- Tofu or tempeh
Replace potatoes with:
- Rice
- Pasta
- Quinoa
- Couscous
- Bread
Approximate Daily Total
| Nutrient | Daily amount |
|---|---|
| Calories | About 3,020 |
| Protein | About 218 g |
| Carbohydrates | About 385 g |
| Fat | About 73 g |
This plan is slightly above 3,000 calories and relatively high in protein.
To bring it closer to exactly 3,000 calories, slightly reduce:
- Granola
- Rice
- Oats
- Olive oil
- Peanut butter
There is no need to hit exactly 3,000 calories every day.
A consistent range matters more than mathematical perfection.
Lower-Protein 3,000-Calorie Version
More protein is not always better.
If 210–220 grams feels excessive for your body size, reduce some lean protein and replace those calories with carbohydrates or fat.
For example:
- Reduce chicken from 170 grams to 130 grams.
- Reduce turkey from 85 grams to 55 grams.
- Add more rice, potatoes, olive oil, or fruit.
A modified target might be:
- Protein: 175–190 grams
- Carbohydrates: 390–420 grams
- Fat: 80–90 grams
This may be more appropriate for a smaller lifter.
Budget 3,000-Calorie Bulking Meal Plan
You do not need expensive steak, supplements, or specialty foods.
Affordable staples include:
- Oats
- Eggs
- Milk
- Rice
- Pasta
- Potatoes
- Chicken thighs
- Ground turkey
- Canned tuna
- Beans
- Lentils
- Peanut butter
- Frozen vegetables
- Bananas
- Store-brand Greek yogurt
Budget day example
Breakfast
Oats, milk, eggs, and banana
Snack
Peanut-butter sandwich and milk
Lunch
Chicken thighs, rice, and frozen vegetables
Pre-workout
Bagel and yogurt
Dinner
Ground turkey, pasta, and tomato sauce
Evening snack
Cottage cheese and cereal
Buying larger packages and preparing several meals at once often reduces the cost per serving.
Vegetarian 3,000-Calorie Bulking Meal Plan
A vegetarian version can include:
Breakfast
- Oatmeal
- Milk or soy milk
- Eggs or tofu scramble
- Peanut butter
- Fruit
Snack
- Greek yogurt or soy yogurt
- Granola
- Nuts
- Berries
Lunch
- Tofu or tempeh
- Rice
- Edamame
- Vegetables
- Olive oil
Pre-workout
- Bagel
- Cottage cheese or a protein shake
- Fruit
Dinner
- Lentil pasta
- Tomato sauce
- Plant-based ground protein
- Cheese or nutritional yeast
Evening snack
- Cottage cheese
- Skyr
- Soy yogurt
- Plant-protein smoothie
Plant-based lifters may benefit from using:
- Soy foods
- Seitan
- Legumes
- Pea protein
- Soy protein
- Mixed plant-protein powders
to make high protein intake easier.
Hardgainer 3,000-Calorie Shake
Some people struggle to eat enough solid food.
A homemade bulking shake can help.
Ingredients
- 2 cups 2% milk
- 1 scoop whey protein
- 1 banana
- 60 grams oats
- 2 tablespoons peanut butter
- Cinnamon
- Ice
Approximate nutrition
- Calories: 750–850
- Protein: 45–55 grams
- Carbohydrates: 85–100 grams
- Fat: 25–30 grams
This can replace a meal or be divided into two servings.
Avoid immediately adding a giant shake on top of your existing diet.
Start with a smaller portion and monitor digestion and weight gain.
How to Meal Prep This Plan
Step 1: Choose two proteins
For example:
- Chicken breast
- Lean ground beef
Step 2: Cook two carbohydrate sources
For example:
- Rice
- Potatoes
Step 3: Prepare vegetables
Use:
- Frozen mixed vegetables
- Broccoli
- Green beans
- Peppers
- Carrots
Step 4: Portion the meals
Use a digital food scale and meal-prep containers.
Step 5: Store safely
Refrigerate meals you will eat within several days and freeze additional portions.
Step 6: Prepare snacks separately
Pre-portion:
- Granola
- Nuts
- Fruit
- Yogurt
- Bagels
- Turkey
Preparing food in advance makes consistent bulking much easier.
How to Adjust the Meal Plan
Follow the plan consistently for at least two weeks before making a large change.
Weigh yourself each morning:
- After using the bathroom
- Before eating or drinking
- Under similar conditions
Calculate your seven-day average.
If your weight is not increasing
Add approximately:
100–150 calories per day
Easy additions include:
- Half a cup of cooked rice
- One tablespoon of olive oil
- A glass of milk
- Half a bagel
- One tablespoon of peanut butter
- Additional granola
If weight is increasing too quickly
Remove approximately:
100–200 calories per day
Easy reductions include:
- Less cooking oil
- A smaller rice serving
- Less granola
- One fewer tablespoon of peanut butter
- A smaller bagel or potato portion
If strength is increasing and body weight is rising slowly
Keep the plan unchanged.
Do not adjust a successful diet simply because you are impatient.
How to Make the Plan 2,800 Calories
Remove approximately 200 calories by choosing one option:
- Remove the almonds and honey from Meal 2.
- Reduce rice by approximately one cooked cup.
- Remove peanut butter from breakfast.
- Reduce the potato serving and cooking oil.
How to Make the Plan 3,200 Calories
Add approximately 200 calories through one option:
- Add a glass of milk.
- Add a second tablespoon of peanut butter.
- Add more rice at lunch.
- Add one ounce of nuts.
- Add cereal before bed.
How to Make the Plan 3,500 Calories
Add approximately 500 calories through:
- One moderate shake
- Larger rice and potato servings
- Additional olive oil
- An extra bagel
- Milk with multiple meals
Increase gradually.
Jumping from 3,000 to 3,500 calories overnight can create digestive discomfort and unnecessary fat gain.
Clean Bulk vs. Dirty Bulk
A clean or lean bulk emphasizes:
- A modest calorie surplus
- High-quality protein
- Fruits and vegetables
- Nutrient-dense carbohydrates
- Controlled weight gain
A dirty bulk often includes:
- Very large calorie surpluses
- Frequent fast food
- Sugary drinks
- Untracked snacks
- Rapid weight gain
Both approaches can increase scale weight.
The dirty bulk usually produces more unnecessary fat gain.
You do not need to eat perfectly, but most of your calories should come from foods that support:
- Training performance
- Digestion
- Recovery
- Overall health
An 80/20 approach works well for many people:
- About 80% minimally processed, nutrient-dense food
- About 20% flexible foods
What to Eat Before Training on a Bulk
A useful pre-workout meal contains:
- Protein
- Carbohydrates
- Moderate or low fat
- Foods you digest comfortably
Examples:
- Bagel and turkey
- Oatmeal and whey
- Chicken and rice
- Greek yogurt and fruit
- Eggs and toast
Eat approximately one to three hours before training.
The closer you eat to your workout, the smaller and easier to digest the meal should generally be.
What to Eat After Training on a Bulk
A balanced post-workout meal should provide:
- Approximately 20–40 grams of protein
- Carbohydrates
- Fluids
- Sodium according to sweat loss
Examples:
- Beef and potatoes
- Chicken and rice
- Salmon and pasta
- Protein shake and banana
- Greek yogurt and cereal
You do not need to eat the second your workout ends.
Your total daily calories and protein matter more than a narrow 30-minute window.
Do You Need Supplements?
No supplement is required to follow this meal plan.
Useful options may include:
Protein powder
Helpful when reaching your protein target with food is difficult.
Creatine monohydrate
A standard dose of approximately 3–5 grams per day can support high-intensity training performance.
Caffeine
May improve energy and focus, but late intake can disrupt sleep.
Vitamin or mineral supplements
Use these to address genuine deficiencies or dietary gaps—not as substitutes for food.
Avoid relying on expensive mass-gainer powders.
A homemade shake often provides similar calories at a lower cost.
Common 3,000-Calorie Bulking Mistakes
Mistake 1: Assuming 3,000 calories is automatically a surplus
Track your body weight and adjust.
Mistake 2: Increasing calories too quickly
Begin with a modest increase.
Mistake 3: Eating most calories late at night
Distribute food across the day if huge evening meals hurt digestion or sleep.
Mistake 4: Drinking too much water immediately before meals
This can reduce appetite in hardgainers.
Mistake 5: Ignoring fruits and vegetables
A bulk should still provide fiber and micronutrients.
Mistake 6: Eating far more protein than needed
Very high protein can crowd out carbohydrates and fats.
Mistake 7: Failing to track oils and sauces
These can add hundreds of calories.
Mistake 8: Expecting every pound gained to be muscle
Some water, glycogen, digestive weight, and fat gain are normal.
Mistake 9: Following the diet without progressive training
Calories do not build muscle without a sufficient training stimulus.
Mistake 10: Changing the plan every few days
Allow enough time to identify a genuine trend.
Frequently Asked Questions
Is 3,000 calories enough to bulk?
It depends on your maintenance needs. It may be a surplus for one person and maintenance or a deficit for another.
How much protein should a 3,000-calorie bulk include?
Many lifters do well with approximately 1.6–2.2 grams of protein per kilogram of body weight. The exact amount depends on body size and goals.
Can I build muscle eating 3,000 calories?
Yes, when 3,000 calories creates an appropriate surplus and you follow a progressive resistance-training program.
Will I gain fat on 3,000 calories?
Some fat gain may occur during a bulk. The amount depends on the size of your surplus, training quality, genetics, and rate of weight gain.
Can women use this meal plan?
Yes, but 3,000 calories may be more than many women require. Adjust portion sizes according to maintenance needs and weekly progress.
Is 3,000 calories too much for a beginner?
Not necessarily. A large, active beginner may need that amount, while a smaller beginner may require far less.
How long should I follow this plan?
Follow it while your weight and strength increase at an appropriate rate. Adjust calories as your body weight and activity change.
Can I eat fast food while bulking?
Occasional fast food can fit, but relying on it heavily makes calorie control, digestion, and diet quality more difficult.
Final Thoughts
A 3,000-calorie bulking meal plan can be an effective starting point for lifters who struggle to eat enough and gain weight.
The key is not the number 3,000.
The key is whether the plan creates the right calorie surplus for your body.
Use these principles:
- Eat a consistent number of calories.
- Consume enough protein.
- Use carbohydrates to fuel training.
- Include enough dietary fat.
- Spread meals throughout the day.
- Track your weekly average body weight.
- Adjust calories in small increments.
- Continue progressive resistance training.
- Prioritize sleep and recovery.
- Limit unnecessary fat gain by bulking slowly.
A successful bulk should make you:
- Stronger
- Better recovered
- More muscular
- Slightly heavier over time
It should not make you gain weight so quickly that you immediately need a long cutting phase.
Eat with purpose, track your results, and allow the plan enough time to work.
Ready to Start Your Bulk?
Download our FREE 3,000-Calorie Bulking Meal Plan PDF and receive:
- A seven-day menu
- Complete grocery list
- Meal-prep instructions
- Macro breakdowns
- Budget substitutions
- Vegetarian alternatives
- 2,800-, 3,200-, and 3,500-calorie adjustments
Pair it with our 12-Week Muscle Growth Program for a complete training and nutrition system.
Question: Which part of bulking is hardest for you—eating enough, meal preparation, tracking calories, or limiting fat gain? Share your answer in the comments.**
Nutrition Disclaimer
This meal plan provides general educational information and is not individualized medical or nutrition advice. Calorie and nutrient needs vary. Consult a qualified healthcare professional or registered dietitian if you have food allergies, diabetes, kidney disease, digestive problems, an eating-disorder history, or another medical condition.
How to Track Macros for Muscle Growth: Beginner’s Guide
How to Track Macros for Muscle Growth: The Beginner’s Step-by-Step Guide
You train consistently.
You drink protein shakes.
You try to eat “healthy.”
But you still do not know whether you are consuming enough food to build muscle—or whether most of your extra calories are simply leading to unnecessary fat gain.
This is where tracking macros can help.
Tracking your macronutrients gives you a clearer picture of how much:
- Protein
- Carbohydrate
- Fat
- Total energy
you consume each day.
It replaces guessing with measurable targets.
You do not need to track every gram perfectly forever. However, logging your food for several weeks can teach you what appropriate portions look like, which foods contribute the most protein, and whether your current diet supports your training goals.
In this guide, you will learn:
- What macros are
- How to estimate maintenance calories
- How to create a muscle-building calorie target
- How much protein, fat, and carbohydrate to eat
- How to weigh and log food correctly
- How to adjust your macros as your body changes
- The biggest tracking mistakes to avoid
What Are Macros?
Macros, short for macronutrients, are nutrients your body requires in relatively large amounts.
The three primary macronutrients are:
- Protein
- Carbohydrates
- Fat
Alcohol also provides calories, but it is not an essential nutrient and is not usually treated as a primary muscle-building macro.
Each macronutrient provides energy:
- Protein: approximately 4 calories per gram
- Carbohydrates: approximately 4 calories per gram
- Fat: approximately 9 calories per gram
- Alcohol: approximately 7 calories per gram
Your total calorie intake is largely determined by the combination of these nutrients.
For example:
- 180 grams of protein = 720 calories
- 300 grams of carbohydrates = 1,200 calories
- 80 grams of fat = 720 calories
Total:
2,640 calories
Why Track Macros for Muscle Growth?
Muscle growth requires more than eating protein.
Your body also needs:
- Enough total energy
- Fuel for demanding workouts
- Essential fatty acids
- Vitamins and minerals
- Recovery resources
Tracking macros helps answer important questions:
- Am I eating enough calories to gain muscle?
- Am I eating too much and gaining fat too quickly?
- Am I getting enough protein?
- Am I eating enough carbohydrates to support training?
- Is my fat intake unnecessarily low or high?
- Why has my body weight stopped changing?
A calorie surplus can support muscle growth, but the exact surplus needed to maximize hypertrophy is not firmly established. Research supports using a controlled, individualized surplus rather than assuming that eating as much as possible produces more muscle.
Step 1: Define Your Goal
Before calculating macros, choose your primary objective.
Lean muscle gain
Best for people who are relatively lean and want to maximize muscle growth.
Use:
- Maintenance calories plus a modest surplus
- High protein
- Enough carbohydrates to support training
Body recomposition
Best for many beginners, returning lifters, and people carrying additional body fat.
Use:
- Calories near maintenance or in a modest deficit
- High protein
- Progressive resistance training
Fat loss while preserving muscle
Use:
- A moderate calorie deficit
- High protein
- Resistance training
- Slower weight loss
Do not choose your macros based only on what produces the fastest scale increase.
A rapid increase usually includes more:
- Water
- Glycogen
- Digestive contents
- Body fat
not just muscle.
Step 2: Estimate Your Maintenance Calories
Your maintenance intake is the approximate number of calories required to keep your body weight stable.
This is also known as your total daily energy expenditure, or TDEE.
TDEE includes:
- Resting metabolism
- Daily movement
- Exercise
- Digestion
- Work and household activity
Method 1: Use a calorie calculator
An online TDEE calculator can provide a starting estimate based on:
- Age
- Sex
- Height
- Weight
- Activity level
The result is only an estimate.
People frequently overestimate how active they are, so treat the number as a trial target rather than a proven requirement.
Method 2: Track your current intake
This is often more useful.
For 10–14 days:
- Eat normally.
- Log everything you consume.
- Weigh yourself each morning.
- Calculate your average calorie intake.
- Compare your average body weight from week to week.
If your average weight remains stable, your average intake is probably close to maintenance.
Why use an average?
Body weight changes daily because of:
- Water retention
- Sodium
- Carbohydrate intake
- Bowel contents
- Hormonal changes
- Training soreness
One weigh-in tells you very little.
Use a seven-day average.
Step 3: Add a Modest Calorie Surplus
Once you have estimated maintenance calories, add a controlled surplus.
A practical starting point is:
Approximately 150–300 calories above maintenance per day
Larger, highly active people may eventually need more.
Smaller people may need less.
The goal is to gain slowly enough that most of the additional weight supports training, glycogen storage, and tissue growth rather than excessive fat accumulation.
Example
Estimated maintenance:
2,500 calories
Starting muscle-building target:
2,700 calories
Follow that target for two to three weeks before making a major adjustment.
Do not increase your intake after three days because the scale did not move.
How Fast Should You Gain Weight?
A reasonable target for many natural lifters is approximately:
0.25%–0.5% of body weight per week
For a 180-pound lifter, that equals roughly:
- 0.45 pounds per week at 0.25%
- 0.9 pounds per week at 0.5%
Beginners and underweight individuals may tolerate the higher end.
Experienced lifters usually need a slower rate because their potential rate of new muscle gain is lower.
If your waist measurement is rising rapidly while your strength is not improving, your surplus may be too large.
Step 4: Set Your Protein Target
Protein is the first macro to establish.
It supplies the amino acids used to repair and build muscle proteins.
A practical target for resistance-trained adults is:
1.6–2.2 grams of protein per kilogram of body weight per day
A broader evidence-based recommendation of approximately 1.4–2.0 grams per kilogram is sufficient for most exercising adults.
Protein calculation example
Body weight:
180 pounds
Convert pounds to kilograms:
180 ÷ 2.2 = approximately 82 kilograms
Protein range:
- 82 × 1.6 = 131 grams
- 82 × 2.2 = 180 grams
A simple target might be:
160 grams of protein per day
You do not need to consume the maximum possible amount.
Choose a target that you can meet consistently.
Should You Use Total Body Weight or Lean Body Mass?
Total body weight works well for most people.
Using lean body mass may be more practical for someone carrying a substantial amount of excess body fat because calculations based on total weight can produce an unnecessarily high target.
You do not need a perfectly accurate body-fat test to begin.
Choose a realistic protein target, follow it consistently, and adjust according to:
- Hunger
- Digestion
- Calories
- Training
- Progress
Step 5: Set Your Fat Target
Dietary fat supports:
- Cell membranes
- Hormone production
- Absorption of fat-soluble vitamins
- Food enjoyment
- Essential fatty-acid intake
A practical starting range is:
Approximately 20%–35% of total calories
Another simple method is:
0.6–1.0 grams of fat per kilogram of body weight
Example
An 82-kilogram lifter could start with:
- 82 × 0.8 = approximately 66 grams of fat
Rounding to:
70 grams per day
Fat should not be driven extremely low just to create room for more carbohydrates.
At the same time, fat is calorie-dense, so large servings of oils, nut butter, cheese, and nuts can make a calorie target easy to exceed.
Step 6: Fill the Remaining Calories With Carbohydrates
Once protein and fat are established, assign the remaining calories to carbohydrates.
Carbohydrates help support:
- Resistance-training performance
- Muscle glycogen
- High training volume
- Recovery
- Overall calorie intake
Example Macro Calculation
Daily calorie target:
2,700 calories
Protein:
160 grams
160 × 4 = 640 calories
Fat:
70 grams
70 × 9 = 630 calories
Calories used:
640 + 630 = 1,270 calories
Calories remaining:
2,700 − 1,270 = 1,430 calories
Carbohydrates:
1,430 ÷ 4 = approximately 358 grams
Rounded daily targets:
- Protein: 160 grams
- Fat: 70 grams
- Carbohydrates: 355–360 grams
- Calories: approximately 2,700
Your macro targets do not need to total the calorie number perfectly because food labels and databases use rounding.
Example Macro Targets by Goal
These are examples—not universal prescriptions.
180-pound lifter gaining muscle
- Calories: 2,700
- Protein: 160 g
- Fat: 70 g
- Carbohydrates: 358 g
180-pound lifter recomping
- Calories: 2,450
- Protein: 175 g
- Fat: 70 g
- Carbohydrates: 280 g
180-pound lifter cutting
- Calories: 2,100
- Protein: 180 g
- Fat: 60 g
- Carbohydrates: 210 g
An energy deficit can reduce gains in lean mass during resistance training, which is why aggressive dieting is generally not the ideal approach when maximizing muscle growth is the priority.
Step 7: Download a Food-Tracking App
A tracking app makes the process easier.
Useful features include:
- Barcode scanning
- Saved meals
- Recipe creation
- Weight tracking
- Macro targets
- Food-database searches
Common options include:
- Cronometer
- MacroFactor
- MyFitnessPal
- Lose It!
- MyNetDiary
No app is perfectly accurate.
Users can add incorrect entries, and branded products may change.
Check questionable foods against:
- The package label
- The manufacturer’s website
- USDA FoodData Central
USDA FoodData Central is an official food-composition database containing information for minimally processed and branded foods.
Step 8: Use a Digital Food Scale
A food scale is one of the most useful tools for accurate tracking.
Visual estimates are often wrong, especially for calorie-dense foods such as:
- Peanut butter
- Cooking oil
- Nuts
- Cheese
- Cereal
- Pasta
- Rice
- Salad dressing
How to use a food scale
- Place your plate or container on the scale.
- Press the tare or zero button.
- Add the food.
- Record the weight.
- Repeat for each ingredient.
Grams are usually easier and more precise than cups and tablespoons.
Raw Weight vs. Cooked Weight
One of the most common macro-tracking errors is logging a cooked food using a raw-food database entry—or the reverse.
Cooking changes food weight because it adds or removes water.
For example:
- Rice becomes heavier when cooked.
- Meat usually becomes lighter when cooked.
- Pasta absorbs water.
- Vegetables may lose moisture.
The total protein and calories do not disappear, but the nutrient content per 100 grams changes.
Choose one method
Method 1: Weigh food raw
Log it using a raw entry.
This works well when meal prepping.
Method 2: Weigh food cooked
Log it using a cooked entry.
This may be easier when eating prepared meals.
Do not weigh cooked chicken and log it as raw chicken unless the entry is specifically designed for that conversion.
How to Track a Meal-Prep Recipe
Suppose you cook:
- 1,000 grams raw chicken
- 500 grams dry rice
- 30 grams olive oil
- Vegetables and sauce
Step 1
Enter all raw ingredients into the recipe feature of your app.
Step 2
Cook the meal.
Step 3
Weigh the entire finished recipe.
Assume the final cooked weight is:
2,400 grams
Step 4
Set the recipe to contain 2,400 one-gram servings.
Step 5
When you eat 600 grams, log 600 servings.
That equals one-quarter of the full recipe.
This method accounts for changes in water weight while preserving the total calories and macros of the ingredients.
Should You Track Vegetables, Sauces, and Cooking Oil?
Yes—especially while learning.
Vegetables are usually low in calories, but they still contribute:
- Carbohydrates
- Fiber
- Calories
- Micronutrients
Sauces and oils can contribute much more than expected.
One tablespoon of oil contains approximately:
120 calories
A free-poured amount may be two or three tablespoons.
That can add hundreds of untracked calories.
Track:
- Oil used for cooking
- Dressing
- Mayonnaise
- Sauces
- Creamers
- Sweetened drinks
- Alcohol
- Small snacks and bites
The foods people forget are often the reason their logged intake does not match their results.
How Accurate Do You Need to Be?
You do not need to hit every macro perfectly.
A practical daily range is:
Protein
Within approximately 5–10 grams of target.
Fat
Within approximately 5–10 grams.
Carbohydrates
Use them to fill the remaining calories.
Calories
Within approximately 50–100 calories on most days.
The weekly pattern matters more than one imperfect day.
Avoid turning macro tracking into a rigid test you can fail.
The goal is better decision-making—not mathematical perfection.
Which Macro Matters Most?
For muscle growth, prioritize in this order:
- Total calories
- Protein
- Minimum adequate fat
- Carbohydrates
That does not mean carbohydrates are unimportant.
It means that once protein and essential fat needs are covered, carbohydrate intake can be adjusted more flexibly according to:
- Training volume
- Food preference
- Digestion
- Calorie target
How to Distribute Protein Across the Day
Instead of eating most of your protein at dinner, divide it across three to five meals.
A practical meal target is:
Approximately 20–40 grams of quality protein
Larger individuals may prefer 35–50 grams in some meals.
Example 160-gram day
Breakfast
35 grams
Lunch
40 grams
Pre- or post-workout meal
35 grams
Dinner
40 grams
Snack
10 grams
The total does not need to be evenly divided down to the gram.
How to Time Carbohydrates Around Training
Your total daily carbohydrate intake matters more than perfect timing.
However, placing some carbohydrates around training can support performance and recovery.
Before training
Eat carbohydrates and protein one to three hours before training.
Examples:
- Oatmeal and whey
- Chicken and rice
- Greek yogurt and fruit
- Eggs and toast
After training
Eat protein and carbohydrates during the next few hours.
Examples:
- Beef and potatoes
- Chicken and pasta
- Protein shake and banana
- Greek yogurt and cereal
You do not need to consume sugar immediately after every ordinary lifting session.
Sample 2,700-Calorie Muscle-Building Day
Approximate targets:
- Protein: 160 g
- Fat: 70 g
- Carbohydrates: 355–360 g
Breakfast
- Oatmeal
- Milk
- Whey protein
- Banana
- Peanut butter
Approximate macros:
- Protein: 40 g
- Carbohydrates: 90 g
- Fat: 18 g
Lunch
- Chicken breast
- Rice
- Vegetables
- Olive oil
Approximate macros:
- Protein: 45 g
- Carbohydrates: 85 g
- Fat: 15 g
Pre-workout snack
- Greek yogurt
- Granola
- Berries
Approximate macros:
- Protein: 25 g
- Carbohydrates: 60 g
- Fat: 5 g
Dinner
- Lean beef
- Potatoes
- Vegetables
Approximate macros:
- Protein: 40 g
- Carbohydrates: 80 g
- Fat: 22 g
Evening snack
- Cereal
- Milk
Approximate macros:
- Protein: 12 g
- Carbohydrates: 45 g
- Fat: 8 g
Exact totals vary by brand and portion size.
How to Adjust Your Macros
Do not change your targets based on one weigh-in.
Follow your starting macros for at least two to three weeks.
Track:
- Daily morning body weight
- Seven-day average weight
- Waist measurement
- Workout performance
- Hunger
- Digestion
- Progress photos
If weight is not increasing
Add approximately:
100–150 calories per day
Usually from carbohydrates or a combination of carbohydrates and fat.
If weight is increasing too quickly
Remove approximately:
100–200 calories per day
If strength is improving and weight is slowly rising
Do not change anything.
If waist size rises rapidly without strength gains
Reduce the surplus slightly and review your training quality.
How Often Should You Update Your Macros?
Recalculate or adjust when:
- Your body weight changes significantly
- Your activity level changes
- You begin or stop cardio
- Your job becomes more or less physical
- Weight gain stalls for several weeks
- Your goal changes from bulking to cutting
- Hunger or recovery becomes difficult to manage
You do not need to recalculate every week.
Small adjustments based on results are usually more accurate than repeatedly using a new calculator.
Can You Track Macros Without Tracking Calories?
Technically, your macros determine most of your calories.
If you track protein, carbohydrate, and fat accurately, you are indirectly tracking calories.
Some people use a simplified approach:
- Hit a protein target.
- Eat a minimum amount of fat.
- Adjust carbohydrate portions according to weight changes.
This can work, but beginners often benefit from seeing the calorie total until they understand their food intake better.
Can You Build Muscle Without Tracking Macros?
Absolutely.
Macro tracking is a tool—not a requirement.
You may not need to track when you can consistently:
- Eat protein at every meal
- Maintain a stable meal structure
- Gain weight at an appropriate rate
- Progress in the gym
- Control excessive fat gain
A simplified plate method could include:
- One or two palms of protein
- One or two fists of carbohydrates
- Vegetables or fruit
- A moderate serving of fat
Adjust portions based on body-weight trends.
Tracking is most useful when your progress is unpredictable or stalled.
Flexible Dieting vs. Clean Eating
Macro tracking is often associated with flexible dieting.
Flexible dieting means you can include a wide variety of foods as long as your overall diet meets your calorie, macro, and nutrition needs.
This does not mean:
- Eating only junk food
- Ignoring fiber
- Avoiding vegetables
- Treating all foods as nutritionally identical
A useful target is to obtain most of your diet from:
- Lean proteins
- Whole grains and starches
- Fruits
- Vegetables
- Dairy or alternatives
- Healthy fats
Then leave room for foods you enjoy.
Consistency is easier when your diet does not feel like punishment.
Fiber and Micronutrients Still Matter
A perfect macro total can still come from a poor-quality diet.
Also track the quality of your food choices.
Aim for:
- Fruits and vegetables daily
- Several protein sources
- Whole grains or minimally processed starches
- Adequate fiber
- Healthy fats
- Sufficient calcium, iron, potassium, and other nutrients
Do not build a muscle-gain diet from protein powder, cereal, candy, and cooking oil simply because the numbers fit.
Common Macro-Tracking Mistakes
Mistake 1: Using an unrealistic calorie calculator result
Treat the calculator as a starting estimate.
Mistake 2: Adding too large a surplus
More calories do not mean unlimited muscle growth.
Mistake 3: Logging cooked food as raw
Match the database entry to the food’s measured state.
Mistake 4: Ignoring oils and sauces
These can add hundreds of calories.
Mistake 5: Eating too little fat
Very low-fat diets can be difficult to sustain and may provide inadequate essential fats.
Mistake 6: Prioritizing protein while ignoring calories
Protein cannot completely compensate for chronic energy deficiency when muscle growth is the goal.
Mistake 7: Changing macros every few days
Use weekly averages and allow time for trends to develop.
Mistake 8: Trusting every app entry
Check the package label or an authoritative database.
Mistake 9: Trying to hit every gram perfectly
Use reasonable ranges.
Mistake 10: Forgetting weekends
Five accurately tracked days cannot reveal your true intake when weekends are unlogged.
Frequently Asked Questions
What macros are best for muscle growth?
There is no universal ratio. Set protein first, maintain adequate fat, and use carbohydrates for the remaining calories.
How much protein do I need?
Approximately 1.6–2.2 grams per kilogram of body weight is a practical range for many lifters.
How many calories should I eat to build muscle?
Begin near maintenance plus approximately 150–300 calories and adjust according to your weekly body-weight trend.
Should I eat more carbohydrates or fat?
After protein and minimum fat needs are covered, choose the balance that supports your training, digestion, and food preferences. Many lifters benefit from emphasizing carbohydrates.
Do I need to weigh every food?
Weighing food is useful while learning. You may eventually estimate routine meals once you understand portions.
Should I eat back exercise calories?
Usually not when your original calorie target already accounts for your normal activity. Fitness trackers often provide imprecise calorie-burn estimates.
Why am I not gaining weight even though I hit my macros?
Your estimated maintenance may be too high, your logging may be incomplete, or your activity may have increased. Add 100–150 calories and monitor the next two weeks.
Can macro tracking become unhealthy?
Yes, for some people. If tracking creates anxiety, guilt, compulsive behavior, or fear around food, stop and seek guidance from a registered dietitian or qualified mental-health professional.
Final Thoughts
Tracking macros does not build muscle by itself.
It gives you a system for ensuring that your nutrition supports the work you perform in the gym.
Use this process:
- Define your goal.
- Estimate maintenance calories.
- Add a modest calorie surplus.
- Set protein at approximately 1.6–2.2 grams per kilogram.
- Set a reasonable fat intake.
- Fill the remaining calories with carbohydrates.
- Weigh and log food consistently.
- Monitor weekly weight, waist, and strength trends.
- Adjust calories in small increments.
- Focus on consistency rather than perfect daily numbers.
The best macro plan is not the one that looks perfect inside an app.
It is the one that helps you:
- Train harder
- Recover properly
- Gain muscle gradually
- Limit unnecessary fat gain
- Eat in a way you can sustain
Track the numbers—but always judge the plan by your real-world results.
Ready to Calculate Your Muscle-Building Macros?
Use our Muscle Growth Macro Calculator to estimate:
- Maintenance calories
- Lean-bulk calories
- Daily protein
- Fat intake
- Carbohydrate intake
- Expected weight-gain range
Then download our FREE 12-Week Muscle Growth Meal Plan for:
- Done-for-you meals
- Adjustable calorie levels
- Grocery lists
- Meal-prep instructions
- Vegetarian substitutions
- Pre- and post-workout nutrition
Question: Which part of macro tracking feels most confusing—calories, protein, weighing food, or adjusting your targets? Share your answer in the comments.**
Nutrition Disclaimer
This article provides general educational information and is not individualized medical or nutrition advice. People with diabetes, kidney disease, digestive disorders, eating-disorder histories, pregnancy-related needs, or other medical concerns should consult a qualified healthcare professional or registered dietitian before changing calorie or macronutrient intake.
Best Leg Workout for Muscle Growth: Complete Lower-Body Program
Best Leg Workout for Muscle Growth: The Complete Lower-Body Program
A serious leg workout requires more than a few heavy squats and a rushed set of leg extensions.
Your lower body contains several large muscle groups with different functions:
- Quadriceps
- Hamstrings
- Glutes
- Adductors
- Calves
No single exercise trains all of them equally well.
Squats can be excellent for the quadriceps and glutes, but they do not fully replace direct hamstring curls. Romanian deadlifts train the posterior chain effectively, but they do not provide complete quadriceps development. Calves require their own focused work.
The best leg workout therefore combines several movement patterns:
- A squat or leg-press movement
- A hip-hinge movement
- A unilateral exercise
- A knee-flexion exercise
- A quadriceps isolation exercise
- Calf training
This guide gives you a complete lower-body hypertrophy program designed to build muscular size while keeping fatigue manageable.
You will learn:
- The best exercises for complete leg development
- Sets, repetitions, and rest periods
- How close to failure to train
- How to progress each exercise
- How often to train legs
- How to adjust the workout for beginners
- How to replace exercises that cause discomfort
- How nutrition and recovery affect lower-body growth
What Muscles Does a Complete Leg Workout Train?
Before selecting exercises, it helps to understand the major muscles involved.
Quadriceps
The quadriceps are located on the front of the thighs and straighten the knee.
They include:
- Rectus femoris
- Vastus lateralis
- Vastus medialis
- Vastus intermedius
Well-developed quadriceps create thigh size from the front and side.
They are trained through exercises such as:
- Squats
- Hack squats
- Leg presses
- Split squats
- Lunges
- Leg extensions
Hamstrings
The hamstrings are located on the back of the thighs.
They help:
- Bend the knee
- Extend the hip
- Control the leg during movement
Because the hamstrings cross both the hip and knee, a complete program should include:
- A hip-hinge exercise
- A leg-curl exercise
Romanian deadlifts and leg curls complement each other because they train the hamstrings through different joint actions.
Glutes
The gluteal muscles include:
- Gluteus maximus
- Gluteus medius
- Gluteus minimus
The gluteus maximus contributes strongly to hip extension and is trained during:
- Squats
- Deadlift variations
- Hip thrusts
- Split squats
- Lunges
The smaller gluteal muscles contribute to hip stability and movement.
Adductors
The adductors run along the inner thighs.
They contribute to:
- Hip adduction
- Hip extension in certain positions
- Pelvic stability
- Deep squatting movements
Deep squat variations and wider-stance leg exercises can train them substantially.
Calves
The main visible calf muscles are:
- Gastrocnemius
- Soleus
The gastrocnemius crosses the knee and is emphasized during straight-leg calf raises.
The soleus works strongly during bent-knee calf exercises such as seated calf raises.
A complete lower-body program should ideally include both positions.
What Makes a Leg Workout Effective for Muscle Growth?
An effective program requires more than difficult exercises.
Sufficient weekly volume
Research generally shows that performing more than a minimal number of challenging weekly sets supports greater muscle growth, although the benefit becomes progressively smaller as volume rises. A systematic review in trained young men suggested that approximately 12–20 weekly sets per muscle group may be a useful general range, but individual needs and recovery vary considerably.
You do not need to begin with 20 sets for every lower-body muscle.
Start with a recoverable amount and add work only when progress stalls and recovery remains good.
Progressive overload
Your muscles need an increasing challenge over time.
Progress can include:
- More repetitions
- More resistance
- Better technique
- Greater controlled range of motion
- Additional productive sets
Challenging effort
Muscle growth generally improves as working sets are taken relatively close to muscular failure, but complete failure is not necessary on every set. Research suggests that hypertrophy is influenced by proximity to failure while the exact ideal distance remains uncertain.
Appropriate exercise selection
Your workout should train:
- Knee extension
- Hip extension
- Knee flexion
- Unilateral stability
- Ankle plantar flexion
Controlled range of motion
Full-range resistance training generally appears more effective than partial-range training for lower-body hypertrophy and strength, although useful partial repetitions can still be added strategically.
Recovery
The best workout is one you can recover from and progressively repeat.
The Best Leg Workout for Muscle Growth
This program is designed for intermediate lifters with access to a commercial gym.
Exercise 1: Hack Squat or Back Squat
Sets: 3–4
Repetitions: 6–10
Rest: 2–4 minutes
Target: Quadriceps, glutes, adductors
The squat pattern is the foundation of the workout.
A back squat requires more balance and total-body stabilization.
A hack squat provides greater external stability, often allowing lifters to focus more directly on the legs.
Neither option is universally superior.
Choose the variation that allows you to:
- Reach a comfortable depth
- Maintain stable technique
- Train hard without persistent joint pain
- Progress over time
Back-squat technique
- Position the bar securely across your upper back.
- Brace your torso before descending.
- Bend through the hips and knees together.
- Keep your feet firmly planted.
- Descend as deeply as you can control comfortably.
- Drive upward without allowing the hips to rise dramatically ahead of the chest.
Hack-squat technique
- Place your back and shoulders firmly against the pads.
- Position your feet where the knees and hips move comfortably.
- Lower the platform under control.
- Reach the deepest pain-free position you can maintain.
- Drive through the whole foot to return upward.
Key mistake to avoid
Do not shorten the range solely to use more weight.
A smaller load through a controlled, productive range is often more useful than an ego-driven partial repetition.
Exercise 2: Romanian Deadlift
Sets: 3–4
Repetitions: 6–10
Rest: 2–3 minutes
Target: Hamstrings, glutes, spinal erectors
The Romanian deadlift trains the hamstrings through hip extension while placing them under tension in a lengthened position.
How to perform it
- Hold a barbell or dumbbells in front of your thighs.
- Keep your knees slightly bent.
- Push your hips backward.
- Keep the weight close to your legs.
- Lower until you feel a strong hamstring stretch without losing spinal control.
- Drive the hips forward to return to standing.
Key technique cue
Think:
“Push the hips back.”
Do not turn the Romanian deadlift into a squat by bending your knees excessively.
How low should you go?
The correct depth depends on:
- Hamstring flexibility
- Limb proportions
- Spinal control
- Equipment
You do not need to touch the floor.
Stop when your hips can no longer move backward without your lower back rounding significantly.
Exercise 3: Bulgarian Split Squat
Sets: 3
Repetitions: 8–12 per leg
Rest: 90–150 seconds
Target: Quadriceps, glutes, adductors
The Bulgarian split squat trains one leg at a time and provides substantial muscular tension without requiring extremely heavy external loads.
How to perform it
- Place the rear foot on a stable bench.
- Position the front foot far enough forward to remain balanced.
- Lower the rear knee toward the floor.
- Keep the front foot planted.
- Drive upward through the working leg.
- Complete all repetitions before switching sides.
To emphasize the quadriceps
- Keep the torso more upright.
- Allow the front knee to travel forward comfortably.
- Use a slightly shorter stance.
To emphasize the glutes
- Use a slightly longer stride.
- Lean forward moderately from the hips.
- Focus on driving the hip forward.
Do not force one exact position. Use the variation that feels stable and pain-free.
Exercise 4: Seated Leg Curl
Sets: 3–4
Repetitions: 10–15
Rest: 90 seconds
Target: Hamstrings
Hip-hinge exercises do not fully replace knee-flexion training.
The seated leg curl directly trains the hamstrings as they bend the knee.
How to perform it
- Adjust the machine so your knee aligns with its pivot point.
- Secure the thigh pad firmly but comfortably.
- Begin with your knees extended.
- Curl your heels downward and backward.
- Pause briefly in the contracted position.
- Return slowly until the hamstrings are lengthened.
Key tip
Avoid allowing the weight stack to slam between repetitions.
Control both the lifting and lowering phases.
Exercise 5: Leg Extension
Sets: 3
Repetitions: 12–20
Rest: 60–90 seconds
Target: Quadriceps
Leg extensions directly train knee extension and allow you to challenge the quadriceps without the balance and systemic fatigue of another compound exercise.
They are particularly useful for training the rectus femoris, which may not receive the same growth stimulus from squatting alone.
How to perform it
- Align your knees with the machine’s pivot point.
- Secure your hips and torso against the seat.
- Extend your knees smoothly.
- Squeeze the quadriceps near the top.
- Lower the weight under control.
Key tip
Use a load that allows controlled movement.
Do not kick the weight violently or allow your hips to rise from the seat.
Exercise 6: Standing Calf Raise
Sets: 4
Repetitions: 8–15
Rest: 60–90 seconds
Target: Gastrocnemius and soleus
How to perform it
- Position the balls of your feet securely on the platform.
- Lower your heels into a comfortable stretch.
- Push upward as high as possible.
- Pause briefly at the top.
- Lower slowly.
Avoid bouncing through the bottom.
Calf training is often ineffective because lifters use short, fast repetitions and excessive weight.
Optional Exercise 7: Seated Calf Raise
Sets: 3
Repetitions: 12–20
Rest: 60 seconds
Target: Soleus
The bent-knee position places the gastrocnemius at a shorter length and shifts greater relative emphasis toward the soleus.
Use this exercise if calf growth is a priority or if you train legs only once per week.
Complete Leg Workout Summary
| Exercise | Sets | Repetitions |
|---|---|---|
| Hack Squat or Back Squat | 3–4 | 6–10 |
| Romanian Deadlift | 3–4 | 6–10 |
| Bulgarian Split Squat | 3 | 8–12 per leg |
| Seated Leg Curl | 3–4 | 10–15 |
| Leg Extension | 3 | 12–20 |
| Standing Calf Raise | 4 | 8–15 |
| Seated Calf Raise, optional | 3 | 12–20 |
This is a demanding workout.
Beginners should use the reduced version later in this guide.
How Hard Should You Train?
Use repetitions in reserve, or RIR.
Compound exercises
For squats, Romanian deadlifts, and split squats:
Finish most sets with 1–3 repetitions in reserve.
Machine and isolation exercises
For leg curls, leg extensions, and calf raises:
Finish most sets with 0–2 repetitions in reserve.
Training every heavy compound set to complete failure is unnecessary and may increase fatigue, technique breakdown, and recovery demands. Meta-analyses have not shown a consistent hypertrophy advantage when training to failure is compared with non-failure training under similar volume conditions.
Occasional failure can be more practical on stable exercises such as:
- Leg extensions
- Leg curls
- Calf raises
- Machine presses
Best Rep Ranges for Leg Growth
Muscle can grow across a broad range of repetitions when the sets are challenging.
Research indicates that hypertrophy can occur with lighter and heavier loads, while heavier loads generally produce greater improvements in maximal strength.
A practical structure is:
Squats and hinges
6–10 repetitions
Split squats and leg presses
8–15 repetitions
Leg curls and extensions
10–20 repetitions
Calves
8–20 repetitions
You do not need to perform every exercise in the traditional 8–12 range.
Use lower repetitions for stable compound progression and moderate-to-higher repetitions for isolation exercises.
How to Progress the Workout
Use a double-progression system.
Suppose an exercise is prescribed for 8–12 repetitions.
Step 1
Choose a weight you can perform for approximately eight controlled repetitions.
Step 2
Use that weight until you reach 12 repetitions on every set.
Step 3
Increase the load by the smallest practical amount.
Step 4
Return to approximately eight or nine repetitions.
Step 5
Build upward again.
Example: Hack squat
Week 1: 225 × 10, 9, 8
Week 2: 225 × 11, 10, 9
Week 3: 225 × 12, 11, 10
Week 4: 225 × 12, 12, 12
Week 5: 235 × 9, 8, 8
That is progressive overload.
Progress may become slower as you gain experience.
Judge improvement over several weeks rather than expecting to increase every exercise during every session.
How Often Should You Train Legs?
For many people, training the lower body twice per week works well.
The main benefit is that it distributes weekly volume across multiple sessions.
You could use:
Monday: Quad-focused legs
- Hack squat
- Leg press
- Bulgarian split squat
- Leg extension
- Calves
Thursday: Hamstring- and glute-focused legs
- Romanian deadlift
- Hip thrust
- Leg curl
- Reverse lunge
- Calves
Training frequency does not appear to be independently magical when total weekly volume is equated. Its practical value is allowing you to complete more high-quality work without making one workout excessively long.
If you train legs only once weekly, the complete workout in this article can work.
If you train them twice, divide the volume between two sessions.
Two-Day Lower-Body Program
Day 1: Quadriceps Emphasis
Hack Squat
4 sets of 6–10
Leg Press
3 sets of 10–15
Bulgarian Split Squat
3 sets of 8–12 per leg
Leg Extension
3 sets of 12–20
Seated Leg Curl
3 sets of 10–15
Standing Calf Raise
4 sets of 8–15
Day 2: Hamstring and Glute Emphasis
Romanian Deadlift
4 sets of 6–10
Hip Thrust
3 sets of 8–12
Reverse Lunge
3 sets of 10–15 per leg
Seated or Lying Leg Curl
4 sets of 10–15
Leg Extension
2 sets of 15–20
Seated Calf Raise
4 sets of 12–20
Leave at least two days between sessions when possible.
Beginner Leg Workout
Beginners do not need seven exercises or maximum weekly volume.
Use this program once or twice per week.
Goblet Squat or Leg Press
3 sets of 8–12
Romanian Deadlift
3 sets of 8–12
Reverse Lunge
2 sets of 8–12 per leg
Seated Leg Curl
3 sets of 10–15
Standing Calf Raise
3 sets of 10–20
Start with two repetitions or more in reserve.
Focus on learning the movements before increasing volume.
Home Leg Workout
You can build your legs at home using dumbbells, a loaded backpack, or bodyweight progressions.
Bulgarian Split Squat
4 sets of 8–15 per leg
Single-Leg Romanian Deadlift
3 sets of 10–15 per leg
Reverse Lunge
3 sets of 10–20 per leg
Hamstring Walkout
3 sets of 8–15
Single-Leg Glute Bridge
3 sets of 12–20
Single-Leg Calf Raise
4 sets of 12–25
Make the exercises harder through:
- Additional repetitions
- Slower lowering phases
- Pauses
- Greater range of motion
- A loaded backpack
- One-leg variations
Best Exercise Substitutions
No exercise is mandatory.
Back-squat alternatives
- Hack squat
- Leg press
- Safety-bar squat
- Front squat
- Pendulum squat
- Belt squat
Romanian-deadlift alternatives
- Dumbbell Romanian deadlift
- Good morning
- 45-degree back extension
- Cable pull-through
- Single-leg Romanian deadlift
Bulgarian-split-squat alternatives
- Reverse lunge
- Walking lunge
- Step-up
- Single-leg press
- Front-foot-elevated split squat
Seated-leg-curl alternatives
- Lying leg curl
- Standing leg curl
- Nordic curl
- Sliding leg curl
Leg-extension alternatives
There is no perfect bodyweight replacement, but options include:
- Reverse Nordic curls
- Sissy-squat variations
- Additional squat or leg-press work
Choose alternatives according to:
- Comfort
- Equipment access
- Stability
- Target-muscle tension
- Progression potential
Squats vs. Leg Press for Muscle Growth
Both exercises can build substantial lower-body muscle.
Squat advantages
- Trains multiple muscle groups
- Develops free-weight skill
- Requires more stabilization
- Provides a clear strength benchmark
Leg-press advantages
- Greater external stability
- Lower balance demands
- Easier to train close to failure
- Less lower-back fatigue for some lifters
- Useful after squats or as the primary movement
You do not need to choose only one.
Many effective programs use a squat pattern during one session and a leg press or hack squat during another.
Are Deadlifts Enough for Hamstrings?
Conventional deadlifts train the posterior chain, but they are not always the most efficient hypertrophy exercise for the hamstrings.
A complete hamstring program should generally include:
- A hip-hinge exercise
- A knee-flexion exercise
Examples:
- Romanian deadlift plus seated leg curl
- Good morning plus lying leg curl
- Back extension plus Nordic curl
This trains the hamstrings through both primary functions.
Do You Need Hip Thrusts?
Hip thrusts are not mandatory.
Squats, split squats, Romanian deadlifts, lunges, and other exercises already train the glutes.
Hip thrusts may be useful when:
- Glutes are a major priority
- You tolerate the movement well
- You want additional hip-extension volume
- Squatting creates more quadriceps fatigue than glute fatigue
They can replace one compound movement or be added during a second weekly lower-body session.
Do not add them automatically to an already excessive workout.
How Deep Should You Squat?
Use the deepest range that you can perform with:
- Stable feet
- Controlled knee movement
- A braced torso
- No sharp pain
- Repeatable technique
Full or deep ranges generally support lower-body hypertrophy better than consistently using shallow partial repetitions.
However, anatomy and mobility differ.
Not everyone needs to squat with identical:
- Stance width
- Foot angle
- Bar position
- Depth
Choose the variation that fits your structure.
Do Knees Going Over the Toes Cause Injury?
The knees naturally move forward during many lower-body activities.
Allowing controlled forward knee travel is not automatically dangerous.
Restricting the knees excessively can shift more demand toward the hips and lower back.
The important factors are:
- Gradual loading
- Controlled technique
- Appropriate exercise selection
- Pain-free movement
- Recovery
If forward knee travel creates pain, modify:
- Stance
- Depth
- Exercise variation
- Load
Persistent knee pain should be assessed rather than ignored.
How Long Should a Leg Workout Take?
Most effective leg sessions take approximately:
60–90 minutes
The exact duration depends on:
- Exercise count
- Rest periods
- Warm-up sets
- Gym crowding
- Training experience
A workout lasting two hours is not automatically more effective.
Focus on productive sets and adequate rest rather than adding endless exercises.
How to Warm Up for Leg Day
A warm-up should prepare you without causing fatigue.
General warm-up
Perform five to ten minutes of:
- Walking
- Cycling
- Light rowing
- Dynamic movement
Exercise-specific warm-up
Before your first squat exercise:
- Perform the movement with no or very little resistance.
- Add weight gradually.
- Reduce repetitions as the load increases.
- Begin working sets only after you feel prepared.
Example before a 225-pound squat work set:
- Empty bar × 10
- 95 pounds × 8
- 135 pounds × 5
- 185 pounds × 3
- Begin working sets
Warm-up sets do not need to approach failure.
Nutrition for Leg Growth
Lower-body training can be demanding and requires adequate nutrition.
Protein
Aim for approximately:
1.6–2.2 grams per kilogram of body weight per day
Calories
For maximum muscle growth, eat near maintenance or in a modest surplus.
A starting surplus of approximately:
200–300 calories per day
is sufficient for many lifters.
Carbohydrates
Carbohydrates help support demanding lower-body workouts.
Useful sources include:
- Rice
- Oats
- Potatoes
- Pasta
- Fruit
- Bread
Pre-workout meal
One to three hours before training, eat protein and carbohydrates.
Examples:
- Chicken and rice
- Greek yogurt and a banana
- Eggs and toast
- Whey protein and oatmeal
Post-workout meal
Eat a balanced meal containing:
- Approximately 20–40 grams of protein
- Carbohydrates based on your calorie needs
- Fluids and sodium according to sweat loss
Recovery After Leg Day
Your legs do not grow during the workout itself.
They adapt during recovery.
Prioritize:
- Seven to nine hours of sleep
- Adequate protein and calories
- Hydration
- At least 48 hours before another demanding leg session
- Manageable cardio volume
- Deloads when fatigue accumulates
Some soreness is normal, especially after a new exercise.
Severe soreness that repeatedly prevents normal movement or ruins later sessions may indicate excessive volume or poor load management.
Common Leg-Training Mistakes
Mistake 1: Performing only squats
Squats do not fully train every lower-body muscle.
Mistake 2: Neglecting knee-flexion exercises
Include a leg-curl variation for the hamstrings.
Mistake 3: Using shallow repetitions to lift more weight
Train through a productive, controlled range.
Mistake 4: Taking every compound set to failure
This can create excessive fatigue and technique breakdown.
Mistake 5: Ignoring calves
Calves usually require direct, progressive training.
Mistake 6: Changing exercises constantly
Keep key movements long enough to improve your skill and performance.
Mistake 7: Adding too much volume too quickly
More sets are useful only when you can recover from them.
Mistake 8: Avoiding unilateral exercises
Single-leg training can improve balance, symmetry, and local muscular stimulus.
Mistake 9: Treating soreness as the goal
Soreness does not directly measure muscle growth.
Mistake 10: Skipping leg training after one bad session
Progress requires consistency across months.
How Long Does It Take to Build Bigger Legs?
The timeline varies according to:
- Genetics
- Training experience
- Nutrition
- Starting muscle mass
- Exercise selection
- Recovery
- Consistency
A realistic timeline may look like this:
Weeks 1–4
- Better technique
- Improved coordination
- Early strength gains
Weeks 5–12
- Increased training loads
- Better muscle control
- Early visible changes
Three to six months
- More noticeable quadriceps and hamstring development
- Improved leg measurements
- Greater lower-body strength
Six to twelve months
- Significant change when training and nutrition remain consistent
Use:
- Strength records
- Thigh measurements
- Progress photos
- Body-weight trends
- Clothing fit
to assess progress.
Frequently Asked Questions
What is the best leg exercise for muscle growth?
There is no single best exercise for the entire lower body. A squat or leg-press variation is excellent for the quadriceps and glutes, while hinges and leg curls are needed for more complete hamstring development.
How many exercises should a leg workout include?
Approximately five to seven exercises are enough for a complete intermediate session. Beginners may need only four or five.
Should I train legs once or twice per week?
Both can work. Twice-weekly training often makes it easier to distribute sufficient volume and maintain high-quality sets.
Are squats required to build big legs?
No. Hack squats, leg presses, split squats, lunges, and machine exercises can build muscular legs without traditional back squats.
How many sets should I do for legs?
Begin with approximately 8–12 challenging weekly sets for each major area, then adjust according to progress and recovery. Advanced lifters may benefit from more, but more volume is not automatically better.
Should I train legs to failure?
You may train stable isolation exercises close to or occasionally to failure. Keep most heavy compound sets one to three repetitions away from failure.
Why are my legs not growing?
Common reasons include insufficient effort, no progressive overload, inadequate weekly volume, too little protein or calories, poor recovery, and incomplete exercise selection.
Can I build legs at home?
Yes. Split squats, lunges, single-leg Romanian deadlifts, step-ups, hamstring walkouts, glute bridges, and calf raises can all build muscle when progressed appropriately.
Final Thoughts
The best leg workout for muscle growth trains the entire lower body—not just the muscles used in squats.
A complete program should include:
- A squat or leg-press movement
- A hip-hinge movement
- A unilateral exercise
- A leg-curl variation
- A quadriceps isolation movement
- Direct calf training
Use controlled technique, train close enough to failure, and progressively increase the challenge.
Most importantly:
- Track your workouts.
- Eat enough protein and calories.
- Recover before training your legs hard again.
- Follow the same core program long enough to measure progress.
Big legs are not built by surviving one brutal workout.
They are built by performing hundreds of productive sets across months and years.
Ready to Build Bigger Legs?
Download our FREE 12-Week Lower-Body Muscle Growth Plan and receive:
- Quad- and hamstring-focused workouts
- Beginner and intermediate options
- Exercise-substitution charts
- Progressive-overload targets
- Training log sheets
- Protein and calorie guidance
- Recovery and deload recommendations
Stop skipping the movements your legs need and start following a balanced program.
Question: Which part of your lower body needs the most improvement—quads, hamstrings, glutes, or calves? Share your answer in the comments.**
Training Disclaimer
This article provides general fitness information and is not medical or rehabilitation advice. Stop any exercise that causes sharp pain, instability, numbness, or unusual joint symptoms. Consult a qualified healthcare or exercise professional when appropriate.
How Much Water Should You Drink to Build Muscle?
How Much Water Should You Drink to Build Muscle? Most Lifters Get This Wrong
You track your protein.
You count your calories.
You follow a structured workout plan.
But how much attention do you give to hydration?
Many lifters fall into one of two extremes:
- They barely drink water until they feel intensely thirsty.
- They force down a gallon or more every day because a fitness influencer told them to.
Neither approach is ideal.
There is no universal amount of water that every person must drink to build muscle. Your needs depend on your body size, diet, activity, sweat rate, environment, medications, and health.
Hydration does not directly create muscle in the way that resistance training and protein do. However, it supports the conditions needed to train effectively, regulate body temperature, transport nutrients, maintain blood volume, and recover from exercise.
When dehydration becomes significant, strength, power, and high-intensity exercise performance may decline—making it harder to produce the training quality needed for long-term muscle growth. Reviews of the evidence generally support a negative effect of hypohydration on resistance-exercise performance, although the response varies by task and degree of dehydration.
In this guide, you will learn:
- How much water you may need each day
- Why one gallon is not the correct target for everyone
- How to calculate your personal sweat rate
- How much to drink before, during, and after training
- When electrolytes are useful
- Whether creatine increases your water needs
- How to recognize dehydration and overhydration
Does Drinking Water Build Muscle?
Water alone does not stimulate hypertrophy.
You cannot compensate for poor training or inadequate protein by drinking more water.
Muscle growth still depends mainly on:
- Progressive resistance training
- Sufficient protein
- Adequate energy intake
- Recovery
- Sleep
- Long-term consistency
However, water supports several processes that influence your ability to perform and recover.
Water contributes to:
- Blood volume
- Body-temperature regulation
- Nutrient transport
- Normal cellular function
- Joint lubrication
- Digestion
- Waste removal
- Exercise performance
Skeletal muscle also contains a large amount of water. That does not mean every increase in muscle water represents new contractile tissue, but hydration status can change how full your muscles look and how well you perform. Recent laboratory research continues to examine how dehydration affects muscle-cell stress and anabolic signaling, but it is too early to claim that drinking additional water directly increases muscle-protein synthesis in well-hydrated people.
How Much Water Do You Need Each Day?
The National Academies established an Adequate Intake for total water of approximately:
- 3.7 liters per day for adult men
- 2.7 liters per day for adult women
These figures include water from:
- Plain drinking water
- Coffee and tea
- Milk
- Other beverages
- Fruits
- Vegetables
- Soups
- All other foods
They are not instructions to drink 3.7 or 2.7 liters of plain water in addition to everything you eat and drink. In the intake data used to establish these values, food supplied approximately 19% of total water.
That translates roughly to average beverage and drinking-water intake of:
- About 3.0 liters, or 101 fluid ounces, for men
- About 2.2 liters, or 74 fluid ounces, for women
These are reference levels for generally healthy people in temperate conditions—not fixed prescriptions for every lifter.
You may require more when you:
- Train for long periods
- Sweat heavily
- Exercise in heat or humidity
- Work a physically demanding job
- Live at altitude
- Eat a high-sodium diet
- Are larger or more active
- Are ill with fever, vomiting, or diarrhea
You may require a medically individualized intake if you have kidney, heart, liver, or endocrine conditions.
A Practical Starting Target
For many active adults, a useful starting point is:
Drink regularly throughout the day, begin training well hydrated, and increase intake according to thirst, sweat loss, heat, and urine output.
Some fitness plans use a body-weight formula such as:
30–40 milliliters per kilogram of body weight per day
This can provide a rough starting estimate, but it is not an official universal prescription and should not override thirst, medical advice, or individual sweat losses.
Example
A person weighing 180 pounds is approximately 82 kilograms.
Using the rough range:
- 82 × 30 mL = 2.46 liters
- 82 × 40 mL = 3.28 liters
That could suggest roughly 2.5–3.3 liters of total daily fluids before substantial exercise-related adjustments.
Again, this is an estimate—not a target that must be forced.
Do You Need to Drink a Gallon of Water?
A gallon equals approximately:
3.8 liters or 128 fluid ounces
For a large, highly active person training in hot conditions, that amount may be reasonable.
For a smaller person with a sedentary day in a cool environment, it may be unnecessary.
A gallon is not inherently:
- Better for muscle growth
- Required with creatine
- More anabolic
- A detox strategy
- Appropriate for everyone
The correct amount is the amount that replaces your normal losses without leaving you dehydrated or forcing excessive fluid intake.
How Hydration Affects Workout Performance
Dehydration can reduce plasma volume and make temperature regulation more difficult, particularly during prolonged exercise and heat exposure.
The evidence for maximal strength is not identical across every study. Some research finds minimal effects on certain brief contractions, while other work reports reduced strength, power, high-intensity endurance, or total resistance-training performance when participants are hypohydrated.
For muscle growth, the practical concern is indirect.
If dehydration causes you to:
- Complete fewer repetitions
- Use less weight
- Fatigue sooner
- Rest longer than expected
- Lose concentration
- Cut workouts short
then your training stimulus may suffer.
Hydration helps you express your current strength and work capacity. It does not replace progressive overload, but poor hydration can interfere with it.
How Much Should You Drink Before a Workout?
The American College of Sports Medicine recommends beginning exercise in a well-hydrated state with normal electrolyte levels. When extra prehydration is needed, fluid should be consumed several hours beforehand so it can be absorbed and excess urine can be produced before training begins.
A practical approach is:
Two to four hours before training
Drink approximately:
5–7 milliliters per kilogram of body weight
For an 82-kilogram person:
- 82 × 5 mL = 410 mL
- 82 × 7 mL = 574 mL
That is roughly:
14–19 fluid ounces
If your urine remains dark or you produce very little urine, an additional moderate amount may be appropriate before exercise.
Avoid drinking a huge volume immediately before training. That can cause:
- Stomach discomfort
- Sloshing
- Frequent bathroom trips
- Dilution of blood sodium when taken to extremes
How Much Should You Drink During a Workout?
There is no single workout-fluid target for everyone because sweat rates vary dramatically.
Sweat loss depends on:
- Body size
- Genetics
- Workout intensity
- Clothing
- Gym temperature
- Humidity
- Acclimatization
- Exercise duration
Older practical recommendations have suggested approximately 150–300 milliliters every 15–20 minutes, adjusted according to sweat loss. Water is often sufficient for exercise lasting less than roughly 60–90 minutes in ordinary conditions.
For a typical 45- to 75-minute lifting session in an air-conditioned gym:
- Bring a bottle.
- Sip according to thirst.
- Drink more if you are sweating heavily.
- Do not force fluid faster than your body can comfortably handle.
The goal is to avoid excessive dehydration without gaining body weight from overdrinking during the session.
The Best Way to Calculate Your Sweat Rate
Your personal sweat rate is more useful than a generic online number.
Step 1: Weigh yourself before training
Use minimal clothing and record your weight after using the bathroom.
Step 2: Track everything you drink
Record the amount of fluid consumed during the workout.
Step 3: Weigh yourself after training
Use similar clothing and dry off excess sweat.
Step 4: Calculate the loss
A simplified equation is:
Sweat loss = pre-workout weight − post-workout weight + fluid consumed − urine produced
Because one kilogram of body-weight change is approximately equal to one liter of water, the result provides a useful estimate of sweat loss. ACSM also notes that pre- and post-exercise body weight can help estimate fluid losses, although body-mass changes become less precise during very prolonged events.
Example
- Pre-workout weight: 82.0 kg
- Post-workout weight: 81.4 kg
- Fluid consumed: 0.5 L
- No urination
Estimated sweat loss:
0.6 + 0.5 = 1.1 liters
If the workout lasted one hour, estimated sweat rate was:
1.1 liters per hour
You do not necessarily need to replace every drop during exercise, but this tells you that one small sip is probably not enough under those conditions.
How Much Should You Drink After a Workout?
After exercise, the goal is to replace the remaining fluid deficit and restore electrolytes.
A practical recovery target is approximately:
1.25–1.5 liters of fluid for every kilogram of body weight lost
The additional amount accounts for continued urine production after the workout.
Example
If you finish training 0.7 kilograms lighter:
- 0.7 × 1.25 = 0.88 liters
- 0.7 × 1.5 = 1.05 liters
That suggests drinking roughly:
0.9–1.1 liters over the next several hours
Do not attempt to drink all of it immediately.
Combine fluids with a normal meal containing sodium, carbohydrates, and protein.
When recovery is not urgent, normal eating and drinking can usually restore fluid and sodium balance.
Do You Need Electrolytes?
Electrolytes are minerals that carry an electrical charge.
Important examples include:
- Sodium
- Potassium
- Chloride
- Magnesium
- Calcium
Sodium is the primary electrolyte lost through sweat.
You may benefit from an electrolyte drink when:
- You train longer than 60–90 minutes
- You sweat heavily
- Your clothing develops visible salt marks
- You exercise in heat or humidity
- You have multiple sessions in one day
- You must recover rapidly
- You experience a large sweat loss
For most ordinary lifting workouts, plain water plus normal meals is enough.
You do not automatically need a sports drink every time you enter the gym.
Water vs. Sports Drinks
Water is usually sufficient when:
- Your session is under an hour
- The gym is cool
- Sweat loss is modest
- You ate normally before training
- You will eat a meal afterward
A sports or electrolyte drink may help when:
- The session is long
- You are training in heat
- You sweat heavily
- You are performing endurance work
- Rapid recovery is required
- You need both carbohydrates and fluid
Carbohydrates and electrolytes can improve fluid absorption and recovery in demanding situations. ACSM notes that milk and chocolate milk also provide fluid, electrolytes, carbohydrates, and protein, making them practical post-exercise options for some people.
Does Coffee Count Toward Hydration?
Yes.
Coffee, tea, milk, and other beverages contribute to total fluid intake.
Caffeine has a mild diuretic effect, but habitual moderate caffeine consumption does not automatically dehydrate healthy people or cancel the water contained in coffee.
Caffeinated drinks can still count toward your daily fluid intake.
However, avoid depending entirely on high-caffeine energy drinks because they may:
- Disrupt sleep
- Increase anxiety
- Cause stomach discomfort
- Add large amounts of sugar
- Make it harder to judge your actual fatigue
Sleep loss is far more likely to hurt your muscle-building plan than moderate coffee intake.
Does Creatine Mean You Need More Water?
Creatine increases water retention inside muscle cells, particularly during the early stages of supplementation.
That does not mean creatine dehydrates you or requires you to force an extra gallon of water each day.
A large review of common creatine questions concluded that recommended creatine use does not appear to increase dehydration or cramping risk in healthy users. Standard maintenance dosing is commonly 3–5 grams per day.
When taking creatine:
- Maintain normal hydration habits.
- Drink more when sweating or exercising in heat.
- Do not force excessive water solely because you use creatine.
- Seek medical guidance if you have kidney disease or another relevant condition.
Does More Water Make Muscles Look Bigger?
Temporarily, hydration can influence muscle fullness.
Muscle stores carbohydrates as glycogen, and glycogen is stored with water. When glycogen and hydration are low, muscles may look flatter.
After restoring:
- Carbohydrates
- Water
- Sodium
muscles may appear fuller.
This is not the same as building new muscle tissue.
Changes in:
- Water
- Glycogen
- Sodium
- Digestive contents
can alter your scale weight and appearance from day to day.
Judge true muscle growth over weeks and months—not by how pumped or hydrated you look after one meal.
Can Drinking Too Much Water Be Dangerous?
Yes.
More is not always better.
Drinking excessive water faster than your kidneys can remove it may dilute blood sodium.
This condition is called hyponatremia.
Possible symptoms include:
- Headache
- Nausea
- Confusion
- Bloating
- Vomiting
- Muscle weakness
- Seizures in severe cases
The risk is most often discussed during prolonged endurance events, but anyone can overdrink.
Do not:
- Force several liters in a short period
- Continue drinking when you are gaining substantial weight during exercise
- Ignore headache, confusion, or swelling
- Drink only plain water during many hours of heavy sweating without replacing sodium
Severe symptoms require urgent medical attention.
Signs You May Be Dehydrated
Possible signs include:
- Thirst
- Dry mouth
- Darker urine
- Reduced urine output
- Headache
- Dizziness
- Fatigue
- Elevated perceived effort
- Reduced workout performance
- Rapid heart rate
- Feeling unusually hot
Urine color can provide a rough clue, but it is not a perfect measurement.
Some supplements, vitamins, foods, and medications can change urine color.
Pale-yellow urine and normal thirst are practical everyday indicators for many healthy people.
Does Clear Urine Mean You Are Perfectly Hydrated?
Not necessarily.
Completely clear urine throughout the entire day may mean you are drinking more fluid than you need.
Urine should not always look like pure water.
A light straw or pale-yellow color is usually a more practical target.
Morning urine is commonly darker because you have gone several hours without drinking.
A Muscle-Building Hydration Schedule
This example is not a medical prescription. Adjust it according to your body size, sweat rate, diet, and environment.
After waking
Drink:
12–20 ounces
particularly if you wake thirsty.
With breakfast
Drink:
8–16 ounces
Through the morning
Sip according to thirst.
Two to four hours before training
Drink approximately:
5–7 mL per kilogram of body weight
when additional prehydration is needed.
During training
Sip regularly, aiming to limit excessive thirst and large body-weight losses.
After training
Replace the measured fluid deficit gradually and eat a balanced meal containing protein, carbohydrates, and sodium.
Evening
Continue drinking according to thirst, but avoid forcing so much fluid immediately before bed that sleep is repeatedly interrupted.
Sample Hydration Plan for a 180-Pound Lifter
A 180-pound lifter weighs approximately 82 kilograms.
Normal daily starting point
Approximately:
2.5–3.3 liters of fluids, adjusted for diet and conditions.
Before a workout
Approximately:
410–575 mL, or 14–19 ounces, several hours beforehand.
During a moderate one-hour workout
Perhaps:
400–800 mL, depending heavily on sweat rate.
After training
Replace remaining losses according to the change in body weight.
Someone who loses one liter per hour will need much more than someone who barely sweats.
This is why body size alone cannot determine the perfect intake.
Hydration for Bulking
During a calorie surplus, you may eat more:
- Protein
- Carbohydrates
- Sodium
- Fiber
- Total food
That can increase your fluid needs.
Higher carbohydrate intake also increases glycogen storage and associated water.
During a bulk:
- Drink consistently throughout the day.
- Pair high-fiber meals with fluid.
- Do not confuse glycogen and water gain with instant fat gain.
- Avoid using sugary drinks as your main calorie-surplus strategy.
Hydration While Cutting
During fat loss, food intake decreases.
Because foods provide part of your daily water, reducing food may also reduce fluid intake.
Higher protein and fiber intake can also make regular hydration more important for digestive comfort.
During a cut:
- Keep water accessible.
- Use low-calorie beverages if they help adherence.
- Avoid excessive fluid restriction to create temporary scale loss.
- Do not mistake dehydration for successful fat loss.
Rapid water manipulation can reduce strength and exercise performance.
Hydration for Hardgainers
Hardgainers sometimes drink enormous quantities of water immediately before meals.
This can reduce appetite and make it harder to consume enough calories.
A better strategy is to:
- Drink regularly between meals.
- Avoid filling your stomach with excessive water immediately before eating.
- Use milk or calorie-containing smoothies when appropriate.
- Continue replacing workout sweat losses.
Hydration should support your calorie goal—not make eating impossible.
Common Hydration Mistakes
Mistake 1: Believing everyone needs one gallon
Fluid needs vary widely.
Mistake 2: Waiting until severe thirst
Begin training well hydrated rather than trying to catch up halfway through.
Mistake 3: Drinking too much too quickly
Spread intake throughout the day.
Mistake 4: Ignoring sweat rate
A heavy sweater may need much more fluid and sodium than a light sweater.
Mistake 5: Avoiding sodium completely
Sodium helps retain fluid and replace sweat losses.
Mistake 6: Using sports drinks for every short workout
Most ordinary lifting sessions require only water and normal food.
Mistake 7: Assuming creatine causes dehydration
Normal creatine use does not require excessive forced water intake.
Mistake 8: Treating water weight as fat or muscle
Short-term body-weight changes often reflect fluid, glycogen, and digestive contents.
Frequently Asked Questions
How much water should I drink daily to build muscle?
There is no muscle-specific universal number. The National Academies’ reference intake is approximately 3.7 liters of total water for men and 2.7 liters for women, including water from food and all beverages. Active people may need more.
Should I drink one gallon of water per day?
Only when that amount fits your body size, activity, sweat loss, diet, and environment. A gallon is not required for everyone.
Does dehydration reduce strength?
Research is mixed for isolated maximal-strength tests, but dehydration can impair high-intensity endurance, total resistance-training performance, and some measures of strength and power.
How much should I drink during lifting?
Sip according to thirst and sweat loss. Many people drink roughly 400–800 mL during a one-hour session, but individual needs can fall outside that range.
Do I need electrolytes during weight training?
Usually not for an ordinary session under an hour. They become more useful during long sessions, heavy sweating, heat exposure, or multiple workouts.
Does creatine increase water requirements?
Creatine increases water stored in muscle but does not mean you need to force excessive water. Maintain normal hydration and adjust for exercise and heat.
Can too much water hurt performance?
Yes. Overdrinking can cause stomach discomfort and, in extreme cases, dangerous dilution of blood sodium.
What is the easiest way to monitor hydration?
Use thirst, urine color, workout performance, and pre- versus post-workout body weight together rather than relying on one sign alone.
Final Thoughts
Water matters for muscle growth—but not because water is an anabolic supplement.
It matters because hydration helps you:
- Maintain workout performance
- Regulate body temperature
- Transport nutrients
- Sustain blood volume
- Recover from sweat loss
- Train consistently
Use these principles:
- Begin with a reasonable daily intake rather than forcing a gallon.
- Remember that food and all beverages contribute water.
- Start workouts well hydrated.
- Sip during training according to thirst and sweat rate.
- Weigh yourself before and after exercise when you need a more precise plan.
- Replace sodium during long, hot, or high-sweat sessions.
- Avoid both dehydration and excessive water intake.
- Adjust according to your environment, body size, and health.
Most lifters do not need a complicated hydration protocol.
They need to drink consistently, monitor their individual losses, and stop treating one generic number as a rule for every body.
Ready to Build Your Complete Muscle Plan?
Download our FREE 12-Week Muscle Growth Plan and receive:
- Progressive workout programs
- Protein and calorie targets
- Pre- and post-workout nutrition guides
- Hydration and recovery checklists
- Training trackers
- Evidence-based supplement guidance
Build muscle by getting the fundamentals right—training, nutrition, hydration, sleep, and consistency.
Question: How much water do you currently drink each day, and do you notice a difference in your workouts when you are better hydrated? Share your experience in the comments.**
Medical Disclaimer
This article provides general educational information and is not medical advice. Fluid requirements may need to be restricted or medically managed in people with heart, kidney, liver, endocrine, or electrolyte disorders. Seek urgent medical care for severe confusion, seizures, fainting, persistent vomiting, or suspected heat illness.
How to Build a Mind-Muscle Connection for Better Muscle Growth
Mind-Muscle Connection: The Secret Weapon for Faster Muscle Growth
Have you ever finished a set of rows and felt your arms working more than your back?
Or performed lateral raises while feeling most of the tension in your traps?
You completed the exercise.
You moved the weight.
But the muscle you were trying to train barely seemed involved.
This is where the mind-muscle connection can help.
A mind-muscle connection is your ability to deliberately focus attention on a target muscle while it contracts during an exercise.
Used correctly, this can help you:
- Improve exercise technique
- Reduce unnecessary momentum
- Keep tension on the intended muscle
- Identify poor exercise selection
- Improve control through the range of motion
- Make lighter and moderate loads more productive
However, the mind-muscle connection is not magic.
You do not build muscle simply by thinking about it.
Muscle growth still depends primarily on:
- Progressive overload
- Sufficient mechanical tension
- Challenging sets
- Adequate weekly volume
- Protein and calories
- Recovery
The mind-muscle connection is best viewed as a tool that improves how effectively you apply those fundamentals.
What Is the Mind-Muscle Connection?
The mind-muscle connection is an attentional strategy in which you consciously focus on the contraction and movement of a specific muscle during an exercise.
This is sometimes called an internal focus of attention.
Examples include thinking about:
- Squeezing your chest during a cable fly
- Pulling your elbows toward your hips during a pulldown
- Driving through your glutes during a hip thrust
- Lifting your arms outward with your side delts during lateral raises
- Shortening your biceps during a curl
The goal is not merely to move the weight from point A to point B.
The goal is to make the intended muscle produce more of the movement.
Internal Focus vs. External Focus
There are two common ways to direct attention during exercise.
Internal focus
You concentrate on your body or a specific muscle.
Examples:
- “Squeeze the chest.”
- “Contract the glutes.”
- “Drive with the quads.”
- “Pull with the lats.”
External focus
You concentrate on the movement or an object outside the body.
Examples:
- “Push the floor away.”
- “Drive the bar toward the ceiling.”
- “Pull the handle toward your ribs.”
- “Throw the weight upward.”
An external focus often works well for:
- Strength
- Power
- Athletic movement
- Complex lifts
- Maximum-load performance
An internal focus may be more useful for:
- Isolation exercises
- Hypertrophy-focused training
- Improving target-muscle awareness
- Correcting compensation patterns
- Learning how a muscle contracts
Neither approach is always superior.
The best focus depends on the exercise and your goal.
Does the Mind-Muscle Connection Build More Muscle?
It may help under certain conditions.
One frequently cited resistance-training study compared an internal focus with an external focus during elbow flexion and leg-extension training. The participants using an internal focus experienced greater biceps growth, although the same advantage was not clearly observed in the quadriceps.
This suggests that deliberately focusing on a muscle may improve hypertrophy in some exercises, particularly simple isolation movements.
However, this does not mean internal focus always produces better results.
Potential limitations include:
- The evidence base is relatively small.
- Results may differ between muscles.
- Internal focus may reduce performance with heavy loads.
- Experienced lifters may already recruit the target muscle effectively.
- Exercise technique and structure still matter more than thought alone.
A sensible conclusion is:
The mind-muscle connection can improve the quality of hypertrophy-focused training, especially during isolation exercises, but it should support progressive overload rather than replace it.
Can You Increase Muscle Activation by Focusing on a Muscle?
Studies using electromyography, or EMG, have found that people can sometimes increase activity in a target muscle by directing attention toward it.
For example, a lifter may increase:
- Lat activity during a pulldown
- Biceps activity during a curl
- Chest activity during pressing
- Glute activity during hip extension
But greater EMG activity does not automatically guarantee greater long-term muscle growth.
EMG measures electrical activity under specific conditions.
It does not directly measure:
- Mechanical tension
- Muscle-fiber shortening
- Long-term hypertrophy
- Recovery
- Progression
Use activation studies as useful clues—not as proof that one cue or exercise is universally best.
Why You May Not Feel the Target Muscle Working
A weak mind-muscle connection can have several causes.
The weight is too heavy
When the load is excessive, your body may recruit momentum and stronger surrounding muscles to complete the repetition.
Your technique is unstable
Poor positioning can shift tension away from the target muscle.
The exercise does not fit your anatomy
Not every popular exercise feels effective for every person.
You are moving too quickly
Fast, uncontrolled repetitions make it harder to sense the target muscle.
You lack experience
Beginners often need time to learn what muscular tension feels like.
The target muscle is not the prime mover
You may be trying to feel a muscle that only plays a supporting role in the exercise.
Another muscle is dominating
Examples include:
- Front delts dominating chest presses
- Biceps dominating rows
- Traps dominating lateral raises
- Lower back dominating hip hinges
- Hamstrings dominating glute exercises
How to Build a Better Mind-Muscle Connection
1. Learn the Muscle’s Main Function
It is easier to contract a muscle when you understand what it does.
Examples:
Chest
Brings the upper arms toward the center of the body.
Lats
Pull the upper arms downward and backward.
Side delts
Raise the arms away from the body.
Biceps
Bend the elbow and help rotate the palm upward.
Triceps
Straighten the elbow.
Glutes
Extend and externally rotate the hips.
Hamstrings
Bend the knee and help extend the hips.
Understanding the function helps you choose better cues.
2. Reduce the Weight
If you cannot control the exercise or feel the target muscle at all, lower the load.
Use enough resistance to challenge the muscle, but not so much that technique collapses.
A temporary 10%–30% reduction may help you:
- Improve control
- Remove momentum
- Find a better range of motion
- Learn the movement pattern
Once technique improves, gradually increase the load again.
Reducing the weight is not the same as avoiding progressive overload.
It is often the first step toward applying overload more effectively.
3. Slow the Lowering Phase
Use a controlled eccentric, or lowering phase.
A practical tempo is:
- Two to four seconds down
- A brief pause
- A controlled lifting phase
For example, during a biceps curl:
- Curl the weight upward.
- Squeeze briefly at the top.
- Lower the dumbbell over three seconds.
- Fully lengthen the biceps without relaxing completely.
Slower repetitions can improve awareness, although deliberately slow tempos are not automatically better for growth.
Do not turn every repetition into a ten-second movement.
Use enough control to maintain tension while preserving productive effort.
4. Pause in the Contracted Position
A one- or two-second pause at the shortened position can help you feel the target muscle.
Examples:
- Squeeze the glutes at the top of a hip thrust.
- Hold the chest contraction during a cable fly.
- Pause with the elbows behind the body during a rear-delt fly.
- Hold the top of a calf raise.
- Pause during a leg curl.
The pause should reinforce control—not simply extend the set until your joints become uncomfortable.
5. Use a Full, Comfortable Range of Motion
A muscle usually experiences different levels of tension throughout an exercise.
Use the largest range you can control comfortably.
Do not shorten the movement simply because the contraction feels stronger in one part of the repetition.
For example:
- Let the lats lengthen during pulldowns.
- Lower the dumbbells deeply during curls when comfortable.
- Use a deep, controlled squat.
- Allow the chest to stretch during flyes without forcing the shoulder joint.
Muscle growth often benefits from training at longer muscle lengths, so the stretched position should not be ignored in favor of squeezing alone.
6. Touch the Target Muscle
Lightly touching a muscle can improve awareness during beginner-friendly exercises.
Examples:
- Place one hand on your upper chest during a one-arm cable fly.
- Touch your side delt during a single-arm lateral raise.
- Place a hand on your lat during a light one-arm pulldown.
- Touch your glute during a bodyweight hip extension.
This provides additional sensory feedback.
Use this only when the exercise can be performed safely with one arm or with assistance from a coach.
7. Perform a Light Activation Set
Before the main exercise, perform one light set designed to help you feel the target muscle.
Examples:
Chest day
Light cable fly before bench press.
Back day
Straight-arm pulldown before rows.
Glute training
Bodyweight glute bridge before squats or hip thrusts.
Shoulder training
Light cable lateral raise before heavier shoulder work.
Activation sets should not exhaust the muscle.
Use:
- One or two sets
- Light resistance
- 12–20 controlled repetitions
- Plenty of repetitions in reserve
The purpose is awareness—not fatigue.
8. Use Stable Exercises
Stability makes it easier to focus on a target muscle.
Useful options include:
- Chest-supported rows
- Machine presses
- Cable flyes
- Preacher curls
- Seated leg curls
- Leg extensions
- Machine lateral raises
- Reverse pec-deck flyes
Free-weight exercises remain valuable.
However, if balance and stabilization dominate your attention, a machine or supported variation may make target-muscle training easier.
9. Use Unilateral Exercises
Training one side at a time can improve concentration.
Examples:
- One-arm pulldown
- Single-arm cable row
- One-arm lateral raise
- Single-leg extension
- Single-leg curl
- One-arm preacher curl
Unilateral work can also help identify left-to-right differences.
Start with your weaker or less coordinated side.
10. Watch Your Technique
Use a mirror carefully or record a set.
Look for:
- Excessive body swing
- Shortened range of motion
- Shoulder shrugging
- Elbows drifting out of position
- Hips or torso twisting
- Loss of control
Video often reveals problems that are difficult to feel during the set.
Do not obsess over perfect-looking movement.
Your goal is repeatable, controlled technique that places tension where intended.
Best Mind-Muscle Connection Cues by Muscle Group
Chest
Instead of thinking:
“Push the weight.”
Try:
- Bring your upper arms toward each other.
- Squeeze the chest as the arms move inward.
- Keep the shoulder blades stable.
- Drive the biceps toward the center of the chest.
Useful exercises:
- Cable fly
- Pec deck
- Machine chest press
- Dumbbell press
Back and Lats
Instead of thinking:
“Pull with your hands.”
Try:
- Drive your elbows toward your hips.
- Pull your upper arm behind your torso.
- Use your hands as hooks.
- Let the lats stretch before pulling.
Useful exercises:
- One-arm pulldown
- Chest-supported row
- Straight-arm pulldown
- Cable row
Lifting straps can sometimes reduce grip and biceps limitations during back training.
Side Delts
Try:
- Lead with your elbows.
- Lift the upper arms outward.
- Keep your shoulders away from your ears.
- Imagine pushing the walls apart.
Useful exercises:
- Cable lateral raise
- Machine lateral raise
- Dumbbell lateral raise
If the traps dominate, reduce the weight and avoid aggressive shrugging.
Rear Delts
Try:
- Move the upper arms outward and backward.
- Keep a soft elbow bend.
- Avoid turning the movement into a row.
- Think about spreading your arms rather than squeezing the shoulder blades hard.
Useful exercises:
- Reverse pec deck
- Cable rear-delt fly
- Chest-supported rear-delt row
Biceps
Try:
- Shorten the biceps.
- Bring the forearm toward the upper arm.
- Keep the elbow stable.
- Rotate the palm upward when appropriate.
Useful exercises:
- Preacher curl
- Incline dumbbell curl
- Cable curl
- Concentration curl
Triceps
Try:
- Straighten the elbow completely.
- Keep the upper arm stable.
- Squeeze the back of the arm.
- Avoid using shoulder movement to finish the repetition.
Useful exercises:
- Cable pushdown
- Overhead cable extension
- Machine dip
- Single-arm extension
Quadriceps
Try:
- Push the floor away.
- Straighten the knee forcefully.
- Let the knees travel through a comfortable range.
- Maintain tension through the front of the thigh.
Useful exercises:
- Leg extension
- Hack squat
- Leg press
- Heel-elevated squat
Hamstrings
Try:
- Pull the heel toward the glute during leg curls.
- Push the hips backward during hinges.
- Feel the hamstrings lengthen.
- Avoid turning Romanian deadlifts into a squat.
Useful exercises:
- Seated leg curl
- Lying leg curl
- Romanian deadlift
- Back extension
Glutes
Try:
- Drive the hips forward.
- Squeeze the glutes without overextending the lower back.
- Push through the whole foot.
- Keep the pelvis controlled.
Useful exercises:
- Hip thrust
- Bulgarian split squat
- Deep squat
- Glute bridge
- Cable kickback
Calves
Try:
- Push through the ball of the foot.
- Rise as high as you comfortably can.
- Pause at the top.
- Lower into a controlled stretch.
Useful exercises:
- Standing calf raise
- Seated calf raise
- Leg-press calf raise
Should You Use the Mind-Muscle Connection on Compound Exercises?
Yes, but not always in the same way as an isolation exercise.
During compound lifts, focusing too narrowly on one muscle may reduce coordination or force production.
For heavy exercises such as:
- Squats
- Deadlifts
- Bench presses
- Overhead presses
- Barbell rows
an external or movement-based cue may work better.
Examples:
- Push the floor away.
- Drive the bar upward.
- Keep the bar close.
- Pull the elbows back.
- Brace against the belt.
During moderate-load hypertrophy work, you can blend both approaches.
For example, during a machine chest press:
- Use an external cue to press the handles forward.
- Use an internal cue to bring the upper arms inward with the chest.
The heavier and more technically demanding the lift becomes, the less useful it may be to obsess over feeling one isolated muscle.
Does Feeling a Muscle Mean It Is Growing?
Not necessarily.
A strong burning sensation, pump, or contraction can be useful feedback.
But it does not prove that an exercise will produce superior growth.
You can feel a muscle without applying enough progressive tension.
You can also build muscle without an intense burn.
Better indicators include:
- Improved technique
- More repetitions
- Gradually heavier loads
- Stable target-muscle tension
- Increasing muscle measurements
- Better progress photos
- Consistent recovery
Use sensation as one piece of information—not the final measurement of workout quality.
The Muscle Pump vs. the Mind-Muscle Connection
The muscle pump occurs when blood and fluid accumulate in working muscles.
The mind-muscle connection is your conscious awareness and control of the target muscle.
They often occur together, but they are not the same.
A pump may make the target muscle easier to feel.
However:
- A pump does not guarantee muscle growth.
- Lack of a pump does not mean the workout failed.
- Heavy compound work may build muscle without producing an extreme pump.
The pump can be useful for feedback and motivation, but long-term progression remains more important.
How to Practice the Mind-Muscle Connection
Use this five-minute practice before a target-muscle workout.
Step 1: Flex the muscle
Contract it without resistance for 10–20 seconds.
Step 2: Perform a light isolation set
Use 15–20 controlled repetitions.
Step 3: Pause at peak contraction
Hold each repetition briefly.
Step 4: Move into your main exercise
Use moderate resistance and controlled technique.
Step 5: Evaluate the set
Ask:
- Did the target muscle fatigue?
- Did another muscle dominate?
- Was the load too heavy?
- Did I maintain the intended range?
Repeat this process over several weeks.
The mind-muscle connection improves through practice.
A Four-Week Mind-Muscle Connection Plan
Week 1: Learn the movement
- Reduce loads slightly
- Record your technique
- Use controlled repetitions
- Practice basic cues
Week 2: Add pauses
- Add a one-second contraction pause
- Keep the full range of motion
- Continue using moderate loads
Week 3: Use unilateral work
- Add one single-arm or single-leg variation
- Touch the target muscle when safe
- Compare both sides
Week 4: Return to progression
- Increase repetitions or weight
- Keep the improved technique
- Remove unnecessary activation work
- Track whether target-muscle performance improves
After four weeks, the goal is not to remain on lighter weights forever.
The goal is to combine better control with meaningful progressive overload.
Common Mind-Muscle Connection Mistakes
Mistake 1: Using extremely light weights forever
Feeling the muscle is useful, but it still needs adequate tension.
Mistake 2: Sacrificing progression
If you never increase repetitions, load, or difficulty, growth may stall.
Mistake 3: Obsessing over the squeeze
The lengthened portion of an exercise can also be highly valuable.
Mistake 4: Forcing painful positions
A stronger sensation is not worth joint pain.
Mistake 5: Using internal focus during maximum lifts
This can interfere with force production and movement execution.
Mistake 6: Treating soreness as proof
Soreness is not a direct measure of target-muscle growth.
Mistake 7: Constantly changing exercises
You need time to learn and progress a movement.
Mistake 8: Ignoring anatomy
Some muscles are difficult to isolate completely because multiple muscles contribute to the exercise.
What If You Still Cannot Feel a Muscle?
Use this checklist.
Reduce the weight
Start here.
Adjust your position
Change:
- Grip width
- Elbow path
- Bench angle
- Foot placement
- Torso angle
Try a machine or cable
Greater stability may improve focus.
Use a different exercise
Not every movement fits every person.
Perform unilateral work
One side at a time often improves awareness.
Ask a qualified coach
An experienced coach may identify technique problems quickly.
Check for pain or nerve symptoms
Numbness, tingling, sharp pain, weakness, or loss of control may indicate something beyond a poor mind-muscle connection. Seek professional evaluation when needed.
Frequently Asked Questions
What is the mind-muscle connection?
It is the conscious focus on feeling and controlling a target muscle during an exercise.
Does the mind-muscle connection increase muscle growth?
It may improve hypertrophy in some exercises by increasing target-muscle focus and control, but evidence is limited. It should complement progressive overload, not replace it.
Is the mind-muscle connection necessary?
No. People can build substantial muscle without thinking intensely about every contraction. It is most useful when another muscle repeatedly dominates an exercise.
Why can’t I feel my chest during bench presses?
Possible causes include excessive load, poor shoulder-blade positioning, a grip that does not fit your structure, short range of motion, or front-delt dominance. Try lighter dumbbell or machine presses and cable flyes.
Why can’t I feel my back during rows?
Your grip and biceps may be limiting you, or you may be moving the shoulder blades without effectively moving the upper arms. Reduce the weight and focus on driving the elbows backward.
Should I use a slow tempo?
A controlled two- to four-second lowering phase can improve awareness. Extremely slow repetitions are not required.
Is a muscle pump proof of a good mind-muscle connection?
Not necessarily. A pump can make a muscle easier to feel, but it is not a direct measure of hypertrophy.
Should beginners focus on the mind-muscle connection?
Beginners should prioritize safe technique and learning movement patterns. Basic muscle awareness is useful, but overly complicated cues can create confusion.
Final Thoughts
The mind-muscle connection is not a secret shortcut.
It is a skill.
Used correctly, it can help you:
- Improve exercise execution
- Reduce momentum
- Keep tension on the intended muscle
- Identify exercises that fit your anatomy
- Make isolation work more effective
- Develop better control and awareness
But it cannot replace the true foundations of muscle growth:
- Progressive overload
- Challenging working sets
- Adequate weekly volume
- Sufficient protein and calories
- Quality sleep and recovery
- Consistency over time
Use internal focus when it improves the exercise.
Use external cues when strength and coordination are the priority.
Most importantly, do not choose between feeling the muscle and progressing the movement.
The best hypertrophy training does both.
Ready to Improve Every Rep?
Download our FREE 12-Week Muscle Growth Plan and receive:
- Exercise-specific coaching cues
- Mind-muscle connection drills
- Progressive-overload targets
- Complete workouts for every muscle group
- Training log sheets
- Protein and recovery guidance
Stop moving weight without purpose.
Train the target muscle, track your progress, and make every set count.
Question: Which muscle is hardest for you to feel during training—your chest, lats, shoulders, glutes, or hamstrings? Share your answer in the comments.**
Training Disclaimer
This article provides general fitness education and is not medical or rehabilitation advice. Stop any exercise that causes sharp pain, numbness, tingling, instability, or loss of strength. Consult a qualified healthcare or exercise professional when appropriate.
50 High-Protein Foods for Muscle Growth Ranked by Protein per Calorie
50 High-Protein Foods for Muscle Growth, Ranked by Protein per Calorie
You know protein matters for building muscle.
The harder question is:
Which foods give you the most protein without forcing you to eat far more calories than your goal allows?
Some foods are extremely protein-dense.
Others provide valuable protein but also contain more carbohydrates or fat.
Neither category is automatically better.
A lean protein may be ideal during fat loss, while a higher-calorie protein can be useful for a hardgainer struggling to eat enough.
This guide ranks 50 common foods according to their approximate protein per 100 calories, helping you compare how efficiently each food contributes to your daily protein target.
You will also learn:
- Which foods offer the most protein per calorie
- The best animal and plant-based protein sources
- Which foods are complete proteins
- How much protein you need for muscle growth
- How to build high-protein meals
- Why the top-ranked food is not always the best choice
The International Society of Sports Nutrition recommends approximately 1.4–2.0 grams of protein per kilogram of body weight per day for most exercising people, with individual needs varying according to goals, training, age, and calorie intake. A serving of roughly 20–40 grams of high-quality protein is a useful target for many meals.
20 Best High-Protein Foods for Muscle Growth at a Glance
Protein per 100 calories shows how protein-dense each food is. Foods such as shrimp, tuna, cod, egg whites, and whey provide a lot of protein without many calories, making them especially useful when trying to build or maintain muscle while controlling calorie intake. Higher-calorie options such as salmon, whole eggs, tempeh, and peanut butter can be useful when you need more calories for a bulk.
| Food | Protein | Calories | Protein per 100 Calories | Best For |
|---|---|---|---|---|
| Chicken breast, cooked (4 oz) | 35g | 187 | 18.7g | Lean muscle gain |
| Tuna in water (1 can, drained) | 32g | 145 | 22.1g | High protein, low calories |
| Shrimp, cooked (4 oz) | 27g | 120 | 22.5g | Cutting / lean protein |
| Turkey breast, cooked (4 oz) | 32g | 170 | 18.8g | Lean bulking |
| Cod, cooked (4 oz) | 26g | 120 | 21.7g | Cutting |
| Egg whites (1 cup) | 26g | 126 | 20.6g | Maximum protein per calorie |
| Nonfat Greek yogurt (1 cup) | 23g | 130 | 17.7g | Breakfast / snack |
| Whey protein (1 scoop) | 24g | 120 | 20.0g | Convenience / post-workout |
| Lean ground turkey, cooked (4 oz) | 27g | 170 | 15.9g | Meal prep |
| 96% lean ground beef (4 oz) | 24g | 150 | 16.0g | Muscle gain / iron |
| Sirloin steak (4 oz) | 29g | 210 | 13.8g | Bulking / strength diets |
| Salmon, cooked (4 oz) | 25g | 230 | 10.9g | Protein + omega-3 fats |
| Low-fat cottage cheese (1 cup) | 28g | 180 | 15.6g | Snack / before bed |
| Whole eggs (3 large) | 19g | 216 | 8.8g | Breakfast / bulking |
| Tempeh (1 cup) | 31g | 320 | 9.7g | Plant-based muscle gain |
| Extra-firm tofu (1 cup) | 24g | 180 | 13.3g | Plant-based protein |
| Lentils, cooked (1 cup) | 18g | 230 | 7.8g | Budget / plant-based |
| Edamame, cooked (1 cup) | 18g | 190 | 9.5g | Plant-based snack |
| Black beans, cooked (1 cup) | 15g | 227 | 6.6g | Budget meals |
| Peanut butter (2 tbsp) | 8g | 190 | 4.2g | High-calorie bulking |
🔥 Best for cutting: Shrimp, tuna, cod, egg whites, chicken breast
💪 Best for lean bulking: Chicken, turkey, lean beef, Greek yogurt
📈 Best for hardgainers: Salmon, whole eggs, tempeh, peanut butter
🌱 Best plant proteins: Tempeh, tofu, edamame, lentils
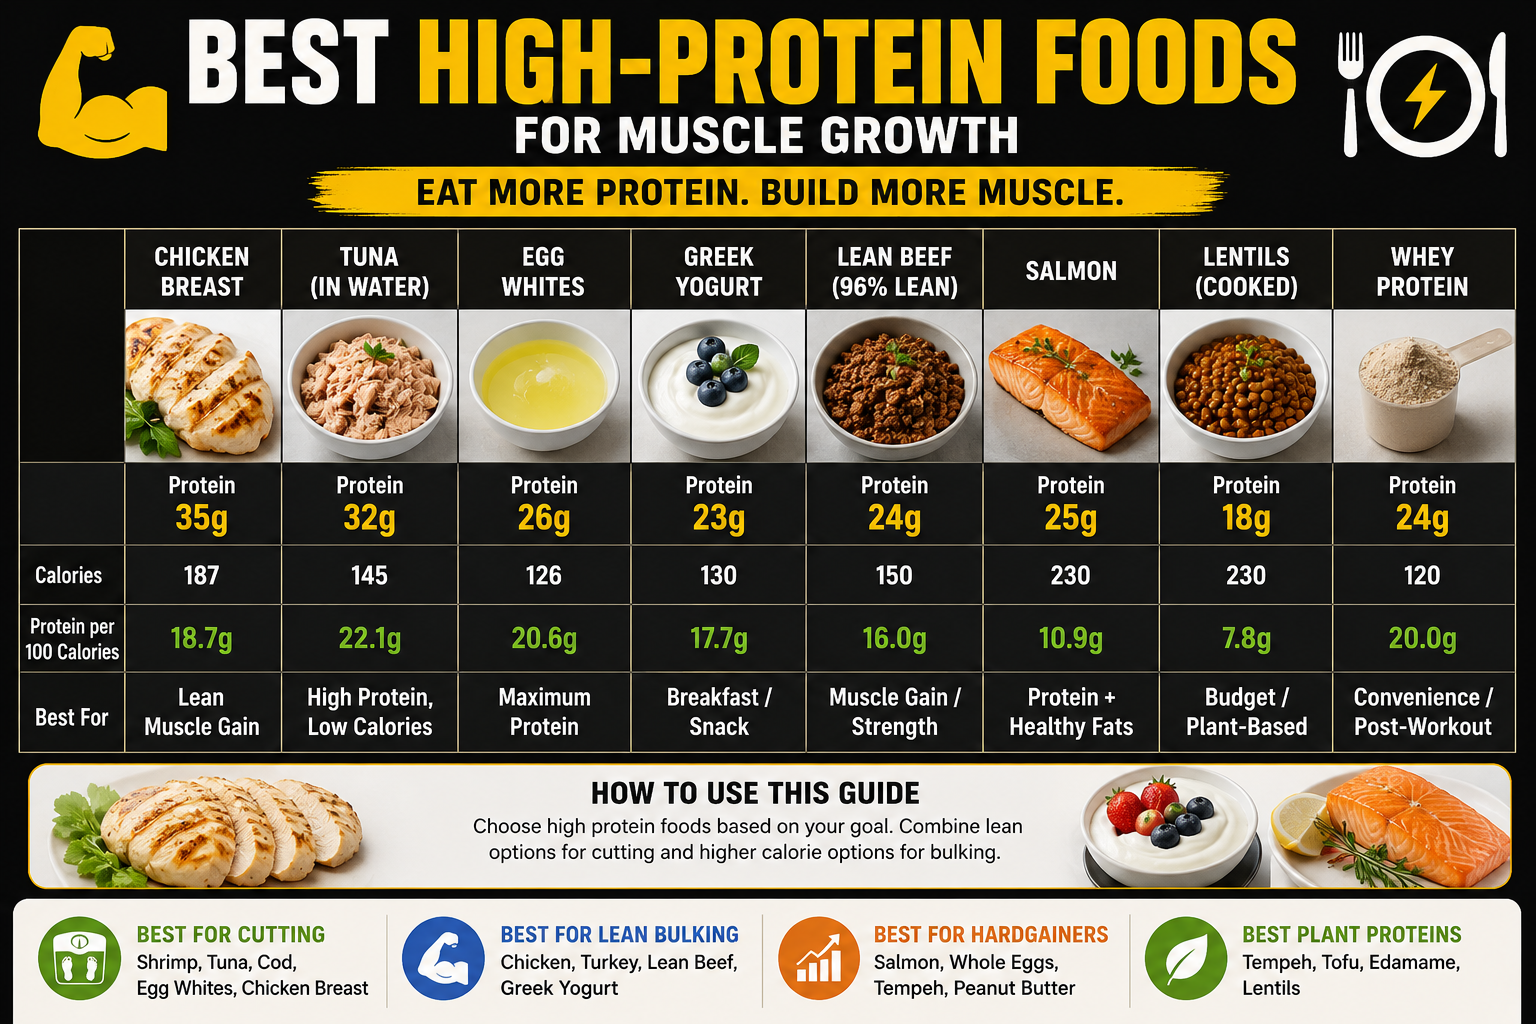
How the Foods Were Ranked
The foods below are ranked by their approximate grams of protein per 100 calories.
The basic calculation is:
Protein per 100 calories = grams of protein ÷ calories × 100
For example, a cooked chicken breast containing approximately 31 grams of protein and 165 calories per 100 grams provides:
About 18.8 grams of protein per 100 calories
Nutritional estimates are based on typical plain-food entries and common serving preparations found in USDA FoodData Central. Actual values vary by brand, species, cut, fat percentage, water content, serving size, and cooking method.
Added oil, breading, sugar, sauces, and marinades can substantially lower a food’s protein-to-calorie ratio.
Use the rankings as a practical comparison—not as laboratory-precise numbers.
Which Foods Give You the Most Protein for the Fewest Calories?
🥇 Shrimp — 22.5g
🥈 Tuna — 22.1g
🥉 Cod — 21.7g
Egg Whites — 20.6g
Whey — 20.0g
Turkey — 18.8g
Chicken — 18.7g
50 High-Protein Foods Ranked by Protein per 100 Calories
| Rank | Food | Approx. protein per 100 calories | Typical protein serving |
|---|---|---|---|
| 1 | Egg whites | 21 g | 18–26 g per cup |
| 2 | Cod | 20–23 g | 20–24 g per 3 oz |
| 3 | Haddock | 20–22 g | 20–24 g per 3 oz |
| 4 | Pollock | 20–22 g | 19–23 g per 3 oz |
| 5 | Tuna in water | 20–22 g | 20–30 g per can |
| 6 | Shrimp | 20–21 g | 20–24 g per 3 oz |
| 7 | Tilapia | 19–21 g | 21–23 g per 3 oz |
| 8 | Skinless turkey breast | 19–20 g | 24–27 g per 3 oz |
| 9 | Skinless chicken breast | 18–19 g | 24–31 g per serving |
| 10 | Nonfat Greek yogurt | 17–19 g | 15–25 g per container |
| 11 | Whey protein isolate | 17–19 g | 22–27 g per scoop |
| 12 | Crab meat | 17–19 g | 17–21 g per 3 oz |
| 13 | Scallops | 17–19 g | 17–20 g per 3 oz |
| 14 | Lobster | 17–18 g | 20–24 g per 3–4 oz |
| 15 | Fat-free cottage cheese | 16–18 g | 24–28 g per cup |
| 16 | Lean deli turkey | 16–18 g | 15–20 g per 3 oz |
| 17 | Canned chicken breast | 16–18 g | 20–25 g per serving |
| 18 | Seitan | 15–18 g | 20–25 g per 3 oz |
| 19 | Very lean ham | 15–17 g | 17–22 g per 3 oz |
| 20 | Buffalo or bison, lean | 15–17 g | 21–24 g per 3 oz |
| 21 | Pork tenderloin | 15–17 g | 22–24 g per 3 oz |
| 22 | Venison | 15–17 g | 22–26 g per 3 oz |
| 23 | 99% lean ground turkey | 15–17 g | 24–27 g per 4 oz |
| 24 | 96% lean ground beef | 14–16 g | 22–25 g per 4 oz |
| 25 | Canadian bacon | 14–16 g | 12–16 g per serving |
| 26 | Low-fat cottage cheese | 14–16 g | 23–28 g per cup |
| 27 | Skyr | 14–16 g | 15–20 g per container |
| 28 | Nonfat plain yogurt | 12–15 g | 10–15 g per cup |
| 29 | Sirloin steak, trimmed | 12–14 g | 23–26 g per 3 oz |
| 30 | Roast beef, lean | 12–14 g | 20–24 g per 3 oz |
| 31 | Whey protein concentrate | 12–14 g | 20–25 g per scoop |
| 32 | Tempeh | 10–12 g | 16–20 g per 3–4 oz |
| 33 | Firm tofu | 10–12 g | 15–22 g per cup |
| 34 | Whole eggs | 9–11 g | 12–13 g per 2 eggs |
| 35 | Light mozzarella | 9–11 g | 7–9 g per ounce |
| 36 | Low-fat milk | 8–10 g | 8 g per cup |
| 37 | Soy milk, unsweetened | 8–10 g | 7–9 g per cup |
| 38 | Edamame | 8–10 g | 17–19 g per cooked cup |
| 39 | Lentils | 7–9 g | 17–18 g per cooked cup |
| 40 | Black beans | 6–8 g | 14–16 g per cooked cup |
| 41 | Kidney beans | 6–8 g | 14–16 g per cooked cup |
| 42 | Chickpeas | 5–7 g | 14–15 g per cooked cup |
| 43 | Green peas | 5–7 g | 8–9 g per cooked cup |
| 44 | Quinoa | 4–6 g | 8 g per cooked cup |
| 45 | Oatmeal | 4–5 g | 5–6 g per cooked cup |
| 46 | Peanut powder | 4–6 g | 6–8 g per serving |
| 47 | Peanuts | 4–5 g | 7 g per ounce |
| 48 | Almonds | 3–4 g | 6 g per ounce |
| 49 | Pumpkin seeds | 3–4 g | 8–9 g per ounce |
| 50 | Peanut butter | 3–4 g | 7–8 g per 2 tablespoons |
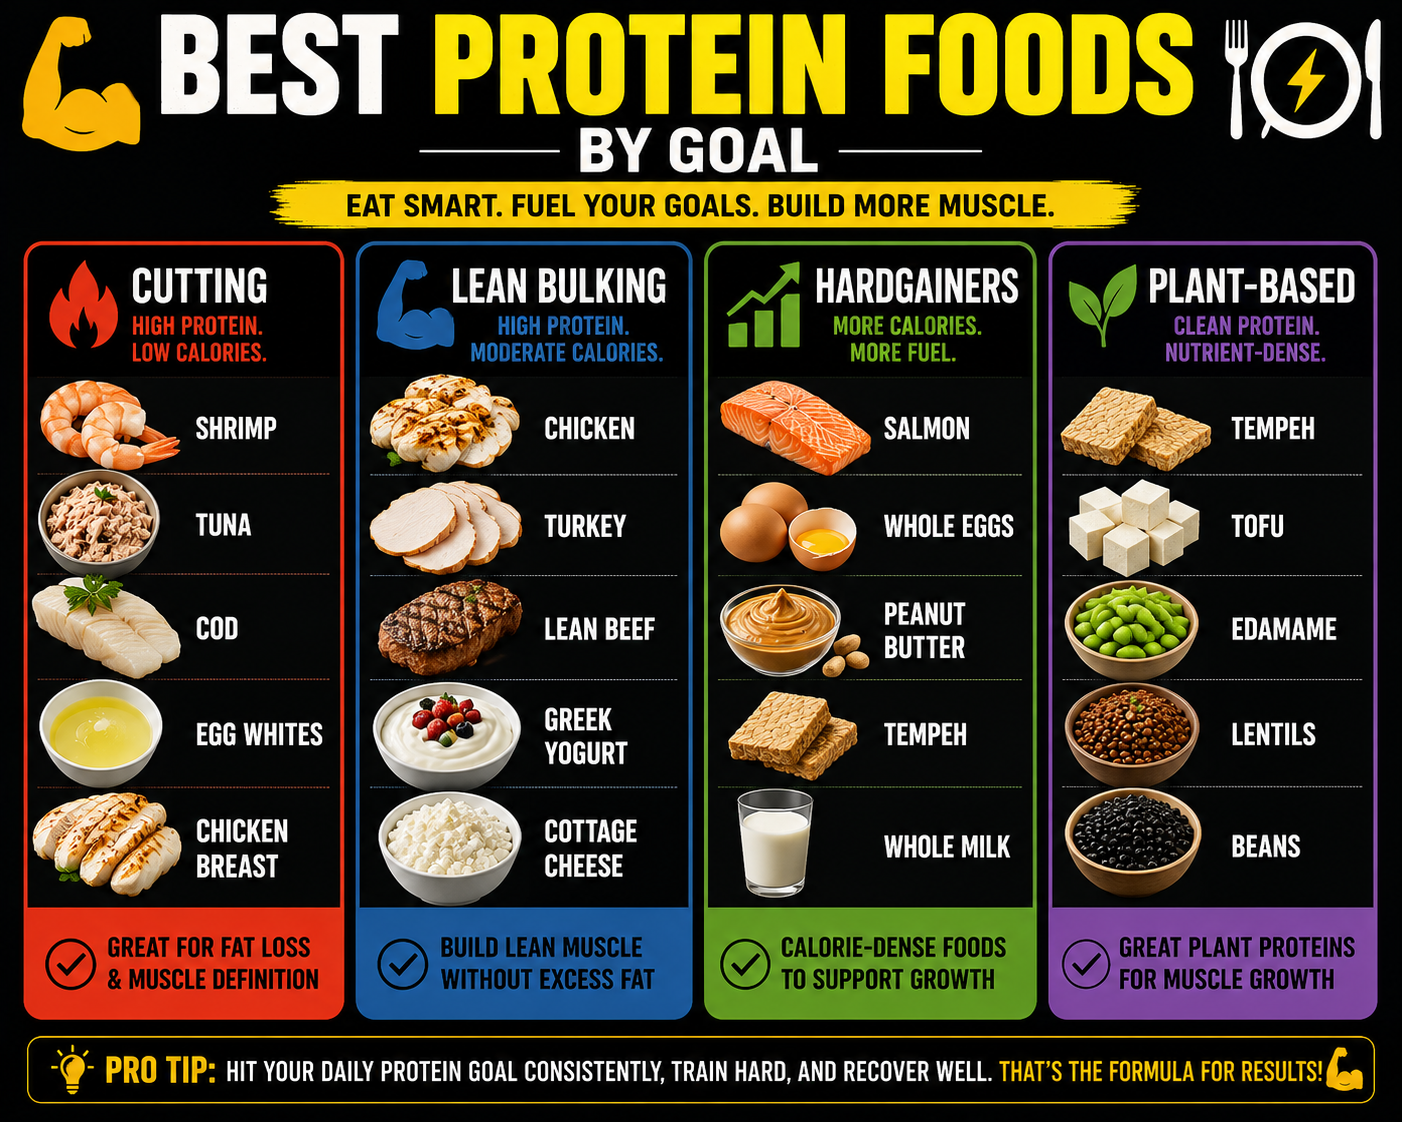
1. Egg Whites
Egg whites rank near the top because they contain almost no fat and very few carbohydrates.
A large egg white provides roughly:
- 3–4 grams of protein
- 15–20 calories
They are useful for increasing the protein content of a meal without adding many calories.
Muscle-building meal idea
Combine:
- One or two whole eggs
- Several egg whites
- Oatmeal
- Fruit
Whole eggs add flavor, dietary fat, vitamins, and minerals, while the egg whites increase the total protein.
2–4. Lean White Fish
Cod, haddock, and pollock are among the most protein-dense whole foods.
They are typically:
- High in complete protein
- Low in fat
- Low in calories
- Easy to combine with rice, potatoes, or vegetables
These fish are excellent during:
- Fat-loss phases
- Body recomposition
- High-protein meal planning
- Lower-calorie diets
Because they are lean, they may be less filling calorie-for-calorie than fatty fish for some people. Add potatoes, rice, olive oil, or avocado according to your goals.
5. Tuna in Water
Water-packed tuna is inexpensive, portable, and protein-dense.
A common can provides approximately 20–30 grams of protein, depending on brand and drained weight. One commercial example provides 20 grams of protein for 90 calories.
Easy ways to use it
- Tuna and Greek-yogurt salad
- Tuna sandwich
- Tuna rice bowl
- Tuna with crackers and vegetables
Avoid relying on tuna as your only fish source. Rotate it with salmon, sardines, shrimp, cod, and other seafood.
6. Shrimp
Shrimp provides approximately 20 grams of protein per typical three-ounce serving with relatively few calories.
It works well in:
- Stir-fries
- Rice bowls
- Pasta dishes
- Tacos
- Salads
Be mindful of added butter, frying oil, breading, and sugary sauces. These can turn a lean protein into a much higher-calorie meal.
7. Tilapia
Tilapia is another lean, mild-flavored fish with a favorable protein-to-calorie ratio.
It is usually affordable and easy to prepare.
Try it with:
- Potatoes and vegetables
- Rice and salsa
- Tacos with cabbage
- Quinoa and salad
8–9. Turkey and Chicken Breast
Skinless poultry breast is a bodybuilding staple for good reason.
Cooked chicken breast provides roughly 31 grams of protein and 165 calories per 100 grams in a commonly referenced USDA entry.
Poultry breast is:
- High in complete protein
- Relatively low in fat
- Easy to meal prep
- Versatile
- Widely available
Keep it interesting
Use different seasonings and cooking styles:
- Garlic and herb
- Taco seasoning
- Curry
- Lemon pepper
- Teriyaki-style sauce
- Smoked paprika
The protein content matters, but adherence matters too. You are more likely to maintain a high-protein diet when the food tastes good.
10. Nonfat Greek Yogurt
Nonfat Greek yogurt is one of the best high-protein breakfast and snack options.
Typical plain versions provide roughly:
- 15–25 grams of protein per serving
- Relatively few calories
- Calcium
- A mixture of whey and casein proteins
USDA FoodData Central contains entries for plain nonfat Greek yogurt, although values vary among products.
Muscle-building snack
Combine:
- Greek yogurt
- Berries
- Oats or granola
- Honey if additional carbohydrates are needed
Choose plain or lower-sugar products when controlling calories.
11. Whey Protein Isolate
Whey isolate is not a whole food, but it is one of the most protein-dense options available.
A typical scoop contains:
- 22–27 grams of protein
- Approximately 100–130 calories
- Very little fat or lactose
It is useful when:
- You have little appetite
- You need a portable protein source
- You train early in the morning
- Your whole-food meals fall short of your target
Protein powder is a convenience—not a requirement.
12–14. Crab, Scallops, and Lobster
Shellfish can provide large amounts of protein with relatively few calories.
They also contribute nutrients such as:
- Vitamin B12
- Selenium
- Zinc
- Iodine
The main issue is often preparation.
Steamed lobster is lean.
Lobster covered in butter is much less protein-efficient.
The same principle applies to fried crab cakes and breaded scallops.
15–17. Fat-Free Cottage Cheese, Deli Turkey, and Canned Chicken
These are convenient options for people who do not have time to cook every meal.
Fat-free cottage cheese
Useful as:
- A snack
- A breakfast
- A pre-sleep protein source
- A base for savory bowls
Deli turkey
Useful for:
- Sandwiches
- Wraps
- Quick snacks
Choose lower-sodium options when possible, especially if processed meats make up a large part of your diet.
Canned chicken
Useful for:
- Salads
- Wraps
- Rice bowls
- High-protein dips
18. Seitan
Seitan is made primarily from wheat gluten.
It is one of the most protein-dense plant-based foods.
A typical serving can provide approximately 20–25 grams of protein with relatively few calories.
However, seitan:
- Is unsuitable for people with celiac disease or gluten intolerance
- Is relatively low in lysine compared with some other proteins
- Is best combined with a varied plant-based diet
Pair it with beans, lentils, soy foods, or other protein sources across the day.
19–25. Lean Meat Options
Very lean ham, bison, pork tenderloin, venison, extra-lean turkey, extra-lean beef, and Canadian bacon all provide substantial protein.
Advantages
- Complete amino-acid profiles
- Iron
- Zinc
- Vitamin B12
- Easy meal preparation
Considerations
Processed meats such as ham, deli meat, and Canadian bacon can be high in sodium and should not displace minimally processed foods.
Lean red meat can fit into a balanced diet, but variety remains important.
Rotate among:
- Poultry
- Fish
- Dairy
- Eggs
- Beans
- Soy foods
- Lean red meat
26–28. Cottage Cheese, Skyr, and Yogurt
These foods provide a combination of:
- High-quality protein
- Calcium
- Convenient serving sizes
- Easy meal preparation
Skyr and Greek yogurt are generally more protein-dense than ordinary yogurt because of their straining and processing methods.
Plain versions allow you to control added sugar.
Recent dietitian recommendations also commonly highlight cottage cheese, tofu, strained yogurt, lentils, and kefir as affordable alternatives to protein powder.
29–31. Lean Beef and Whey Concentrate
Sirloin and roast beef
Lean cuts provide complete protein along with iron, zinc, creatine, and vitamin B12.
Their protein-to-calorie ratio is lower than chicken breast because they generally contain more fat.
That does not make them inferior.
The additional calories can be useful during a muscle-building phase.
Whey concentrate
Whey concentrate usually contains slightly more carbohydrate and fat than isolate, but it is often less expensive.
For most people, the practical difference between concentrate and isolate is small.
Choose based on:
- Budget
- Digestion
- Lactose tolerance
- Taste
32–33. Tempeh and Tofu
Soy foods are among the strongest plant-based options for muscle-building diets.
Tempeh
Tempeh is fermented and usually firmer and more calorie-dense than tofu.
It works well in:
- Stir-fries
- Sandwiches
- Grain bowls
- Salads
Tofu
Tofu is highly versatile and can be:
- Scrambled
- Baked
- Air-fried
- Blended into sauces
- Added to soups
Soy protein contains all nine essential amino acids.
Plant-based lifters can build muscle successfully when they consume enough total protein and calories.
34. Whole Eggs
Whole eggs rank lower than egg whites because the yolk adds fat and calories.
That does not mean the yolk should be avoided.
Whole eggs provide:
- Complete protein
- Choline
- Vitamin B12
- Selenium
- Dietary fat
- Fat-soluble nutrients
A useful strategy is combining whole eggs with additional whites.
Example:
- Two whole eggs
- Four egg whites
This gives you the nutrients and flavor of yolks while increasing the total protein.
35–37. Light Cheese, Milk, and Soy Milk
These foods are not as protein-dense as lean meat or fish, but they are easy ways to raise the protein content of meals.
Light mozzarella
Use it in:
- Omelets
- Sandwiches
- Wraps
- Pizza-style meals
Low-fat milk
Provides approximately eight grams of protein per cup.
Use it in:
- Smoothies
- Oatmeal
- Cereal
- Protein shakes
Unsweetened soy milk
One of the closest plant-based alternatives to dairy milk in protein content.
Check the label because almond, rice, oat, and coconut beverages often contain much less protein.
38–43. Edamame, Lentils, Beans, Chickpeas, and Peas
Legumes rank lower per calorie than lean animal proteins because they also contain carbohydrates.
However, they offer important advantages:
- Fiber
- Folate
- Potassium
- Iron
- Slow-digesting carbohydrates
- Improved meal fullness
A cup of cooked lentils provides roughly 18 grams of protein plus substantial fiber.
Easy high-protein combinations
- Lentils with chicken
- Beans with lean beef
- Chickpeas with tuna
- Edamame with tofu
- Lentil pasta with turkey sauce
You do not have to choose between animal and plant proteins.
Combining them can improve variety and nutrient intake.
44–45. Quinoa and Oatmeal
Quinoa and oatmeal are often called high-protein foods, but they are primarily carbohydrate sources.
They contribute useful protein, but you would need a large number of calories to reach a full muscle-building protein target using them alone.
Treat them as protein-supporting foods.
Improve oatmeal
Add:
- Greek yogurt
- Milk
- Protein powder
- Egg whites
- Peanut powder
Improve quinoa
Combine it with:
- Chicken
- Fish
- Tofu
- Beans
- Lean beef
46. Peanut Powder
Powdered peanut products remove much of the natural fat found in peanuts.
This improves the protein-to-calorie ratio.
Use peanut powder in:
- Smoothies
- Greek yogurt
- Oatmeal
- Sauces
- Protein desserts
Check the label for added sugar.
47–50. Nuts, Seeds, and Peanut Butter
Nuts and nut butters are nutritious, but they are often incorrectly described as primary protein foods.
They contain protein, but most of their calories come from fat.
For example, peanut butter may provide seven or eight grams of protein for nearly 200 calories.
That can be useful for:
- Hardgainers
- Bulking diets
- Calorie-dense snacks
- Adding healthy fats
It is less efficient for someone trying to maximize protein while maintaining a strict calorie deficit.
Use nuts and seeds primarily as sources of:
- Healthy fats
- Minerals
- Fiber
- Additional protein
rather than as your main protein source.
Best High-Protein Foods for Fat Loss
During fat loss, choose foods that provide substantial protein and help manage calories.
Strong options include:
- Egg whites
- Cod
- Tuna in water
- Shrimp
- Chicken breast
- Turkey breast
- Nonfat Greek yogurt
- Low-fat cottage cheese
- Extra-lean ground meat
- Tofu
- White fish
These foods make it easier to maintain protein while creating a calorie deficit.
Best High-Protein Foods for Bulking
During a bulk, protein per calorie is not your only priority.
You may need foods that provide protein and enough energy to support weight gain.
Useful options include:
- Whole eggs
- Salmon
- Lean or moderate-fat beef
- Whole or 2% milk
- Greek yogurt
- Cottage cheese
- Tempeh
- Nuts
- Peanut butter
- Protein smoothies
A hardgainer may find peanut butter more useful than egg whites because the additional calories make it easier to reach a surplus.
Best Budget High-Protein Foods
Protein does not need to be expensive.
Affordable options frequently include:
- Eggs
- Canned tuna
- Canned chicken
- Chicken thighs
- Milk
- Cottage cheese
- Greek yogurt in large containers
- Lentils
- Black beans
- Chickpeas
- Tofu
- Peanut powder
- Whey concentrate
Prices vary by location, sales, and package size.
Compare the cost per 20 or 25 grams of protein rather than only the package price.
Best Vegetarian High-Protein Foods
Vegetarians can use:
- Greek yogurt
- Cottage cheese
- Eggs
- Milk
- Skyr
- Whey protein
- Tofu
- Tempeh
- Edamame
- Lentils
- Beans
- Seitan
Vegans can use:
- Seitan
- Tofu
- Tempeh
- Edamame
- Soy milk
- Lentils
- Beans
- Chickpeas
- Pea or soy protein powder
A varied diet helps provide a complete distribution of essential amino acids.
Complete vs. Incomplete Protein
A complete protein contains all nine essential amino acids in adequate proportions.
Complete proteins include:
- Meat
- Fish
- Eggs
- Dairy
- Soy
- Quinoa
- Many protein powders
Some plant proteins contain lower proportions of one or more essential amino acids.
You do not need to combine incomplete proteins at every meal.
Eating a varied diet across the day is generally sufficient.
Useful combinations include:
- Rice and beans
- Lentils and whole grains
- Peanut butter and bread
- Hummus and pita
How Much Protein Do You Need to Build Muscle?
A practical range for most resistance-trained adults is:
1.6–2.2 grams of protein per kilogram of body weight per day
The lower end may be enough for many people eating at maintenance or in a surplus.
The higher end can be useful when:
- Dieting
- Training at high volume
- Older
- Using mostly plant proteins
- Trying to maximize muscle retention
The ISSN’s broader evidence-based range of approximately 1.4–2.0 grams per kilogram is sufficient for most exercising people.
Example targets
| Body weight | Approximate daily target |
|---|---|
| 120 lb | 87–120 g |
| 140 lb | 102–140 g |
| 160 lb | 116–160 g |
| 180 lb | 131–180 g |
| 200 lb | 145–200 g |
| 220 lb | 160–220 g |
You do not need to hit the maximum number every day to make progress.
Consistency within an appropriate range matters more.
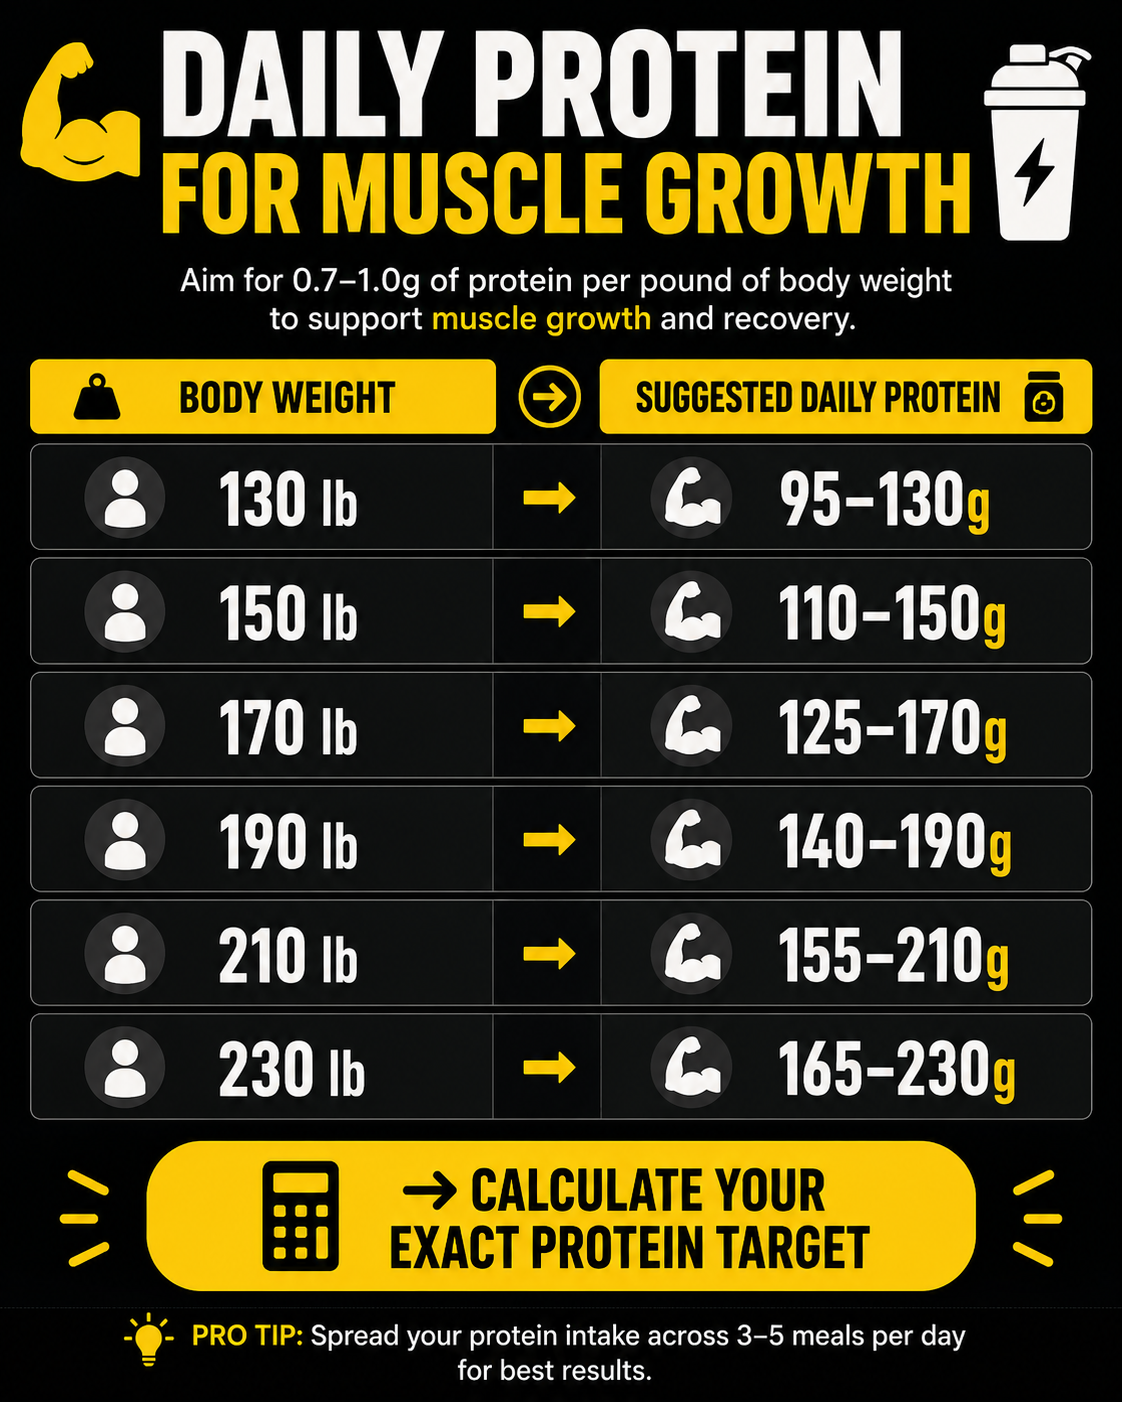
How Much Protein Should You Eat Per Meal?
A practical target is:
20–40 grams per meal
Larger individuals and older adults may benefit from the upper end.
Instead of consuming almost all your protein at dinner, distribute it across three to five meals.
Example 160-gram day
Breakfast
40 grams
Lunch
40 grams
Post-workout meal
40 grams
Dinner
40 grams
An exact four-way distribution is not mandatory, but spreading intake makes the daily target easier to reach.
How to Build a High-Protein Meal
Use this simple formula:
Step 1: Choose a main protein
Examples:
- Chicken
- Fish
- Eggs
- Beef
- Greek yogurt
- Tofu
- Lentils
Step 2: Add a carbohydrate
Examples:
- Rice
- Potatoes
- Oats
- Pasta
- Fruit
- Beans
Step 3: Add vegetables or fruit
This improves fiber, vitamins, minerals, and fullness.
Step 4: Add fat according to your calorie goal
Examples:
- Olive oil
- Avocado
- Nuts
- Cheese
- Peanut butter
Someone cutting may use less added fat.
Someone bulking may use more.
Sample High-Protein Day
Breakfast
- Two whole eggs
- Egg whites
- Oatmeal
- Berries
Approximate protein: 35–40 grams
Lunch
- Chicken breast
- Rice
- Vegetables
Approximate protein: 40–50 grams
Snack
- Nonfat Greek yogurt
- Fruit
- Peanut powder
Approximate protein: 25–35 grams
Dinner
- Salmon, lean beef, or tofu
- Potatoes
- Salad
Approximate protein: 35–45 grams
Evening snack
- Cottage cheese
Approximate protein: 20–25 grams
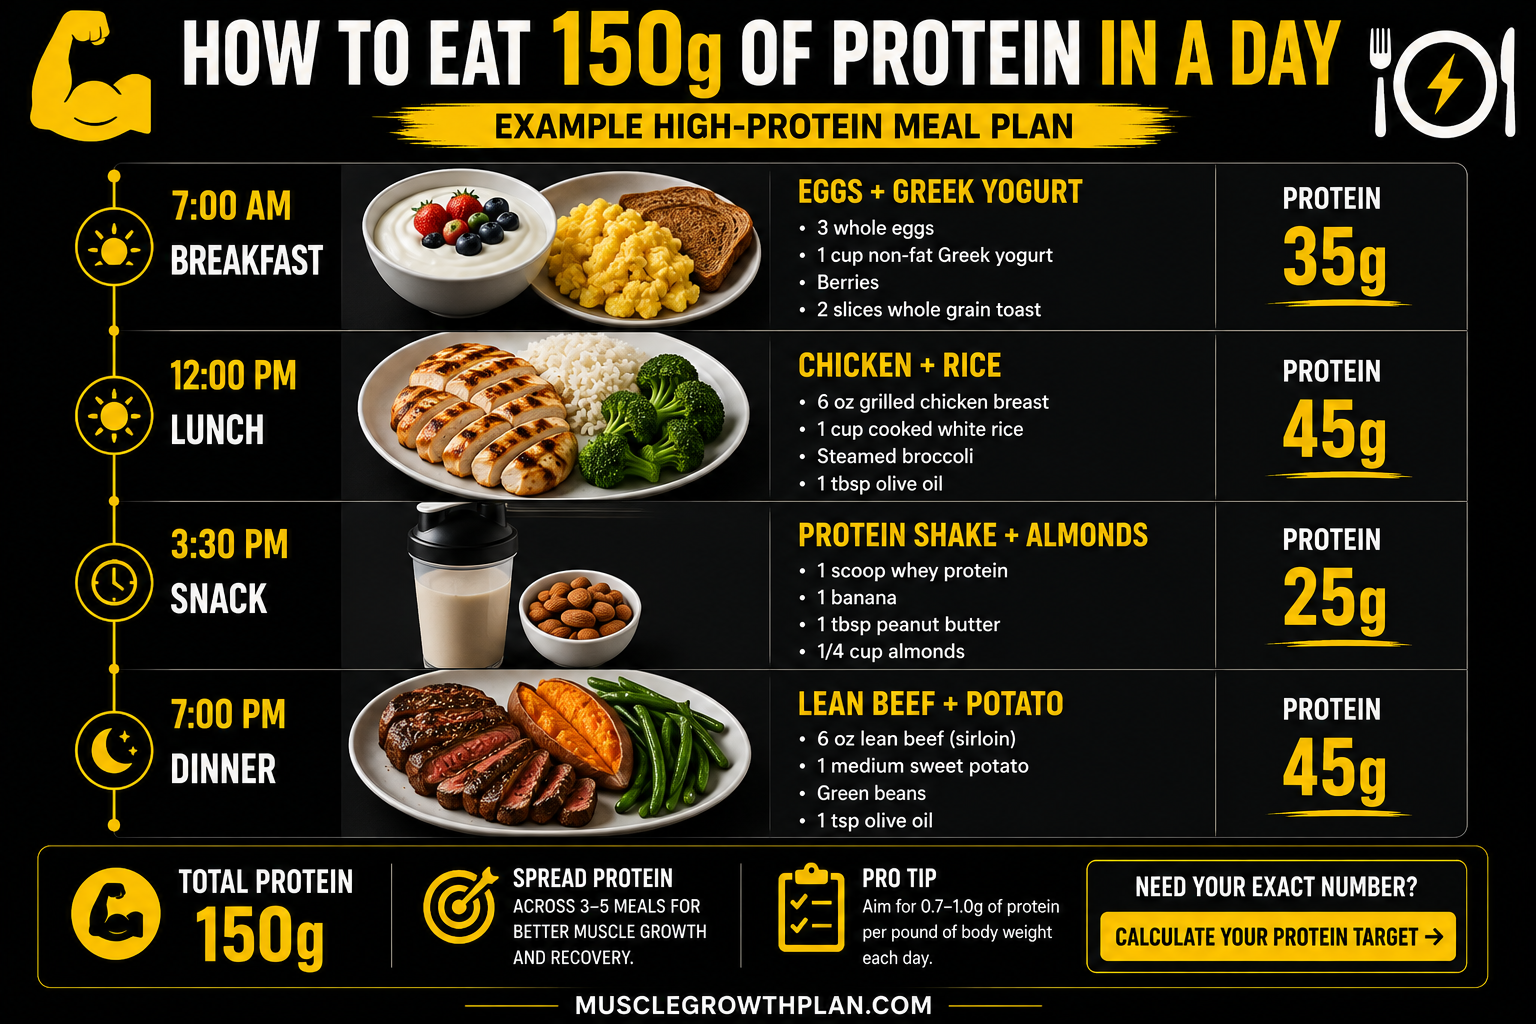
Common High-Protein Diet Mistakes
Mistake 1: Choosing foods based only on protein per calorie
Food quality, enjoyment, cost, nutrients, and your calorie goal also matter.
Mistake 2: Treating nuts as the main protein
Nuts are healthy, but they are primarily fat sources.
Mistake 3: Ignoring calories in sauces and cooking oils
A lean food can become calorie-dense after frying or adding heavy sauces.
Mistake 4: Eating no fruits, vegetables, or fiber
A muscle-building diet should still support overall health.
Mistake 5: Relying entirely on protein powder
Use powder for convenience, not as a replacement for every meal.
Mistake 6: Assuming more protein always produces more muscle
Once adequate intake is reached, extra protein cannot compensate for poor training or insufficient recovery.
Mistake 7: Ignoring total calories
You still need enough energy to support training and growth.
Frequently Asked Questions
What food has the most protein per calorie?
Egg whites, lean white fish, water-packed tuna, shrimp, and skinless poultry breast are among the highest-protein foods per calorie.
Is chicken the best food for muscle growth?
Chicken is an excellent protein source, but it is not uniquely superior. Fish, dairy, eggs, lean meat, soy foods, and legumes can all contribute to muscle growth.
Are eggs good for building muscle?
Yes. Whole eggs provide complete protein and several useful nutrients. Egg whites can be added when you want more protein with fewer calories.
Can plant foods provide enough protein?
Yes. Use tofu, tempeh, seitan, lentils, beans, edamame, soy milk, and plant-based protein powders. Total intake and dietary variety matter.
Is protein powder necessary?
No. It is simply a convenient way to increase protein intake.
Which protein foods are best before a workout?
Choose easily digested options such as Greek yogurt, whey protein, eggs, turkey, or a light chicken meal alongside carbohydrates.
Which protein foods are best after a workout?
Chicken, fish, lean beef, eggs, Greek yogurt, cottage cheese, tofu, and protein shakes can all work. The most important factor is meeting your total daily target.
Are higher-calorie protein foods bad?
No. Salmon, whole eggs, nuts, and peanut butter provide useful nutrients and can be excellent during a muscle-building phase. They are simply less protein-dense per calorie.
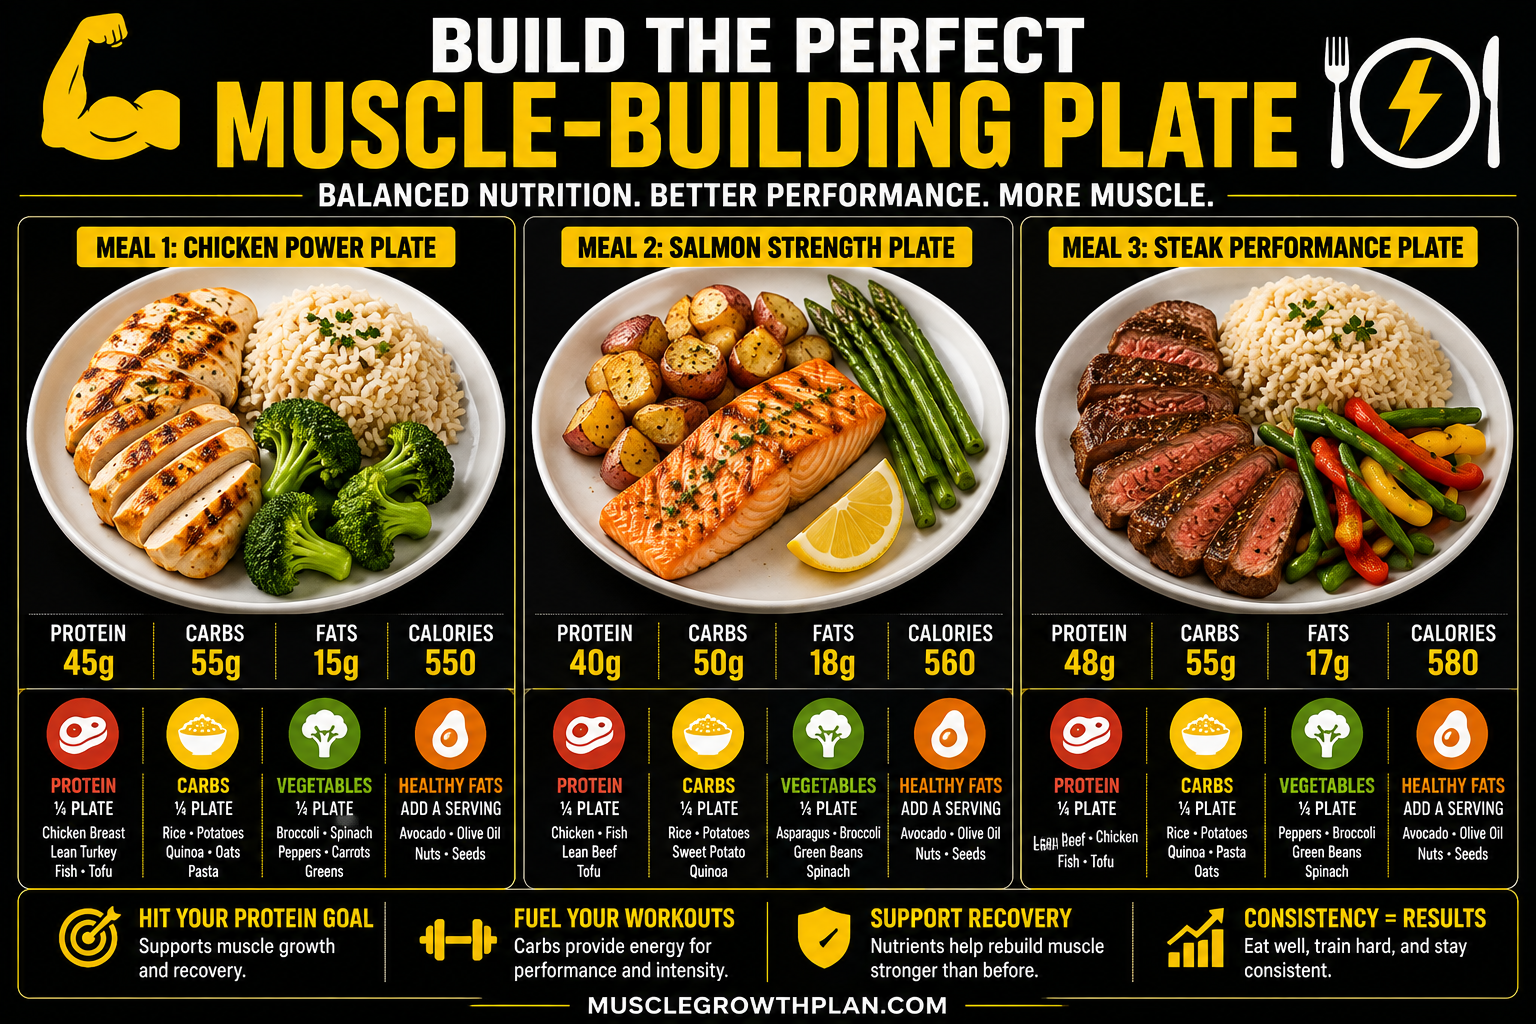
Final Thoughts
The best muscle-building diet is not made from one perfect protein source.
It uses a variety of foods that help you meet your protein target while supporting your calorie needs, preferences, budget, and health.
For maximum protein with fewer calories, prioritize:
- Egg whites
- Lean fish
- Tuna in water
- Shrimp
- Chicken breast
- Turkey breast
- Nonfat Greek yogurt
- Low-fat cottage cheese
For additional calories during a bulk, include:
- Whole eggs
- Salmon
- Lean beef
- Milk
- Tempeh
- Nuts
- Peanut butter
- Higher-calorie smoothies
Remember:
- Eat approximately 1.6–2.2 grams of protein per kilogram when muscle growth is the goal.
- Spread protein across several meals.
- Include complete and varied protein sources.
- Match food choices to your calorie goal.
- Continue training with progressive overload.
- Sleep and recover consistently.
Protein provides the building materials.
Your training provides the reason for your body to use them.
Ready to Build Your Muscle-Growth Diet?
Download our FREE High-Protein Muscle-Building Meal Plan and receive:
- Seven days of meals
- Protein targets for different body weights
- A complete grocery list
- Budget-friendly substitutions
- Vegetarian options
- Pre- and post-workout meal ideas
Stop guessing how to reach your protein target and start building meals you can follow consistently.
Question: Which high-protein food do you eat most often—chicken, fish, eggs, Greek yogurt, beef, or a plant-based option? Share your answer in the comments.**
Nutrition Disclaimer
This article provides general nutrition information and is not individualized medical advice. People with kidney disease, food allergies, digestive disorders, metabolic conditions, or other health concerns should consult a qualified healthcare professional or registered dietitian before substantially increasing protein intake.
Best 5-Day Workout Split for Muscle Growth
The 5-Day Workout Split: Complete Hypertrophy Program for Intermediate Lifters
You have moved beyond the beginner stage.
Your technique is better.
You can handle heavier weights.
You understand the basics of progressive overload.
But your current routine no longer feels organized enough to keep every muscle growing.
That is where a well-designed 5-day workout split can be useful.
Training five days per week gives intermediate lifters enough room to:
- Perform meaningful weekly volume
- Give lagging muscles additional attention
- Keep individual workouts manageable
- Train most muscles more than once per week
- Balance compound lifts with isolation work
- Recover between demanding sessions
However, simply training five days does not guarantee better results.
A poor five-day split can produce:
- Too much pressing
- Neglected legs or rear delts
- Overlapping fatigue
- Excessive arm work
- Joint pain
- Long workouts with little progression
The program in this guide is designed around recoverable hypertrophy training, not maximum exhaustion.
You will learn:
- The best five-day split structure
- The complete exercise program
- Sets, repetitions, and rest periods
- How hard each set should feel
- How to progress from week to week
- How to adjust weekly volume
- When to deload
- What to eat for muscle growth
What Is a 5-Day Workout Split?
A 5-day workout split divides your weekly resistance training across five sessions.
Instead of training the entire body during each workout, you distribute muscle groups and movement patterns across the week.
A traditional bodybuilding split might assign one muscle group to each day.
For example:
- Chest
- Back
- Legs
- Shoulders
- Arms
That structure can work, but it often trains each muscle only once per week.
The program in this guide uses a more balanced hybrid structure:
- Upper body
- Lower body
- Push
- Pull
- Legs and arms
This gives most major muscle groups approximately two weekly exposures while still allowing focused sessions.
Training frequency by itself does not appear to create meaningfully greater hypertrophy when weekly volume is matched. Its practical value is that it helps distribute enough productive sets across the week without making one session excessively long or fatiguing.
Who Should Use This Program?
This split is best suited for lifters who:
- Have trained consistently for at least six to twelve months
- Know how to perform basic compound exercises
- Can train five days most weeks
- Recover reasonably well
- Want to prioritize muscle growth
- Track weights and repetitions
- Have access to a commercial or well-equipped home gym
It may not be the best option for:
- Complete beginners
- People who can train only two or three days
- Lifters with poor sleep or inconsistent nutrition
- People returning immediately after a long break
- Anyone experiencing unresolved joint or injury problems
Beginners can often make excellent progress with a simpler three-day full-body or four-day upper/lower routine.
The Weekly Schedule
Use the following schedule:
| Day | Workout |
|---|---|
| Monday | Upper Body |
| Tuesday | Lower Body |
| Wednesday | Rest |
| Thursday | Push |
| Friday | Pull |
| Saturday | Legs and Arms |
| Sunday | Rest |
This arrangement prevents five consecutive training days and gives your lower body recovery time between sessions.
You may move the rest days to fit your schedule, but try to avoid placing two demanding leg sessions back to back.
Weekly Training Overview
This split trains:
- Chest twice
- Back twice
- Shoulders two to three times
- Quadriceps twice
- Hamstrings twice
- Glutes twice
- Biceps two to three times
- Triceps two to three times
- Calves twice
The program begins around the middle of a practical volume range rather than immediately prescribing the largest number of sets you could tolerate.
Research generally shows a dose-response relationship between weekly set volume and hypertrophy, although returns become progressively smaller and individual recovery varies. Reviews in trained young men have suggested that approximately 12–20 weekly sets per muscle group may be effective, but this should not be treated as a mandatory target for every person or every muscle.
Day 1: Upper Body
The first session trains the chest, back, shoulders, and arms with moderate volume.
Barbell or Dumbbell Bench Press
Sets: 3
Repetitions: 6–10
Rest: 2–3 minutes
Use a controlled descent and maintain a stable upper back.
Choose dumbbells if they feel better on your shoulders.
Chest-Supported Row
Sets: 3
Repetitions: 8–12
Rest: 2 minutes
Pull the elbows backward while keeping your chest supported.
Avoid turning the exercise into a shrug.
Incline Dumbbell Press
Sets: 3
Repetitions: 8–12
Rest: 2 minutes
Use a low-to-moderate incline rather than placing the bench almost upright.
Lat Pulldown or Pull-Up
Sets: 3
Repetitions: 8–12
Rest: 2 minutes
Drive the elbows toward the sides of your torso.
Use assistance if needed to remain within the target range.
Cable Lateral Raise
Sets: 3
Repetitions: 12–20
Rest: 60–90 seconds
Keep the motion controlled and avoid swinging.
Cable Triceps Pushdown
Sets: 2
Repetitions: 10–15
Rest: 60–90 seconds
Incline Dumbbell Curl
Sets: 2
Repetitions: 10–15
Rest: 60–90 seconds
Day 2: Lower Body
This session emphasizes the quadriceps while still training the hamstrings, glutes, and calves.
Back Squat or Hack Squat
Sets: 3
Repetitions: 6–10
Rest: 2–4 minutes
Choose the variation that allows you to train your legs hard with stable technique and tolerable joint stress.
Romanian Deadlift
Sets: 3
Repetitions: 6–10
Rest: 2–3 minutes
Push your hips backward while maintaining a controlled spine position.
Stop when you reach the deepest range you can control without losing position.
Leg Press
Sets: 3
Repetitions: 10–15
Rest: 2 minutes
Use a foot position that feels comfortable and allows a deep, controlled range.
Seated Leg Curl
Sets: 3
Repetitions: 10–15
Rest: 90 seconds
Control the stretched position rather than allowing the weight stack to bounce.
Standing Calf Raise
Sets: 4
Repetitions: 8–15
Rest: 60–90 seconds
Pause briefly at the top and lower into a comfortable stretch.
Hanging Knee Raise or Reverse Crunch
Sets: 3
Repetitions: 10–20
Rest: 60 seconds
Day 3: Rest or Active Recovery
Use this day to reduce fatigue.
Good options include:
- Walking
- Easy cycling
- Mobility work
- Light stretching
- Meal preparation
- Additional sleep
Do not turn the recovery day into an exhausting conditioning session.
Day 4: Push Workout
This session trains the chest, front and side delts, and triceps.
Incline Barbell Press
Sets: 3
Repetitions: 6–10
Rest: 2–3 minutes
Use a moderate incline and avoid excessive lower-back arching.
Seated Dumbbell Shoulder Press
Sets: 3
Repetitions: 8–12
Rest: 2 minutes
Use a slightly forward elbow position if it feels more comfortable.
Machine Chest Press
Sets: 3
Repetitions: 8–12
Rest: 90–120 seconds
A stable machine allows you to focus on effort without balancing the load.
Cable or Pec-Deck Fly
Sets: 2
Repetitions: 12–20
Rest: 60–90 seconds
Use a controlled stretch without forcing your shoulders beyond a comfortable range.
Dumbbell or Machine Lateral Raise
Sets: 4
Repetitions: 12–20
Rest: 60–90 seconds
The side delts are a major priority in this workout.
Overhead Cable Triceps Extension
Sets: 3
Repetitions: 10–15
Rest: 60–90 seconds
Single-Arm Cable Pushdown
Sets: 2
Repetitions: 12–20
Rest: 60 seconds
Day 5: Pull Workout
This session focuses on the lats, upper back, rear delts, and biceps.
Weighted Pull-Up or Neutral-Grip Pulldown
Sets: 3
Repetitions: 6–10
Rest: 2–3 minutes
Use a grip that allows a strong, pain-free pulling motion.
Barbell Row or T-Bar Row
Sets: 3
Repetitions: 6–10
Rest: 2–3 minutes
Keep your torso stable and avoid using excessive momentum.
One-Arm Cable Row
Sets: 3
Repetitions: 10–15 per side
Rest: 90 seconds
Allow a controlled reach before pulling your elbow backward.
Straight-Arm Pulldown
Sets: 2
Repetitions: 12–20
Rest: 60–90 seconds
Keep the elbows slightly bent and focus on moving through the shoulders.
Reverse Pec Deck
Sets: 4
Repetitions: 12–20
Rest: 60–90 seconds
EZ-Bar Curl
Sets: 3
Repetitions: 8–12
Rest: 90 seconds
Hammer Curl
Sets: 2
Repetitions: 10–15
Rest: 60–90 seconds
Day 6: Legs and Arms
This session provides a second lower-body exposure and additional arm work.
It emphasizes the posterior chain slightly more than Day 2.
Front Squat or Pendulum Squat
Sets: 3
Repetitions: 8–12
Rest: 2–3 minutes
Choose a variation that keeps the quadriceps working while allowing good depth.
Hip Thrust
Sets: 3
Repetitions: 8–12
Rest: 2 minutes
Pause briefly at the top without excessively arching your lower back.
Bulgarian Split Squat
Sets: 3
Repetitions: 8–12 per leg
Rest: 90–120 seconds
Use a controlled stride and stable support.
Lying Leg Curl
Sets: 3
Repetitions: 10–15
Rest: 90 seconds
Seated Calf Raise
Sets: 4
Repetitions: 10–20
Rest: 60–90 seconds
Preacher Curl
Sets: 3
Repetitions: 10–15
Rest: 60–90 seconds
Cable Triceps Extension
Sets: 3
Repetitions: 10–15
Rest: 60–90 seconds
Optional:
Cable Crunch
Sets: 3
Repetitions: 10–20
Rest: 60 seconds
Complete Program at a Glance
Monday: Upper
- Bench press — 3 × 6–10
- Chest-supported row — 3 × 8–12
- Incline dumbbell press — 3 × 8–12
- Pulldown or pull-up — 3 × 8–12
- Cable lateral raise — 3 × 12–20
- Triceps pushdown — 2 × 10–15
- Incline curl — 2 × 10–15
Tuesday: Lower
- Squat or hack squat — 3 × 6–10
- Romanian deadlift — 3 × 6–10
- Leg press — 3 × 10–15
- Seated leg curl — 3 × 10–15
- Standing calf raise — 4 × 8–15
- Hanging knee raise — 3 × 10–20
Thursday: Push
- Incline barbell press — 3 × 6–10
- Dumbbell shoulder press — 3 × 8–12
- Machine chest press — 3 × 8–12
- Cable fly — 2 × 12–20
- Lateral raise — 4 × 12–20
- Overhead triceps extension — 3 × 10–15
- Single-arm pushdown — 2 × 12–20
Friday: Pull
- Pull-up or pulldown — 3 × 6–10
- Barbell or T-bar row — 3 × 6–10
- One-arm cable row — 3 × 10–15
- Straight-arm pulldown — 2 × 12–20
- Reverse pec deck — 4 × 12–20
- EZ-bar curl — 3 × 8–12
- Hammer curl — 2 × 10–15
Saturday: Legs and Arms
- Front or pendulum squat — 3 × 8–12
- Hip thrust — 3 × 8–12
- Bulgarian split squat — 3 × 8–12
- Lying leg curl — 3 × 10–15
- Seated calf raise — 4 × 10–20
- Preacher curl — 3 × 10–15
- Cable triceps extension — 3 × 10–15
Approximate Weekly Set Volume
Direct and indirect sets overlap, so exact numbers are estimates.
| Muscle Group | Approximate Weekly Sets |
|---|---|
| Chest | 14 |
| Back and lats | 17 |
| Side delts | 7 direct |
| Rear delts | 4 direct plus rows |
| Front delts | 3 direct plus pressing |
| Quadriceps | 15 |
| Hamstrings | 9 |
| Glutes | 12–15 |
| Biceps | 10 direct plus pulling |
| Triceps | 10 direct plus pressing |
| Calves | 8 |
This is enough volume for many intermediate lifters without automatically requiring 20 direct sets for every muscle.
Increase volume only when a muscle is recovering well but still not progressing.
How Hard Should You Train?
Use repetitions in reserve, or RIR, to manage effort.
Compound exercises
Finish most sets with:
1–3 repetitions in reserve
Isolation exercises
Finish most sets with:
0–2 repetitions in reserve
Training to complete failure is not required for muscle growth. Meta-analyses have generally found no clear hypertrophy advantage for taking every set to momentary failure, although sets should still be sufficiently challenging.
Occasional failure can be used on safer isolation exercises, such as:
- Lateral raises
- Cable curls
- Triceps pushdowns
- Leg extensions
Avoid frequent failure on heavy squats, deadlift variations, and unsupported barbell rows because the extra fatigue and technique breakdown may exceed the benefit.
Best Repetition Ranges for Hypertrophy
Muscle can grow across a wide range of loads when the sets are challenging and enough work is performed.
Research comparing different load ranges has generally found similar hypertrophy outcomes across low, moderate, and high loads when training is appropriately matched, while heavier loading tends to produce greater gains in one-repetition maximum strength.
This program uses:
Heavy compounds
6–10 repetitions
Moderate compound and machine exercises
8–15 repetitions
Isolation exercises
10–20 repetitions
This provides enough load variety to build muscle while also supporting strength progression.
How to Progress the Program
Use double progression.
If an exercise is prescribed for 8–12 repetitions:
- Select a weight you can lift for approximately eight controlled repetitions.
- Keep the same weight until you reach 12 repetitions on every set.
- Increase the load by the smallest available amount.
- Return to approximately eight or nine repetitions.
- Build upward again.
Example:
Week 1
Incline dumbbell press:
70 pounds × 10, 9, 8
Week 2
70 pounds × 11, 10, 9
Week 3
70 pounds × 12, 11, 10
Week 4
70 pounds × 12, 12, 12
Week 5
75 pounds × 9, 8, 8
That is progressive overload.
What If You Cannot Add Weight?
Progress does not always require heavier weights.
You can also improve by:
- Adding repetitions
- Improving exercise technique
- Using a greater controlled range of motion
- Reducing unnecessary momentum
- Improving stability
- Performing the same work with less perceived effort
- Adding a set when recovery allows
Intermediate lifters should expect progression to slow.
Adding five pounds every week forever is unrealistic.
Measure improvement across months rather than expecting personal records during every session.
How Long Should You Follow This Split?
Run the program for approximately:
8–16 weeks
Do not replace it after two weeks because the workouts no longer feel new.
A productive training block should give you enough time to:
- Learn the exercises
- Establish baseline weights
- Add repetitions
- Increase loads
- Evaluate recovery
- Identify lagging muscle groups
Change an exercise when:
- It causes pain
- You cannot progress it for an extended period
- Equipment is unavailable
- Another variation better fits your anatomy
- The program requires a new stimulus after a full block
Do not change exercises simply because you are bored.
When Should You Deload?
Consider a deload after six to ten hard weeks or when several recovery problems appear together.
Possible signs include:
- Declining strength
- Persistent joint discomfort
- Unusual fatigue
- Poor motivation
- Disrupted sleep
- Soreness that never resolves
- Multiple stalled exercises
During a deload:
- Reduce sets by approximately 40%–60%
- Use lighter loads
- Remain several repetitions away from failure
- Keep practicing the movements
A deload should leave you feeling better—not create another week of hard training.
Related guide: [What Is a Deload Week?]
Exercise Substitutions
No exercise is mandatory.
Use these replacements when needed.
Bench press alternatives
- Dumbbell bench press
- Machine chest press
- Weighted push-up
Squat alternatives
- Hack squat
- Leg press
- Safety-bar squat
- Pendulum squat
Romanian deadlift alternatives
- Good morning
- 45-degree back extension
- Cable pull-through
- Additional leg curls
Pull-up alternatives
- Neutral-grip pulldown
- Assisted pull-up
- Single-arm pulldown
Barbell row alternatives
- Chest-supported row
- T-bar row
- Seated cable row
- Machine row
Shoulder press alternatives
- Machine shoulder press
- Landmine press
- High-incline dumbbell press
Choose exercises based on:
- Comfort
- Stability
- Target-muscle tension
- Progression potential
- Equipment access
What If You Miss a Workout?
Do not cram two full workouts into one day.
Use one of these approaches:
Miss one day
Move the remaining workouts back by one day if your schedule permits.
Cannot train Saturday
Alternate the fifth session from week to week:
- Week 1: Legs and arms
- Week 2: Return to the normal schedule
Regularly miss sessions
A four-day upper/lower split is probably a better choice.
The best program is not the most advanced one.
It is the one you can perform consistently.
Can You Use This Split While Cutting?
Yes, but recovery may be reduced during a calorie deficit.
When cutting:
- Keep the main exercises
- Maintain training intensity
- Reduce optional sets if fatigue rises
- Continue eating sufficient protein
- Avoid adding excessive cardio immediately
- Focus on maintaining strength
The goal during a cut is often to preserve performance and muscle rather than constantly add training volume.
Nutrition for the 5-Day Split
Training five days per week increases your recovery needs.
Protein
Aim for approximately:
1.6–2.2 grams of protein per kilogram of body weight per day
Calories
For muscle gain, begin near maintenance or in a modest surplus of approximately:
200–300 calories per day
Adjust based on:
- Weekly body-weight trend
- Waist measurement
- Gym performance
- Recovery
- Visual changes
Carbohydrates
Carbohydrates support training performance and glycogen restoration.
Include:
- Rice
- Oats
- Potatoes
- Pasta
- Fruit
- Bread
- Beans
Fats
Include sources such as:
- Olive oil
- Nuts
- Seeds
- Whole eggs
- Avocado
- Fatty fish
Pre- and Post-Workout Nutrition
Before training
Eat a meal containing protein and carbohydrates approximately one to three hours before training when possible.
Examples:
- Chicken and rice
- Greek yogurt and fruit
- Eggs and toast
- Whey protein and oatmeal
After training
Consume approximately 20–40 grams of quality protein with carbohydrates according to your calorie and training needs.
Examples:
- Salmon and potatoes
- Beef and rice
- Protein shake and banana
- Greek yogurt with oats
Exact timing is less important than meeting your total daily nutrition targets.
Sleep and Recovery
Aim for:
Seven to nine hours of sleep per night
Five weekly sessions can become difficult to recover from when sleep is consistently poor.
Also monitor:
- Work stress
- Step count
- Cardio volume
- Appetite
- Joint discomfort
- Motivation
- Resting energy levels
Your body responds to total stress, not gym stress alone.
Cardio With a 5-Day Split
Cardio can support health without preventing muscle growth.
A reasonable starting point is:
- Two moderate sessions of 20–30 minutes
- Daily walking
- One optional interval session for conditioned trainees
Avoid placing demanding intervals immediately before or after heavy lower-body sessions when possible.
If leg strength declines, reduce cardio volume before assuming you need a new lifting program.
Common 5-Day Split Mistakes
Mistake 1: Training five consecutive days
Most lifters perform better with a rest day after the first two sessions.
Mistake 2: Adding extra exercises constantly
The listed volume is already substantial.
Mistake 3: Taking every set to failure
This creates unnecessary fatigue.
Mistake 4: Neglecting recovery
Five workouts require adequate food and sleep.
Mistake 5: Program hopping
Follow the split long enough to measure progression.
Mistake 6: Counting only direct sets
Presses also train the triceps and front delts. Rows and pulldowns also train the biceps.
Mistake 7: Ignoring pain
Replace exercises that repeatedly cause joint discomfort.
Mistake 8: Treating every workout like a strength test
Hypertrophy training is not a daily competition for maximum weight.
Frequently Asked Questions
Is a 5-day split good for muscle growth?
Yes. It allows intermediate lifters to distribute enough weekly volume across manageable sessions. The number of training days itself is less important than total productive volume, progression, effort, and recovery.
Is a 5-day split better than push/pull/legs?
Neither is universally better. A five-day hybrid split may fit someone who wants two weekly exposures without committing to six days of push/pull/legs.
Can a beginner use this routine?
A beginner could perform it, but a three-day full-body or four-day upper/lower routine is usually simpler and easier to recover from.
How long should each workout take?
Approximately 60–90 minutes, depending on rest periods and gym crowding.
Is one rest day enough?
This program includes two rest days. Some lifters may need an additional recovery day during stressful weeks.
Should I train to failure?
Not on every set. Finish most compound sets with one to three repetitions in reserve and most isolation sets with zero to two.
Can I build muscle using machines?
Yes. Machines, free weights, cables, and bodyweight exercises can all build muscle when they provide sufficient tension and allow progression.
Can women use this program?
Yes. Women and men can use the same basic hypertrophy principles. Exercise selection, volume, and calorie intake should be individualized.
Final Thoughts
A 5-day workout split can be one of the best structures for an intermediate lifter who wants more muscle without training six or seven days per week.
The program works because it provides:
- Enough weekly volume
- Multiple muscle exposures
- Dedicated recovery days
- A balance of compound and isolation work
- Clear progression targets
- Additional attention for shoulders and arms
- Two complete lower-body sessions
To make it effective:
- Track every workout.
- Train hard without failing every set.
- Progress repetitions and loads gradually.
- Avoid adding unnecessary exercises.
- Eat enough protein and calories.
- Sleep seven to nine hours.
- Deload when fatigue accumulates.
- Follow the program for at least eight weeks.
The split is only the structure.
Your results will come from how consistently you execute, recover, and progress within that structure.
Ready to Start the Program?
Download our FREE 12-Week 5-Day Muscle Growth Plan and receive:
- Printable weekly workouts
- Exercise substitution charts
- Progressive-overload tracking sheets
- Built-in deload guidance
- Protein and calorie targets
- Recovery checklists
Stop walking into the gym without a plan.
Train each muscle with purpose and build measurable progress week after week.
Question: Which muscle group would you prioritize most on a five-day split—chest, back, shoulders, arms, or legs? Share your answer in the comments.**
Training Disclaimer
This program provides general fitness information and is not medical or rehabilitation advice. Consult a qualified healthcare or exercise professional before starting the program if you have an injury, medical condition, significant pain, or a long period of inactivity.
How to Build Muscle at Home With No Equipment
How to Build Muscle at Home With No Equipment: Complete Full-Body Program
You do not need a gym membership to build muscle.
You do not need a barbell.
You do not need expensive machines.
And you do not need a room full of equipment.
What you need is a way to make your muscles work hard enough to adapt.
That can happen with:
- Your body weight
- Slower repetitions
- Longer ranges of motion
- Harder exercise variations
- More repetitions
- Better technique
- Strategic pauses
- Progressive overload
The main challenge with home training is not whether bodyweight exercises can build muscle.
They can.
The challenge is making those exercises progressively harder as your body becomes stronger.
In this guide, you will learn:
- How muscle growth works without weights
- The best equipment-free exercises
- A complete three-day full-body workout
- How to progress every movement
- How close to failure you should train
- How much protein and food you need
- Common mistakes that stop home muscle growth
Can You Build Muscle Without Equipment?
Yes.
Muscles respond to tension and effort—not to the logo printed on a machine.
Research shows that lighter loads can stimulate muscle growth when sets are performed with enough effort. This means bodyweight exercises can build muscle when they are challenging enough and progressed over time.
The most important factors are:
- Training close enough to muscular failure
- Using enough weekly volume
- Performing exercises through a controlled range of motion
- Making the exercises harder over time
- Eating enough protein and calories
- Recovering properly
A push-up may be easy for an advanced lifter but extremely challenging for a beginner.
What matters is how demanding the exercise is for you.
The Biggest Myth About Home Workouts
A common belief is:
“Bodyweight exercises only build endurance.”
That is not always true.
Very easy bodyweight exercises performed for extremely high repetitions may emphasize endurance.
But harder variations performed for challenging sets can build muscle.
For example:
- Wall push-ups may be appropriate for a beginner.
- Standard push-ups may challenge an intermediate trainee.
- Decline, diamond, archer, or one-arm push-up progressions may challenge an advanced trainee.
The exercise must match your current strength.
The Principles of Equipment-Free Muscle Growth
1. Train Close to Failure
A working set should become difficult near the end.
For most sets, stop with approximately:
One to three good repetitions left
This means you could probably complete one to three additional repetitions with acceptable form.
You do not need to reach complete failure on every set.
However, if you finish 20 push-ups and could easily perform another 20, the set was probably not challenging enough for maximum muscle growth.
2. Use Progressive Overload
Progressive overload means gradually increasing the challenge.
Without equipment, you can progress by:
- Adding repetitions
- Adding sets
- Slowing the lowering phase
- Pausing at the hardest position
- Increasing range of motion
- Using one limb at a time
- Choosing a harder variation
- Reducing assistance
- Shortening rest periods carefully
3. Train Through a Full Range of Motion
Partial repetitions can have a place, but most beginners should first learn controlled full-range movements.
Examples:
- Lower your chest close to the floor during push-ups.
- Use a deep, comfortable squat.
- Fully shorten and lengthen the target muscles when possible.
4. Train Each Muscle More Than Once Weekly
A three-day full-body program works well for home training because it provides frequent practice and distributes weekly volume.
5. Recover Between Sessions
Training stimulates muscle growth.
Recovery allows adaptation.
Leave at least one day between demanding full-body sessions when possible.
Best No-Equipment Exercises for Muscle Growth
Chest
- Push-ups
- Wide-grip push-ups
- Decline push-ups
- Diamond push-ups
- Archer push-ups
- Deficit push-ups using stable household surfaces
Shoulders
- Pike push-ups
- Elevated pike push-ups
- Wall-supported handstand holds
- Handstand push-up progressions
- Push-up variations
Back
Back training is the hardest part of a completely equipment-free program.
Useful options include:
- Reverse snow angels
- Prone Y-T-W raises
- Superman pull-downs
- Floor lat pull-downs
- Isometric towel rows using a strong self-resisted pull
- Doorway row variations only when the structure is unquestionably secure
For better long-term back development, an inexpensive pull-up bar or resistance band is extremely useful. However, this program includes floor-based options for people with no equipment.
Biceps
Without external resistance, direct biceps training is limited.
Options include:
- Self-resisted curls
- Towel curls against your own leg
- Isometric curl holds
- Under-table rows only when the table is stable and safe
Triceps
- Diamond push-ups
- Close-grip push-ups
- Bodyweight triceps extensions against a wall or sturdy counter
- Sphinx push-ups
Legs
- Bodyweight squats
- Reverse lunges
- Split squats
- Bulgarian split squats using a stable couch or chair
- Step-ups using a safe, stable surface
- Single-leg squats
- Glute bridges
- Single-leg glute bridges
- Hamstring walkouts
- Single-leg calf raises
Core
- Planks
- Side planks
- Dead bugs
- Reverse crunches
- Hollow-body holds
- Mountain climbers
- Leg raises
Complete Three-Day No-Equipment Muscle-Building Program
Train on nonconsecutive days, such as:
- Monday
- Wednesday
- Friday
Before each session, warm up for five to eight minutes.
Use:
- Arm circles
- Hip circles
- Bodyweight squats
- Easy push-ups
- Lunges
- Light movement rehearsals
Workout A
Push-Ups
Sets: 4
Repetitions: 8–20
Rest: 90 seconds
Choose a variation that becomes difficult within the target range.
Bulgarian Split Squats
Sets: 4
Repetitions: 8–15 per leg
Rest: 90 seconds
Place the rear foot on a stable couch or chair only if it does not move.
Pike Push-Ups
Sets: 3
Repetitions: 6–15
Rest: 90 seconds
Keep the hips elevated and lower the head toward the floor in front of the hands.
Single-Leg Glute Bridges
Sets: 3
Repetitions: 10–20 per leg
Rest: 60 seconds
Pause at the top and squeeze the glutes.
Reverse Snow Angels
Sets: 3
Repetitions: 12–20
Rest: 60 seconds
Lie face down and move the arms through a controlled arc.
Plank
Sets: 3
Duration: 30–60 seconds
Workout B
Close-Grip Push-Ups
Sets: 4
Repetitions: 8–20
Rest: 90 seconds
Keep the hands close enough to emphasize the triceps without creating wrist discomfort.
Reverse Lunges
Sets: 4
Repetitions: 10–20 per leg
Rest: 90 seconds
Step backward and lower under control.
Bodyweight Triceps Extensions
Sets: 3
Repetitions: 8–15
Rest: 60–90 seconds
Use a wall, counter, or sturdy surface. The lower the surface, the harder the exercise.
Hamstring Walkouts
Sets: 3
Repetitions: 8–15
Rest: 60–90 seconds
Begin in a glute bridge and slowly walk the heels away from the body.
Prone Y-T-W Raises
Sets: 3 rounds
Repetitions: 8–12 in each position
Rest: 60 seconds
Move slowly and focus on the upper back and rear shoulders.
Side Plank
Sets: 3
Duration: 20–45 seconds per side
Workout C
Decline or Standard Push-Ups
Sets: 4
Repetitions: 8–20
Rest: 90 seconds
Use a decline only if standard push-ups are no longer challenging enough.
Tempo Squats
Sets: 4
Repetitions: 12–25
Tempo: Three seconds down, one-second pause
Rest: 90 seconds
Keep the movement controlled.
Elevated Pike Push-Ups
Sets: 3
Repetitions: 6–12
Rest: 90 seconds
Elevate the feet only when standard pike push-ups become manageable.
Single-Leg Calf Raises
Sets: 4
Repetitions: 12–25 per side
Rest: 45–60 seconds
Pause at the top and lower fully.
Superman Pull-Downs
Sets: 3
Repetitions: 12–20
Rest: 60 seconds
Extend the arms overhead, then pull the elbows toward the ribs.
Reverse Crunches
Sets: 3
Repetitions: 10–20
Rest: 60 seconds
Weekly Program Summary
| Day | Workout |
|---|---|
| Monday | Workout A |
| Tuesday | Rest or walking |
| Wednesday | Workout B |
| Thursday | Rest or walking |
| Friday | Workout C |
| Saturday | Optional light cardio or mobility |
| Sunday | Rest |
How to Make Bodyweight Exercises Harder
Push-Up Progression
Use this order:
- Wall push-up
- Counter push-up
- Knee push-up
- Standard push-up
- Close-grip push-up
- Decline push-up
- Diamond push-up
- Archer push-up
- Assisted one-arm push-up
- One-arm push-up progression
Do not advance until you can perform the current level with good control.
Squat Progression
- Assisted squat
- Bodyweight squat
- Tempo squat
- Pause squat
- Split squat
- Bulgarian split squat
- Assisted single-leg squat
- Pistol squat progression
Shoulder Progression
- Incline push-up
- Standard push-up
- Pike push-up
- Elevated pike push-up
- Wall-supported handstand hold
- Partial handstand push-up
- Full handstand push-up progression
Glute and Hamstring Progression
- Glute bridge
- Paused glute bridge
- Single-leg glute bridge
- Hamstring walkout
- Sliding leg curl using a safe floor surface and towel
- Single-leg sliding curl progression
How to Progress Week by Week
Use a simple progression system.
Suppose the exercise range is 8–15 repetitions.
Week 1
Push-ups: 10, 9, 8, 8
Week 2
Push-ups: 11, 10, 9, 8
Week 3
Push-ups: 13, 11, 10, 9
Week 4
Push-ups: 15, 15, 14, 12
Once you reach the top of the repetition range on every set:
- Move to a harder variation
- Add a pause
- Slow the lowering phase
- Increase the range of motion
This keeps the exercise challenging without adding weights.
What If You Can Perform More Than 30 Repetitions?
Very high repetitions can still create muscular fatigue, but they are often inefficient.
If you can perform more than 25–30 controlled repetitions:
- Choose a harder variation
- Use one limb
- Slow the eccentric phase
- Add a long pause
- Increase range of motion
The goal is to make the exercise difficult enough that the set does not last forever.
How Long Should Home Workouts Take?
Most sessions should take approximately:
35–60 minutes
Longer workouts are not automatically more effective.
Focus on:
- Challenging sets
- Good technique
- Adequate rest
- Progressive overload
Avoid turning the workout into nonstop cardio unless conditioning is your primary goal.
How Much Rest Between Sets?
Use:
Compound movements
90–180 seconds
Isolation-style or core exercises
45–90 seconds
Short rest periods may create a stronger burn, but they can reduce performance.
Rest long enough to perform the next set with good quality.
How Much Protein Do You Need?
A practical target for muscle growth is:
1.6–2.2 grams of protein per kilogram of body weight per day
For someone weighing 170 pounds, or approximately 77 kilograms, that equals roughly:
123–169 grams per day
Useful protein sources include:
- Chicken
- Turkey
- Fish
- Eggs
- Greek yogurt
- Cottage cheese
- Lean beef
- Milk
- Whey protein
- Soy protein
- Tofu
- Tempeh
- Beans and lentils
Protein powder is optional.
It simply makes the daily target easier to reach.
Do You Need a Calorie Surplus?
Not everyone needs to bulk.
Beginners
Beginners may build muscle at maintenance calories, especially when training and protein intake improve significantly.
People with higher body fat
Body recomposition may be possible while eating in a modest calorie deficit.
Leaner, experienced trainees
A modest calorie surplus may make muscle gain easier.
A reasonable starting surplus is approximately:
200–300 calories per day
Avoid aggressive dirty bulking.
Extra calories beyond what your body can use for muscle growth are more likely to increase fat gain.
Sample Muscle-Building Meal Plan
Breakfast
- Eggs
- Oatmeal
- Fruit
Lunch
- Chicken or tofu
- Rice
- Vegetables
Snack
- Greek yogurt
- Banana
- Nuts
Dinner
- Lean beef, fish, or tempeh
- Potatoes or pasta
- Salad or vegetables
Evening snack
- Cottage cheese or protein shake
- Berries
Adjust portions according to your calorie needs.
Can You Build Your Back Without Equipment?
This is the main limitation of a completely equipment-free program.
Pushing muscles are easy to train with the floor and gravity.
Pulling muscles require something to pull against.
Floor-based movements can train:
- Rear delts
- Upper back
- Scapular control
- Some lat function
But they may not provide the same progression potential as:
- Pull-ups
- Rows
- Resistance-band pulldowns
For balanced long-term development, consider eventually adding one inexpensive item:
- Pull-up bar
- Resistance band
- Suspension trainer
This is not required to begin, but it greatly improves your ability to train the back and biceps.
Can Household Items Be Used?
Yes, but safety comes first.
Possible additions include:
- A backpack filled with books
- Water containers
- A towel
- Stairs
- A stable couch
- A secure table
Never use:
- Unstable chairs
- Weak doors
- Glass tables
- Furniture that can tip
- Improvised overhead weights that may fall
A loaded backpack can add resistance to:
- Squats
- Split squats
- Push-ups
- Calf raises
- Glute bridges
Although this technically adds equipment, it can extend your home-training progress significantly.
How Much Cardio Should You Do?
Cardio is healthy and does not automatically prevent muscle growth.
A balanced schedule might include:
- Three resistance workouts
- Two or three moderate cardio sessions
- Daily walking
Avoid so much cardio that:
- Your legs never recover
- You cannot maintain your calorie intake
- Strength declines
- Fatigue accumulates
When muscle gain is the priority, resistance training should come first.
How Much Sleep Do You Need?
Aim for:
Seven to nine hours per night
Sleep supports:
- Training performance
- Recovery
- Appetite regulation
- Motivation
- Muscle-protein synthesis
A home program still requires real recovery.
Training at home does not mean your muscles need less rest.
Common Home-Training Mistakes
Mistake 1: Repeating the same easy workout forever
The workout must become harder over time.
Mistake 2: Stopping every set too early
Your muscles need challenging sets.
Mistake 3: Performing only push-ups
A balanced program also trains legs, shoulders, upper back, glutes, and core.
Mistake 4: Rushing repetitions
Slow down and control the movement.
Mistake 5: Doing endless circuits
Circuits are useful for conditioning, but constant rushing may reduce muscular performance.
Mistake 6: Ignoring nutrition
Home workouts cannot overcome inadequate protein and calories.
Mistake 7: Training every day
More frequency is not always better.
Mistake 8: Expecting gym-level back development without pulling resistance
Be realistic about the limitations of equipment-free back training.
How Long Does It Take to Build Muscle at Home?
Results depend on:
- Starting fitness
- Exercise difficulty
- Progression
- Protein intake
- Calories
- Sleep
- Genetics
- Consistency
A practical timeline may look like this:
Weeks 1–4
- Better coordination
- Improved technique
- Early strength gains
Weeks 5–12
- More repetitions
- Harder variations
- Improved muscle firmness
- Early visual changes
Three to six months
- Noticeable chest, shoulder, arm, leg, and glute development
- Improved body composition
- Better work capacity
Six to twelve months
- Significant change when progression and nutrition remain consistent
Do not judge the program after one week.
Measure progress using:
- Repetition records
- Exercise variations
- Photos
- Body measurements
- Clothing fit
- Body-weight trends
Frequently Asked Questions
Can push-ups build muscle?
Yes. Push-ups can build the chest, shoulders, and triceps when they are challenging enough and progressed over time.
Can squats without weights build muscle?
Yes, especially for beginners. As you become stronger, use tempo squats, split squats, Bulgarian split squats, and single-leg progressions.
How many days should I train at home?
Three full-body workouts per week are sufficient for many beginners and intermediates.
Do I need to train to failure?
No. Finish most sets with one to three repetitions in reserve. Occasional failure on safe bodyweight exercises can be used, but it is not required.
Can women use this program?
Yes. The same principles of progressive resistance training apply to women and men.
Can I build muscle without supplements?
Absolutely. Supplements are optional. Food, training, and recovery matter most.
What is the hardest muscle to train without equipment?
The back and biceps are the most difficult because effective pulling exercises require external resistance or a secure structure.
Final Thoughts
You can build muscle at home without traditional gym equipment.
The formula is straightforward:
- Choose exercises that challenge you.
- Train close enough to failure.
- Progress the movements over time.
- Train the full body.
- Eat enough protein and calories.
- Sleep and recover consistently.
- Track your performance.
You do not need the perfect setup to begin.
Start with the floor, your body weight, and a structured plan.
As you become stronger, use harder variations, slower repetitions, pauses, unilateral exercises, and eventually inexpensive resistance tools when necessary.
The best program is not the one with the most equipment.
It is the one you can follow consistently and continue progressing.
Ready to Start Training at Home?
Download our FREE 12-Week No-Equipment Muscle Growth Plan and receive:
- Three-day full-body workouts
- Exercise progression charts
- Beginner and intermediate variations
- Protein and calorie guidance
- Weekly tracking sheets
- Recovery recommendations
Start where you are, use what you have, and build strength one workout at a time.
Question: Which exercise is hardest for you right now—push-ups, squats, pike push-ups, or lunges? Share your answer in the comments.**
Training Disclaimer
This article provides general fitness information and is not medical advice. Stop any exercise that causes sharp pain, dizziness, numbness, or joint instability. Consult a qualified healthcare or fitness professional when appropriate.
Best Shoulder Workout for Mass: Build Bigger, Wider Shoulders
Best Shoulder Workout for Mass: Build Bigger, Wider “Boulder” Shoulders
Few muscle groups transform your physique as dramatically as well-developed shoulders.
Bigger shoulders can make your:
- Upper body look wider
- Waist appear smaller
- Arms look more muscular
- Chest and back appear more developed
- Overall physique look stronger and more athletic
But many lifters never achieve the round, three-dimensional shoulder development they want.
They perform several heavy presses, add a few rushed lateral raises, and assume that is enough.
The problem is that your shoulders are made up of multiple regions with different functions. Pressing exercises heavily train the front deltoids, but they may not provide enough direct work for the side and rear deltoids—the areas that create width and a rounded appearance.
To build complete shoulders, your program needs to train all three major deltoid heads:
- Anterior, or front, deltoid
- Lateral, or side, deltoid
- Posterior, or rear, deltoid
This guide provides a complete shoulder workout for mass, along with exercise instructions, progression rules, weekly volume, recovery guidance, and common mistakes to avoid.
Understanding the Shoulder Muscles
The main visible shoulder muscle is the deltoid.
It surrounds the shoulder joint and is commonly divided into three regions.
Front Deltoids
The anterior deltoids help raise the arm in front of the body and contribute heavily to pressing movements.
They are trained during:
- Overhead presses
- Bench presses
- Incline presses
- Front raises
- Push-ups
Because chest training already places significant stress on the front delts, most lifters do not need large amounts of direct front-raise work.
Side Deltoids
The lateral deltoids help lift the arms away from the body.
They contribute most directly to shoulder width.
They are trained with exercises such as:
- Dumbbell lateral raises
- Cable lateral raises
- Machine lateral raises
- Upright-row variations
If your goal is to look wider, side-delt training should be a major priority.
Rear Deltoids
The posterior deltoids help move the upper arm backward and contribute to horizontal pulling and external rotation.
They are trained during:
- Reverse flyes
- Face pulls
- Rear-delt rows
- Chest-supported rows
- Reverse pec-deck flyes
Well-developed rear delts improve the back view of your shoulders and help create a rounder appearance from the side.
What Actually Makes Shoulders Grow?
Shoulder growth depends on the same major principles as every other muscle group.
Mechanical tension
Your deltoids need to work against meaningful resistance.
Sufficient training volume
You need enough challenging weekly sets to stimulate adaptation.
Progressive overload
Your exercises must become more demanding over time.
Exercise selection
Your routine must train the front, side, and rear deltoids—not just the pressing muscles.
Recovery
Muscles need adequate protein, calories, sleep, and time between demanding sessions.
The goal is not to perform as many shoulder exercises as possible.
It is to select a manageable group of effective exercises and gradually improve your performance on them.
The Best Shoulder Workout for Mass
This workout combines one major pressing movement with direct side- and rear-delt exercises.
Exercise 1: Seated Dumbbell Shoulder Press
Sets: 3–4
Repetitions: 6–10
Rest: 2–3 minutes
The dumbbell shoulder press is an effective compound exercise for building overall shoulder strength and mass.
It primarily trains:
- Front deltoids
- Side deltoids
- Triceps
How to perform it
- Sit on a bench with back support.
- Hold the dumbbells around shoulder height.
- Keep your feet planted firmly on the floor.
- Press the dumbbells upward without violently locking your elbows.
- Lower them under control until you reach a comfortable range of motion.
- Repeat without bouncing or excessive lower-back arching.
Key tip
Do not flare your elbows directly sideways if that position feels uncomfortable.
A slightly forward elbow position often allows a smoother pressing path.
Exercise 2: Cable Lateral Raise
Sets: 3–4
Repetitions: 10–15 per side
Rest: 60–90 seconds
Cable lateral raises provide continuous resistance through much of the movement.
They are one of the best exercises for directly targeting the side deltoids.
How to perform it
- Stand beside a low cable pulley.
- Hold the handle with the arm farther from the machine.
- Begin with your hand slightly across the front of your body.
- Raise your arm outward until it reaches approximately shoulder height.
- Keep a slight bend in your elbow.
- Lower the handle slowly and repeat.
Key tip
Lead with your elbow rather than pulling the handle upward with your hand.
Avoid leaning excessively or turning the movement into a full-body swing.
Exercise 3: Machine or Dumbbell Lateral Raise
Sets: 3
Repetitions: 12–20
Rest: 60–90 seconds
A second lateral-raise variation increases side-delt volume without requiring another heavy compound lift.
Machines provide stability, while dumbbells are accessible in almost every gym.
How to perform a dumbbell lateral raise
- Stand with the dumbbells beside your thighs.
- Lean slightly forward if that position feels natural.
- Raise the dumbbells outward in a controlled arc.
- Stop around shoulder height or slightly below.
- Lower slowly without allowing the weights to crash into your legs.
Key tip
Use less weight than your ego wants.
If you must swing aggressively from the first repetition, the dumbbells are probably too heavy.
Exercise 4: Reverse Pec-Deck Fly
Sets: 3–4
Repetitions: 12–20
Rest: 60–90 seconds
The reverse pec deck provides stable, direct rear-delt training.
How to perform it
- Sit facing the machine pad.
- Hold the handles with your arms near shoulder height.
- Keep your chest against the pad.
- Move your arms outward and backward.
- Focus on moving through the shoulders rather than squeezing the shoulder blades as hard as possible.
- Return under control.
Key tip
If you retract your shoulder blades excessively, the upper back may take over.
Allow some scapular movement, but keep the rear delts as the primary focus.
Exercise 5: Rear-Delt Cable Fly
Sets: 3
Repetitions: 12–20
Rest: 60–90 seconds
Cable flyes allow you to train the rear delts through a slightly different resistance profile.
How to perform it
- Set two cables around shoulder height.
- Hold the opposite-side handles so the cables cross in front of you.
- Take a small step backward.
- Open your arms outward while keeping the elbows slightly bent.
- Pause briefly when your arms are extended.
- Return slowly.
Key tip
Do not turn this into a rowing movement.
Keep your elbows relatively fixed and move the arms outward in a fly pattern.
Optional Exercise 6: Face Pull
Sets: 2–3
Repetitions: 12–20
Rest: 60 seconds
Face pulls train the rear delts and several muscles around the shoulder blades.
They can be a useful accessory movement, although they should not replace heavier rows or direct rear-delt work.
How to perform it
- Attach a rope to a cable around face height.
- Pull the rope toward your forehead or upper face.
- Separate the rope ends as you pull.
- Keep your shoulders down rather than shrugging.
- Return under control.
Complete Shoulder Workout Summary
| Exercise | Sets | Repetitions |
|---|---|---|
| Seated Dumbbell Shoulder Press | 3–4 | 6–10 |
| Cable Lateral Raise | 3–4 | 10–15 |
| Machine or Dumbbell Lateral Raise | 3 | 12–20 |
| Reverse Pec-Deck Fly | 3–4 | 12–20 |
| Rear-Delt Cable Fly | 3 | 12–20 |
| Face Pull, optional | 2–3 | 12–20 |
This is a high-volume shoulder workout.
Beginners should start with fewer total sets rather than immediately performing the maximum prescription.
Beginner Shoulder Workout
If you are new to resistance training, use this simpler version:
Seated Dumbbell Shoulder Press
3 sets of 8–12 repetitions
Dumbbell Lateral Raise
3 sets of 12–15 repetitions
Reverse Pec-Deck Fly
3 sets of 12–15 repetitions
Perform this workout once or twice per week, depending on the rest of your program.
You do not need six shoulder exercises to make beginner gains.
Home Shoulder Workout for Mass
You can train your shoulders effectively at home with dumbbells and resistance bands.
Dumbbell Shoulder Press
4 sets of 8–12 repetitions
Leaning Dumbbell Lateral Raise
3 sets of 10–15 repetitions per side
Standard Dumbbell Lateral Raise
3 sets of 12–20 repetitions
Bent-Over Rear-Delt Raise
4 sets of 12–20 repetitions
Band Face Pull
3 sets of 15–25 repetitions
When your dumbbells become too light, increase the challenge through:
- More repetitions
- Slower lowering
- Pauses
- Longer ranges of motion
- One-arm variations
- Additional resistance bands
How Often Should You Train Shoulders?
For most lifters, training the deltoids twice per week works well.
You could distribute your shoulder work like this:
Monday: Push or upper-body workout
- Shoulder press
- Lateral raise
Thursday: Upper-body or shoulder-focused workout
- Lateral raise
- Rear-delt fly
- Face pull
Training twice weekly allows you to distribute volume and perform more high-quality sets.
Remember that your shoulders are also trained indirectly during:
- Bench presses
- Incline presses
- Rows
- Pull-ups
- Chest-supported pulling exercises
Your total shoulder workload includes both direct and indirect training.
How Many Weekly Sets Build Shoulder Mass?
A reasonable starting range is:
Front deltoids
Approximately 4–8 direct weekly sets, often fewer when you already perform substantial chest pressing.
Side deltoids
Approximately 10–16 direct weekly sets.
Rear deltoids
Approximately 8–16 direct weekly sets, depending on your rowing volume.
These are starting ranges—not mandatory targets.
Some lifters grow with less, while others eventually benefit from more.
Begin at the lower end and add volume only when:
- You recover well
- Strength is progressing
- Joint discomfort is low
- Soreness does not interfere with later workouts
- Your performance remains stable
Best Rep Range for Shoulder Growth
The deltoids can grow across a wide range of repetitions.
A practical approach is:
Pressing exercises
6–12 repetitions
Lateral raises
10–20 repetitions
Rear-delt isolation work
12–25 repetitions
Heavy lateral raises often become sloppy and shift tension away from the target muscle.
Moderate and higher repetitions usually make it easier to maintain control.
Your final repetitions should feel difficult, but technique should remain recognizable.
How Close Should You Train to Failure?
You do not need to take every shoulder set to complete muscular failure.
For most working sets, finish with approximately:
One to three repetitions in reserve
Isolation exercises such as lateral raises can occasionally be taken closer to failure because they generally create less systemic fatigue than heavy presses.
However, stop a set when:
- Technique breaks down
- You begin using extreme momentum
- Shoulder pain develops
- The target muscle is no longer controlling the movement
Productive effort is different from reckless effort.
How to Progress Your Shoulder Workout
Use double progression.
For an exercise prescribed for 8–12 repetitions:
- Select a weight you can perform for eight controlled repetitions.
- Use that weight until you can complete 12 repetitions on every set.
- Increase the load by the smallest available amount.
- Return to approximately eight repetitions.
- Repeat.
For lateral raises, the available weight jump may be too large.
In that case, progress by:
- Adding repetitions
- Improving control
- Increasing range of motion
- Using fractional weights
- Adding one set
- Switching to a cable that allows smaller increases
Track every workout.
You cannot apply progressive overload consistently when you do not remember your previous performance.
Barbell vs. Dumbbell Shoulder Press
Both can build shoulder mass.
Barbell press advantages
- Easier to load heavily
- Stable movement path
- Useful for strength progression
Dumbbell press advantages
- Each arm works independently
- More freedom to adjust arm path
- May feel more comfortable for some shoulders
- Helps identify left-to-right strength differences
Neither is automatically superior.
Choose the version that:
- Feels comfortable
- Allows steady progression
- Trains the deltoids effectively
- Fits your equipment and program
Are Upright Rows Good for Shoulder Mass?
Upright rows can train the side delts and upper trapezius.
However, some people experience shoulder discomfort during the exercise.
To make the movement more comfortable:
- Use a wider grip
- Avoid pulling excessively high
- Use dumbbells or cables
- Stop if you experience pinching or sharp pain
Upright rows are optional.
You can build excellent shoulders without them.
Do You Need Front Raises?
Most lifters do not need much direct front-delt work.
The front deltoids already receive substantial stimulation from:
- Bench pressing
- Incline pressing
- Overhead pressing
- Push-ups
- Dips
If your program contains several pressing exercises, adding large amounts of front raises may create unnecessary fatigue.
Prioritize side- and rear-delt work unless your front delts are genuinely underdeveloped.
How to Perform Lateral Raises Correctly
Lateral raises are simple, but they are often performed poorly.
Use a manageable weight
Momentum should not dominate the movement.
Keep a slight elbow bend
Do not lock your arms completely straight.
Raise in the scapular plane
Move your arms slightly forward rather than directly sideways if that feels more natural.
Stop around shoulder height
Raising much higher is not necessary for side-delt development and may feel uncomfortable for some people.
Control the lowering phase
Do not allow gravity to drop the dumbbells.
Avoid excessive shrugging
If your shoulders rise toward your ears, the upper traps may be taking over.
Some trap involvement is normal, but the side delts should remain the primary target.
How to Protect Your Shoulder Joints
The shoulder joint allows a large range of motion, but that mobility can also make it sensitive to poor load management.
Warm up gradually
Perform light movement and several progressive warm-up sets before heavy pressing.
Use pain-free ranges
You do not need to force a movement that causes pinching or sharp pain.
Control the eccentric phase
Lower weights with control.
Avoid sudden volume increases
Do not double your weekly shoulder sets overnight.
Train the upper back
Rows, pulldowns, rear-delt work, and other pulling exercises help create balanced upper-body development.
Allow recovery
Avoid heavy pressing on consecutive days.
Persistent shoulder pain should be evaluated by a qualified healthcare professional.
Nutrition for Bigger Shoulders
No shoulder workout can compensate for inadequate nutrition.
Eat enough protein
A practical target for muscle growth is approximately:
1.6–2.2 grams of protein per kilogram of body weight per day
Consume sufficient calories
If maximizing muscle growth is your goal, eat near maintenance or in a modest calorie surplus.
A surplus of approximately 200–300 calories per day is a reasonable starting point for many lifters.
Eat carbohydrates
Carbohydrates help fuel high-volume training and replenish muscle glycogen.
Useful foods include:
- Rice
- Oats
- Potatoes
- Fruit
- Pasta
- Whole-grain bread
Stay hydrated
Poor hydration can reduce training performance.
Recovery for Shoulder Growth
Muscle growth occurs during recovery from training.
Prioritize:
- Seven to nine hours of sleep
- At least 48 hours between demanding shoulder sessions
- Adequate daily protein
- Sensible weekly volume
- Rest days
- Deload weeks when fatigue accumulates
If your pressing strength is declining, your joints ache, and soreness never disappears, adding more shoulder work is unlikely to solve the problem.
You may need less volume or more recovery.
Common Shoulder-Training Mistakes
Mistake 1: Performing only overhead presses
Presses emphasize the front delts and may not provide enough side- or rear-delt work.
Mistake 2: Using too much weight on lateral raises
Heavy swinging often reduces side-delt tension.
Mistake 3: Ignoring rear delts
Rear delts create shoulder depth and support balanced development.
Mistake 4: Training shoulders every day
More frequency does not automatically produce more growth.
Mistake 5: Performing too much front-delt work
Chest presses already train the front delts.
Mistake 6: Skipping progressive overload
Repeating the same weights and repetitions forever gives your muscles little reason to adapt.
Mistake 7: Training through sharp pain
Muscle fatigue is expected. Joint pain should not be ignored.
Mistake 8: Changing exercises every week
Keep core movements long enough to improve your technique and performance.
How Long Does It Take to Build Bigger Shoulders?
The timeline depends on:
- Genetics
- Training experience
- Body-fat level
- Nutrition
- Recovery
- Exercise execution
- Consistency
A realistic timeline may look like this:
First four weeks
- Better technique
- Improved mind-muscle connection
- Early strength gains
Eight to twelve weeks
- Improved shoulder fullness
- Better lateral-raise performance
- Early visible changes
Three to six months
- Noticeably wider shoulders
- Improved definition
- Greater pressing strength
Six to twelve months
- Significant shoulder development when training and nutrition remain consistent
Progress may occur gradually.
Use:
- Photos
- Shoulder measurements
- Workout records
- Clothing fit
- Strength trends
to evaluate results.
Frequently Asked Questions
What is the best shoulder exercise for mass?
The overhead press is an excellent compound movement for overall shoulder mass, but it should be combined with lateral raises and rear-delt exercises for complete development.
Can I build shoulders using only dumbbells?
Yes. Dumbbell presses, lateral raises, and bent-over rear-delt raises can provide a complete shoulder workout.
How many shoulder exercises should I perform?
Three to five exercises are sufficient for most dedicated shoulder sessions. Beginners may need only three.
Should I train shoulders twice per week?
Twice-weekly training works well for many lifters because it allows weekly volume to be distributed across more than one session.
Are lateral raises necessary?
Some form of direct side-delt training is highly useful when shoulder width is the goal. Lateral raises are one of the most practical options.
Why are my shoulders not growing?
Common causes include insufficient side- and rear-delt work, poor exercise technique, lack of progressive overload, inadequate calories, low protein intake, and poor recovery.
Can I train shoulders with chest?
Yes. Pressing movements train both the chest and front delts. Add side-delt work after chest exercises and train rear delts with back or during another upper-body session.
Final Thoughts
The best shoulder workout for mass is not built around pressing alone.
To create wide, rounded, three-dimensional shoulders, you need to train:
- Front delts through pressing
- Side delts through lateral-raise variations
- Rear delts through flyes and rows
Use this structure:
- Begin with a progressive overhead press.
- Prioritize direct side-delt volume.
- Train the rear delts consistently.
- Use controlled technique.
- Finish most sets close—but not always all the way—to failure.
- Track your weights and repetitions.
- Eat enough protein and calories.
- Recover before repeating the workout.
Building impressive shoulders takes time.
But when you train every region properly and progress your exercises consistently, your shoulders can become one of the most visually powerful parts of your physique.
Ready to Build Bigger Shoulders?
Download our FREE 12-Week Muscle Growth Plan and receive:
- Complete shoulder, chest, back, arm, and leg workouts
- Weekly progression targets
- Training log sheets
- Protein and calorie guidance
- Recovery recommendations
- Beginner and intermediate options
Stop guessing which exercises to perform and start following a structured muscle-building plan.
Question: Which part of your shoulders needs the most work—the front, side, or rear delts? Share your answer in the comments.**
Training Disclaimer
This article provides general fitness information and is not medical or rehabilitation advice. Stop any exercise that causes sharp pain, instability, numbness, or persistent joint discomfort. Consult a qualified healthcare or fitness professional when necessary.
What Is a Deload Week? Benefits, Timing and How to Do One Properly
What Is a Deload Week and Do You Actually Need One?
You’ve been training hard for weeks.
Your workouts have become more difficult.
The weights feel heavier.
Your joints ache.
You’re constantly sore.
Your motivation is disappearing.
Many lifters respond by training even harder.
Ironically, that can make the problem worse.
Sometimes the fastest way to keep making progress is to temporarily do less.
That’s exactly what a deload week is designed to accomplish.
Contrary to popular belief, a deload is not a week of laziness or lost progress.
It’s a planned reduction in training stress that allows your body to recover so you can return stronger.
In this guide, you’ll learn:
- What a deload week actually is
- Why it improves long-term muscle growth
- When you should take one
- How to structure a deload correctly
- Whether you’ll lose muscle or strength
- Common mistakes that ruin deloads
Deload Week Definition
A deload week is a planned period—usually about one week—during which you temporarily reduce your training stress to improve recovery while maintaining your exercise routine.
Most deloads involve reducing one or more of the following:
- Training volume
- Training intensity
- Training frequency
- Proximity to muscular failure
The goal is not to stop training.
The goal is to reduce accumulated fatigue while preserving your fitness.
Simple Definition
A deload week is a short period of easier training that helps your muscles, joints, nervous system, and mind recover before returning to harder workouts.
Why Recovery Matters for Muscle Growth
Muscles don’t grow while you’re lifting weights.
They grow while recovering from the training stimulus.
Every workout creates:
- Muscle fatigue
- Connective tissue stress
- Nervous system fatigue
- Energy depletion
With enough:
- Sleep
- Nutrition
- Protein
- Recovery time
your body adapts by becoming stronger and more resilient.
However, when fatigue accumulates faster than recovery, performance can begin to decline.
This is called accumulated fatigue.
A well-timed deload helps reduce that fatigue before it limits long-term progress.
Fatigue vs. Fitness
One of the easiest ways to understand deloading is to separate fitness from fatigue.
Imagine your body has two “scores.”
Fitness
Your actual strength, muscle, conditioning, and skill.
Fitness improves over months and years.
Fatigue
The temporary tiredness created by training.
Fatigue can build quickly.
Sometimes you’re actually stronger than you feel—but accumulated fatigue hides that strength.
A deload reduces fatigue while allowing most of your fitness to remain.
When fatigue falls, performance often improves.
Why Deload Weeks Work
Reducing training stress may help:
- Lower overall fatigue
- Improve workout performance
- Reduce joint discomfort
- Improve motivation
- Restore training quality
- Improve recovery capacity
- Prepare you for another productive training block
Many experienced strength athletes use planned deloads to manage long-term workload.
While there is limited direct research comparing scheduled deloads with no deloads, sports science strongly supports the concept of periodization—planned variation in training stress—to improve long-term performance and recovery. Periodized resistance-training programs generally produce greater strength gains than non-periodized approaches. (pubmed.ncbi.nlm.nih.gov)
Will You Lose Muscle During a Deload?
No.
One week of lighter training does not erase months or years of hard work.
Research shows that muscle and strength decline gradually during prolonged inactivity—not after a properly structured week of reduced training.
In fact, a deload usually includes enough resistance exercise to help maintain muscle while allowing fatigue to decrease.
Many lifters actually return feeling:
- Stronger
- Fresher
- More motivated
- Less sore
If anything, a deload often improves your ability to train hard the following week.
Do You Need a Deload Week?
Not everyone needs scheduled deloads.
Whether you benefit depends on:
- Training experience
- Workout intensity
- Weekly volume
- Recovery ability
- Age
- Sleep
- Stress levels
- Injury history
Beginners
Many beginners recover quickly because they use lighter weights and lower training volumes.
They may only need an easier week occasionally.
Intermediate Lifters
As training becomes more demanding, planned deloads often become more useful.
Advanced Lifters
Advanced athletes usually train with much higher workloads and heavier weights.
Most benefit from regular fatigue management.
Signs You May Need a Deload
You don’t always need to wait for complete exhaustion.
Common signs include:
- Strength decreasing for several workouts
- Persistent soreness
- Joint aches
- Poor motivation
- Difficulty sleeping
- Constant fatigue
- Reduced workout performance
- Longer recovery between sessions
- Feeling mentally burned out
- Loss of enthusiasm for training
One bad workout isn’t enough.
Look for patterns lasting one to two weeks.
How Often Should You Deload?
There is no perfect schedule.
General guidelines:
Every 4–6 Weeks
Useful for:
- High-volume bodybuilding programs
- Hard training blocks
- Advanced lifters
Every 6–10 Weeks
Common for:
- Intermediate lifters
- Moderate training volume
As Needed
Some experienced lifters prefer autoregulated deloads, taking one only when recovery begins to decline.
This approach works well for people who closely monitor:
- Performance
- Fatigue
- Sleep
- Joint health
- Motivation
Four Ways to Deload
There is more than one effective method.
Method 1: Reduce Volume
This is often the simplest option.
Example:
Normal:
4 sets
Deload:
2 sets
Keep the weight similar while cutting total work by about 40–60%.
Method 2: Reduce Weight
Keep your normal number of sets but use lighter weights.
Example:
Normal:
225 pounds
Deload:
165–185 pounds
Focus on perfect technique.
Method 3: Reduce Both
Many coaches reduce both:
- Weight
- Volume
This creates the least fatigue.
Method 4: Increase Repetitions in Reserve
Instead of training close to failure:
Finish every set with:
4–6 repetitions left in the tank.
The goal is to leave the gym feeling better than when you arrived.
Sample Deload Week
Monday
Full-body workout
50% of normal volume
Moderate weights
Tuesday
Walking
Mobility work
Stretching
Wednesday
Upper body
50% volume
Easy effort
Thursday
Rest
Friday
Lower body
Light weights
Controlled technique
Saturday
Walking
Recovery
Sunday
Rest
Return to full training Monday.
What Should You Do During a Deload?
A deload is a great time to focus on recovery habits.
Use the extra energy to:
- Sleep more
- Walk
- Stretch
- Practice mobility
- Improve lifting technique
- Meal prep
- Reduce life stress
- Recover mentally
Many lifters also use deload weeks to evaluate their training log and prepare goals for the next training block.
Should You Still Eat the Same?
Yes.
One of the biggest mistakes is dramatically cutting calories during a deload.
Your body is still recovering.
Continue eating:
- Plenty of protein
- Fruits and vegetables
- Healthy carbohydrates
- Healthy fats
If you’re bulking, continue your calorie surplus.
If you’re cutting, stay consistent with your planned calorie deficit.
Protein intake should remain high to support muscle maintenance.
Should You Take Creatine During a Deload?
Yes.
Creatine works through daily saturation, not by taking it only on workout days.
Continue taking:
3–5 grams per day
throughout your deload.
The same applies to most evidence-based supplements used consistently.
Should You Do Cardio?
Yes—but keep it reasonable.
Good options include:
- Walking
- Easy cycling
- Swimming
- Light rowing
- Hiking
Avoid turning your deload into a week of exhausting endurance workouts.
The goal remains recovery.
Deload vs. Complete Rest
Some people stop training entirely.
Others perform lighter workouts.
Neither approach is automatically right.
Complete Rest
Useful if you’re:
- Sick
- Extremely burned out
- Recovering from minor injury
- Traveling
Deload Training
Usually better for:
- Maintaining movement patterns
- Preserving exercise technique
- Staying mentally engaged
- Preparing to resume heavier training
For most healthy lifters, reducing training stress is preferable to eliminating it completely.
Common Deload Mistakes
Mistake 1: Training Too Hard
If your deload feels like a normal workout…
It isn’t a deload.
Mistake 2: Skipping Recovery
Use the week to improve:
- Sleep
- Nutrition
- Hydration
Mistake 3: Testing Maxes
A deload is not the time to test:
- One-rep max
- Personal records
Save that for the following training block.
Mistake 4: Feeling Guilty
Recovery is productive training.
Professional athletes schedule recovery for a reason.
Mistake 5: Cutting Protein
Protein needs remain high.
Continue meeting your daily target.
Frequently Asked Questions
Will I Lose Muscle During a Deload?
No.
One week of lighter training is extremely unlikely to cause noticeable muscle loss.
Should Beginners Deload?
Sometimes.
Most beginners need them less frequently because their overall training stress is lower.
Can I Take a Vacation Instead?
Yes.
A vacation may function as an unplanned deload if you remain reasonably active.
Can I Still Train Hard on One Exercise?
It’s usually better to reduce overall fatigue rather than keeping one lift extremely heavy.
Should I Deload Before Testing My Max?
Yes.
Many strength athletes reduce fatigue before testing maximal strength.
Is a Deload the Same as a Rest Week?
Not exactly.
A rest week usually involves no structured lifting.
A deload involves easier training.
Key Takeaways
A deload week is one of the most overlooked tools for long-term muscle growth.
Remember:
- Recovery builds muscle.
- Fatigue hides performance.
- Deloads reduce accumulated fatigue.
- You won’t lose muscle in one week.
- Most intermediate and advanced lifters benefit from occasional deloads.
- Focus on lighter training—not complete inactivity.
- Continue eating enough protein and calories.
- Return to normal training refreshed and ready to progress.
The strongest lifters aren’t the ones who train the hardest every single day.
They’re the ones who know when to push—and when to recover.
Continue Learning
Read these next:
- Signs You’re Overtraining (And How to Fix It Fast)
- Progressive Overload Explained
- Muscle Recovery: The Complete Guide
- How Much Sleep Do You Need to Build Muscle?
- Why You’re Always Sore After Workouts
- Muscle Memory Explained
- How to Break Through a Muscle-Building Plateau
- Muscle Growth Glossary
Download our FREE 12-Week Muscle Growth Program, which includes:
- Built-in deload weeks
- Progressive overload tracking
- Recovery checklists
- Strength progression templates
- Workout log sheets
Train hard—but recover even smarter.
Question: When was your last deload week, and did you come back feeling stronger? Share your experience in the comments below.
Medical Disclaimer
This article is for educational purposes only and should not be considered medical advice. If you are recovering from an injury, illness, surgery, or have persistent pain or fatigue, consult a qualified healthcare professional before changing your training program.
- 3,000-Calorie Bulking Meal Plan for Muscle Growth
- How to Track Macros for Muscle Growth: Beginner’s Guide
- Best Leg Workout for Muscle Growth: Complete Lower-Body Program
- How Much Water Should You Drink to Build Muscle?
- How to Build a Mind-Muscle Connection for Better Muscle Growth
- 50 High-Protein Foods for Muscle Growth Ranked by Protein per Calorie
- Best 5-Day Workout Split for Muscle Growth
- How to Build Muscle at Home With No Equipment
- Best Shoulder Workout for Mass: Build Bigger, Wider Shoulders
- What Is a Deload Week? Benefits, Timing and How to Do One Properly